A lot of photographers think of black and white as the classical form of photography but digital technology helps make black and white photography a dynamic and creatively fulfilling modern pursuit.
With black and white photography, the constraints of conveying reality do not come into play since there is no reality conveyed in shades of gray. Thus, I can take an image file and using the tools available in the digital darkroom, create something that reflects my interests, visual preferences, and emotions about a scene in a much different way than I can with a color photograph.
For this reason, black and white photography often feels like a more expansive pursuit.
Creating Compelling Black and White Photographs
In this article, I will start by sharing a few introductory lessons that can help photographers create more compelling and personally expressive black and white photographs.
Next, I will walk through an overview of my black and white photo processing workflow, sharing a few examples of how I apply the workflow to a specific photograph along the way.

It’s difficult to distill years of learning and experimentation into a few bullet points but I consider the following lessons to be the most important for photographers who are just starting out and want to create better black and white photographs:
Black & White = A deliberate creative choice
Typically, the most compelling black and white photographs result from making a deliberate creative choice to create a black and white photograph. This process often starts in the field.
The sooner you see black and white photography as an equal to color photography, the better.
Black and white photography is not just a fallback for saving a bad color photo but an equally valid creative pursuit that opens up all kinds of opportunities for personal expression and experimentation.
Depart from “reality”
Black and white photography is by its very nature a departure from reality.
Since we do not experience scenes in monochrome, black and white photographs do not have the same emotional tethers and expectations as color photographs might. Embracing this aspect of working in black and white is part of what makes this such an expansive and freeing creative pursuit.
While all of the scenes you see in this article reflect single moments I experienced in nature, I depart from the literal interpretations of these scenes during the processing stage to help me meet my goals for my black and white photography (specifically accentuating the darkness and drama often present in nature).

Learn to visualize a scene in black & white
Learning how color scenes will translate into a black and white photograph can be challenging but is an important skill to learn. For example, a photo of a green bush with red berries will have a lot of color contrast but when converted to shades of gray, the same scene will look dull.
Why?
Because the greens and reds become similar tones of gray, leaving the scene with little tonal contrast.
For another example, take white clouds against a dark sky. When converted to black and white, the bright white tones will contrast nicely with the darker gray sky.
A good way to start learning this skill is to take some color photographs and convert them to black and white using software like Lightroom. Observe how the colors translate to tones of gray and then work on applying those observations in the field.
The next step is learning how to manipulate colors to introduce or tame contrast when processing a black and white photograph. Experimenting with the color sliders in the “Black & White Mix” panel in Lightroom’s Develop module can help you build this skill, as well.
Mood and light
Mood and light are essential in filling a photograph with emotion but in different ways than with color photography.
For example, strive to see past typical landscape “rules” like “only photograph during the golden hour” Doing so will help create many more opportunities for black and white photography while in the field.
All types of light can work, including harsher light in the middle of the day. Likewise, seeking out moody scenes, like dark and dreary weather, can also work well for black and white photography.

Composition
Some color photos can succeed due to the sheer overwhelming power of dramatic, colorful light even with a less-than-compelling composition.
With black and white photography, the emotional reaction associated with strong color is gone.
This means that composition plays an elevated role in creating compelling black and white photographs. Thus, learning to integrate strong graphic elements and abstractions into your compositions can help elevate a black and white portfolio.
Push beyond presets and the basic grayscale conversion
My personal experience suggests that carefully adjusted tonal contrast is often what brings a black and white photograph to life. Thus, grayscale conversions and presets are almost never the final solutions.
Why?
A simple grayscale conversion rarely goes far enough in processing. And, black and white presets often convert a photo to grayscale and add some contrast but often not enough and in some of the wrong places.
Thus, if creative expression is one of your goals for your photography, learning to make your own processing decisions is often a key step in developing a more personal portfolio of work. By relying on presets or a simple grayscale conversion, you are allowing an algorithm or another photographer to decide what your photo should look like.
While presets can be a great learning tool and offer a good place to start in processing some photos, learning how to make manual adjustments in your favorite processing software can help you finish your photos in a way that is true to your vision.

A more personalized approach to black & white photo processing
The most common question I get about my black and white photos is “Do you use Nik Silver Efex Pro for processing?”
Many photographers are quite surprised when I say no. From my perspective, Silver Efex is one tool in my processing toolbox. It can be fun to experiment with the presets to see potential in a photograph but for my work, I often prefer other tools, specifically Adobe Lightroom and Photoshop.
Why?
First, black and white photo processing can push a file to its limits. I get cleaner files when using Photoshop than I do when using presets or other software packages, even when making significant adjustments to contrast.
More importantly, Photoshop offers full manual control over the results and many options for making very fine-tuned adjustments. Take the wisp of sand in the photo above. It would be difficult and/or tedious to accentuate the sand as shown here with any tool other than layers and masks in Photoshop.
While Photoshop comes with a learning curve, the investment of time in getting to know the software is quite worthwhile when considering its flexibility and the potential for superior results. And, as I discuss below, only a few tools are needed to get started (levels, curves, luminosity masks, and dodging/burning tools).
My workflow for black and white photo processing can be distilled into five steps using Lightroom and Photoshop, which I briefly describe below (if you want to learn more and see expanded examples of this workflow in practice, it is explained thoroughly in Black & White Photography: A Complete Guide for Nature Photographers).
This workflow applies to photos that can be created using one file, as blending files for exposure, depth of field or other reasons would add more complexity and quite a few additional steps.

I also share a few examples of how each step applies to the photo above (not the complete steps in processing the photo but some key examples for each workflow step).
I took this photo in California’s Death Valley National Park at Badwater Basin. While Badwater Basin is a fascinating place to photograph under any conditions, flooding can turn it into a magical experience.
Here, the edges of salt rise just above the pooled water. This allows for both reflections and well-defined polygons, which worked out well for black and white photography. The white edges of salt stand out against the darker areas of water. This kind of tonal contrast helps add visual interest to a black and white photograph.
Also, I took this photo a few hours before sunset – another important lesson for anyone interested in black and white photography. The harsher light of the afternoon might look unattractive in a color photograph but can work well when translated to black and white.

Workflow step #1: Basic adjustments
After selecting a photo to work with, I start with initial technical adjustments in Lightroom. This often includes cropping, noise reduction, balancing the exposure, and other initial steps for processing the RAW file.
Note: I could process quite a few of my black and white photos using only Lightroom. While it is possible to do many of the same tasks in both Lightroom and Photoshop, however, I prefer the ease and fine-tuned control of the tools in Photoshop.
For this sample photo, my steps in Lightroom included both technical corrections and a few initial creative choices.
For example, I used Lightroom’s lens correction tool to remove some of the wide-angle distortions along the horizon. I also used the graduated filter tool to start balancing the exposure between the foreground and the sky.
Using the blacks, whites, highlights, and shadows sliders, I introduced some additional contrast as well.
While I could make these changes in Photoshop, I like to go into Photoshop with a balanced exposure with some initial contrast adjustments when I am using a single file.
Lightroom (or its companion Adobe Camera RAW) can produce better results for recovering highlights and shadows than trying to do the same thing once in Photoshop.
Workflow step #2: Black & white conversion
Next, I take the photo into Photoshop and convert it to black and white using the black and white adjustment layer.
I sometimes use the color sliders (which are part of the black and white adjustment layer) to make initial adjustments to contrast in the photo, which I fine-tune later with other tools.
For example, by darkening or lightening a blue tone (like the sky in this photo), I can darken or lighten the equivalent gray tone in the black and white conversion. Repeating this step for each color present in the photo can help adjust the contrast in a scene.
For this photo, I applied a black and white adjustment layer without any major adjustments to the color sliders in Photoshop. I slightly darkened the blues but left everything else alone.
While these color sliders can be a helpful tool, I find that big adjustments often degrade a file with other adjustment tools, like levels, curves, and luminosity masks, producing better results.
Workflow step #3: Global adjustments in Photoshop
After the file has been converted to black and white, I move onto the next round of global adjustments, which are adjustments that apply to the full photograph. This step typically includes adjustments to overall exposure and contrast using tools like levels and curves adjustments.
For this photo, I already made a few global adjustments in Lightroom, like adjusting the overall exposure. Here, my global adjustments in Photoshop started with a levels layer to add more contrast – darkening the mountains and darker tones in the reflection and lightening the brighter tones in the salt and the clouds (pulling in the sliders to set the black and white points).
Workflow step #4: Local adjustments in Photoshop
Next, I use layers and masks to make targeted local adjustments.
In this step, I typically use levels, curves, and luminosity masks to make changes to luminosity (brightness/darkness) and contrast within specific areas of a photo. I also use various dodging and burning techniques to adjust the lighting, contrast, and mood within specific parts of the scene.
While presets, software like Silver Efex, and Lightroom can usually get a photo to this point, this is the step where Photoshop shines. The steps I take here can add a great deal of life to a photograph.
For this example, one major local adjustment focused on brightening the salt patterns and darkening the surrounding reflections to introduce additional contrast into the scene. Here, I used a multi-step process to introduce more contrast in the foreground.
I started with a levels adjustment that applied to the full photograph to set the black and white points, which introduced more contrast to the scene.
Next, I used a luminosity mask to select the lighter tones in the salt (painting black over the lighter tones in the sky so that the luminosity mask would only apply to the lighter tones in the foreground).
With a luminosity mask on a curves layer, I pulled up the curve to brighten only the lighter tones in the salt (this helped brighten only the lighter tones while leaving the rest of the scene alone).
Finally, I used a dodging layer to further brighten some areas of the salt. Without this step, this photo would not be nearly as dynamic.
Without Photoshop, achieving this sort of fine-tuned control would be tedious in Lightroom and impossible in many other black and white photo processing software packages.
Workflow step #5: Final adjustments
My final step is typically cleaning up dust spots and adding other finishing touches (Orton Effect, selective sharpening, adjusting the texture of clouds, etc).
In this case, my final touches included cloning out a lot of dust spots, which I always leave to the end as black and white processing brings out a lot of spots and I prefer to deal with them all at once.
I also added an Orton Effect layer at a low opacity to add a final pop of contrast and the ever-so-slightest glow.

Depending on the photo, this basic workflow might take 10 minutes and include 2 to 3 layers in Photoshop (example: the photo directly above).
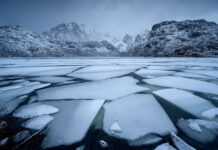
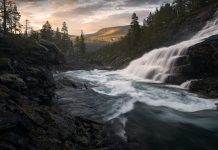
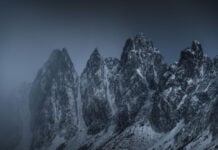
For other photos, like the two at the top of this post, this workflow might involve more complex techniques like exposure blending or double-processing a RAW file plus a lot of time and many layers in Photoshop to fine-tune specific areas of the scene.
Each photo is different and this process is always iterative – I take a few steps forward, assess my progress, and then possibly reverse a decision or two, eventually moving forward in the right direction until I have a finished draft or final version to share.
While some of these steps might seem complicated, all of the tools I discussed above are easy to learn. The hard part is learning how to apply these tools to get to your intended result.
Based on my own experience in learning to process black and white photos and in teaching others, allowing time for practice is essential. Experiment a lot, be bold in testing out new tools, take risks without worrying about the result, and embrace failure as a means of learning.
DON’T FORGET TO SHARE THIS ARTICLE
Make sure to check out our Black & White Photography: A Complete Guide for Nature Photographers for more in-depth guidance on how you can create compelling Black and White images. The course includes a 170+ page eBook and complete video courses on how to process images in Adobe Lightroom, Adobe Photoshop, and Nik Silver Efex.


Thank you, Sarah, for this detailed and great article. B&W is definetley more than just a way to rescue images. Your B&W portfolio is top-notch and extremely inspiring. Keep it up 🙂