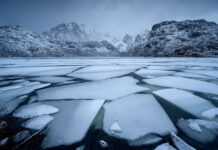
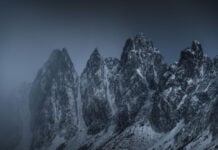
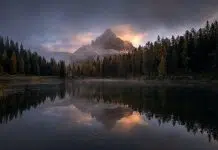
Dodging and Burning was one of the first processing techniques photographers began using. Its continued use in the digital darkroom is a testament to its effectiveness and a great reason to implement it into your post-processing workflow.
In the early days, Dodging and Burning were done both in the field and in the darkroom. Today, we’ve got easy-to-use tools that require minimal effort to master.
Keep reading, and I’ll share two easy-to-follow Dodge & Burn techniques in Photoshop.
Why Use Dodge & Burn in Photoshop?
So, what exactly is Dodging and Burning, and why should you implement it into your Photoshop workflow?
The main point of Dodging and Burning is to emphasize the primary subject in your landscape photograph or where the viewer’s eye should be led.
Often, when shooting landscapes, a compositional device leads the viewer’s eye to the subject. This could be a road, curved path, river, or other leading line. These elements can be made brighter or darker to better guide the eyes to the main point of interest.
Recommended Reading: 5 Compositional Guidelines to Know in Landscape Photography
Similarly, the main subject can be exaggerated by lightening or darkening it, again, to draw attention to that part of the image.
In a photo of a snowy mountain, for example, light areas could be dodged (lightened), and rocks burned (darkened) to create contrast and strengthen the view.
A landscape photographer is often faced with relative chaos, which nature has offered as a challenge. Dodging and burning can help the viewer overcome nature’s hurdles by making it easier for their eyes to run smoothly throughout the image.
Some potential uses for dodge and burn include:
- enhancing focal points
- creating contrast in the image
- lighting highlights
- darkening shadows
- enhancing leading lines
- creating space through light or dark
- directing light
2 Easy Techniques to Dodge and Burn in Photoshop
There are many ways to create similar effects in Photoshop, and Dodging and Burning is no exception. While the core concepts remain the same, many photographers make small adjustments to the techniques to make them flow better with their personal workflows.
Below, I’ll share two easy ways to dodge and burn in Photoshop. Which one you choose to work with is entirely up to you. The output will be pretty similar, but there’s one significant difference between the two: one is a non-destructive workflow, and the other is not.
More on that in a bit.
Method #1: Use the Dodge or Burn Tool
The first method is perhaps the most convenient and popular. It uses Photoshop’s Dodge and Burn tools, which makes it more straightforward and easier to fit into any workflow.
- Duplicate the base layer or create a new Merged Layer. Set the blending mode of your new layer to Luminosity. This will prevent any oversaturation of the edited areas.
- Select the Dodge Tool (O), set the Exposure to around 5%, and choose Highlights from the Range selection.
- Adjust the brush size and start painting (dodging) the areas of the photograph you want to brighten.
- Review as you go along by toggling the layer’s visibility on and off. If you have overdone it, you can either undo your actions or selectively remove them using a layer mask.
- If some areas are more midtone than highlight, you can change the Range to midtones in the dropdown menu. Same for shadows.
Burning (darkening) works the same way, with the only difference being that you select the Burn tool and set the Range to Shadows. This time, you paint onto the areas you want to darken. If needed, the Range can be set to Midtones.
The exact exposure values are not fixed in stone but should be played around and set appropriately for the image you are working with. In general, I tend to recommend staying within the range of 5-10%. It’s better to brush multiple times in the same area at a lower exposure than once with a higher one. At the end of the day, you want to make it look natural.
While this is an easy method to implement, it comes with one big downside: it’s destructive for your workflow. This might not matter for everyone, but if you want the possibility to make changes later on, you need to use the next method instead:
Method #2 Non-Destructive Dodge & Burn in Photoshop
If this is the first time you hear the term non-destructive editing, it refers to the type of editing in which you can undo or alter anything you’ve done at any point in your workflow.
This method doesn’t require a merged layer, making it the perfect non-destructive dodge & burn technique:
- Adjust the brush size and paint onto the areas you want to brighten or darken
- Create a 50% gray layer by holding the option key on your keyboard and clicking the “Create a new layer”. Set the Mode to Overlay or Soft Light and check the Fill with Soft-Light-neutral color (50%) gray option.
- Select the Brush Tool (B) and set the Opacity to 5%, and Brush Hardness to 0%.
- Select a white foreground color for dodging or black for burning.
Note: Alternatively, you can create the 50% gray layer with one click by using the Photoshop plug-in Raya Pro. I do this for all my photos, as it saves a lot of time in the long run. Learn more about Dodge & Burn in Raya Pro here.
Another advantage of this technique is that you can choose to dodge or burn with other colors than just black or white. For example, you can use a bright orange color to enhance the glow of a setting sun.
Conclusion
Dodging and Burning is one of the few oldschool editing technique that are still just as popular today. As you now know, applying the technique is quite straightforward and doesn’t take long to learn.
You can use this technique to enhance subjects of the photo, direct light, add contrast, or help guide the viewer through the frame. Just remember to keep it subtle, and apply it gradually, to make it look as natural as possible.
It is possible to apply Dodging and Burning in Lightroom or other photo editors too, but I still believe you’ll get the best results from Photoshop.
Now, happy editing!
DID YOU ENJOY THIS ARTICLE? THEN DON’T FORGET TO SHARE!


