


ISO is the camera setting that controls how much the signal from your sensor is brightened after the exposure is made. A low ISO such as 100 gives the cleanest file. A high ISO such as 3200 lets you get a bright enough image when there isn’t much light, at the cost of more visible noise.
That’s the short version. The longer version matters, because ISO is the most misunderstood of the three exposure settings. Most explanations call it “the sensor’s sensitivity to light”, and that one phrase leads to a lot of bad decisions in the field.
In this guide, I’ll explain what ISO actually does, why high ISO images look noisy (it’s not quite what you think), and how I choose my ISO when I’m photographing landscapes, from tripod shots at sunset to the northern lights here in the Lofoten Islands. If you’ve just bought your first camera, don’t worry. None of this needs a physics degree, and once it clicks, you’ll stop thinking about it.
(And if you’re just getting started, my complete introduction to landscape photography is a good place to see how ISO fits into the bigger picture.)
- What is ISO?
- ISO and the Exposure Triangle
- Where Noise Really Comes From
- Base ISO, Extended ISO and Other Terms You’ll Come Across
- Choosing Your ISO in The Field
- Should You Use Auto ISO?
- How to Reduce Noise
- Frequently Asked Questions About ISO in Photography
- Conclusion
What is ISO?
ISO stands for the International Organization for Standardization, the body that sets the standard for rating film speed. In the film days, a roll marked ISO 400 was more sensitive to light than a roll marked ISO 100, because the chemistry on the film was different. Digital cameras kept the name and the numbers, but the way it works changed completely.
Your camera’s sensor has one fixed sensitivity. It can’t become “more sensitive”. What happens instead is this: the sensor records the light that reaches it during the exposure, and the camera then amplifies that signal before turning it into an image. ISO is the amount of amplification. Increase it, and the same small amount of light gets turned into a brighter picture.
I find it helpful to think of it like the volume knob on a radio. Turning up the volume makes a quiet station louder, but it doesn’t make the broadcast any clearer. The hiss gets louder too.
Standard ISO Values
Most cameras offer ISO in a doubling sequence: 100, 200, 400, 800, 1600, 3200, 6400 and up. Each doubling makes the image one stop brighter, which is the same change in brightness you get from doubling the shutter speed or opening the aperture by one stop. Most cameras also let you set third-stops in between, such as 125, 160 and 250.

The lowest number your camera offers without an “L” or “Lo” label is its base ISO. For most cameras, that’s 100, though some (several Nikon bodies, for example) go down to 64, and some go no lower than 200. I’ll come back to why that number matters.
ISO and the Exposure Triangle
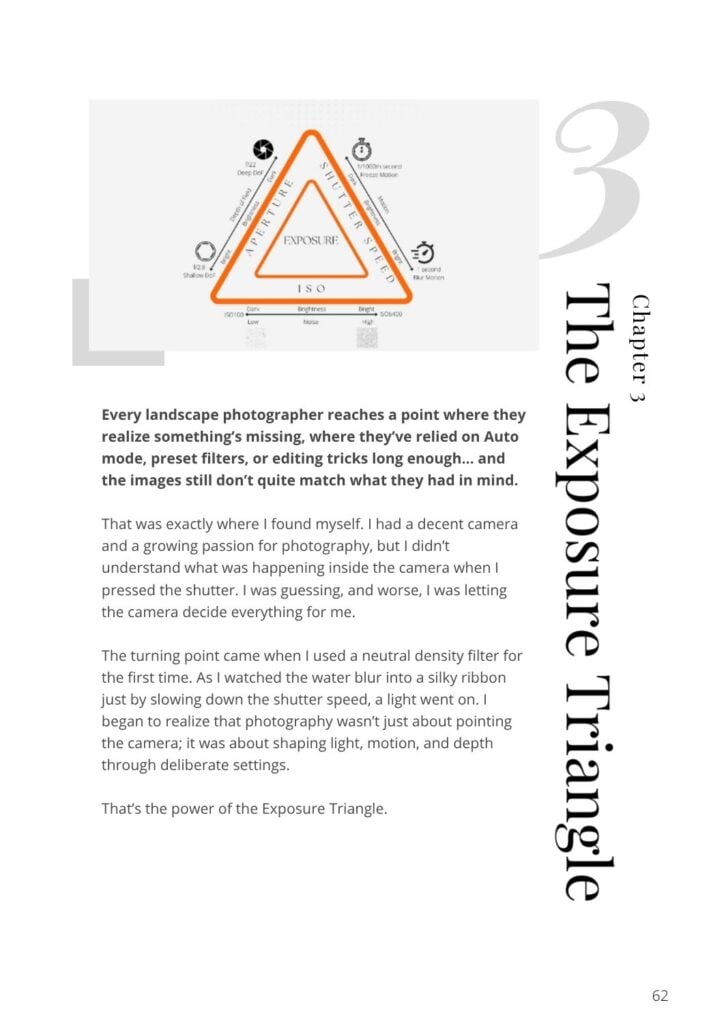
ISO is the third corner of the Exposure Triangle, alongside aperture and shutter speed. But it plays a different role from the other two, and seeing that difference is the key to everything else in this article.
Aperture and shutter speed decide your exposure: how much light actually reaches the sensor. A wider aperture lets more light in through the lens, and a longer shutter speed lets it in for longer. ISO doesn’t change how much light you capture at all. It only decides how bright the final image looks, given the light you captured.
In practice, that means each corner has its own trade-off:
| Setting | What it changes | The price you pay |
|---|---|---|
| Aperture | How much light gets in | Depth of field |
| Shutter speed | How long the light comes in | Motion blur (or frozen motion) |
| ISO | How much the captured light is brightened | Noise and lost dynamic range |

When I set up a landscape shot, I nearly always decide in that order. I pick the aperture for the depth of field I want, then the shutter speed for how I want water, clouds, or movement to look, and only then use ISO to bring the brightness to where it needs to be. ISO is the setting I use to fix what’s left, not the one I start with.
Where Noise Really Comes From
Noise mostly comes from capturing too little light, not from the ISO setting itself. This is the one idea I wish someone had explained to me when I started, because it changes how you think about every low-light situation.
Light doesn’t arrive at the sensor as a smooth, even flow. It arrives as individual particles, and they land a little unevenly, like raindrops on a pavement. When lots of light reaches the sensor, that unevenness is tiny compared to the total, and you don’t see it. When very little light reaches the sensor, the unevenness becomes a large part of the signal, and it shows up as grain and speckles. On top of that, the camera’s electronics add a small amount of noise of their own, which matters most in the darkest parts of the image.
So why do high ISO photos look noisy? Because you only reach for a high ISO when there isn’t much light. You’ve closed down the aperture or shortened the shutter speed; less light has reached the sensor, and the noise that was always there in that weak signal is now brightened up along with everything else. The high ISO is a symptom, not the cause.
You can see this for yourself. Take one photo at ISO 3200 that’s correctly exposed. Then take the same shot at ISO 100 with the same aperture and shutter speed, which will come out about five stops too dark, and brighten it by five stops in Lightroom. The second file won’t be cleaner. On most cameras, it’ll look the same or worse.
That leads to a more useful rule than “keep your ISO low”: capture as much light as your shot allows, then use ISO to make up the rest. The way to a cleaner image is a slower shutter speed or a wider aperture, not simply a lower number on the ISO dial. If you’re not sure whether you’ve captured enough light, the histogram will tell you.
High ISO has one more cost worth knowing about: dynamic range. Each step up in ISO leaves less room before the brightest parts of the scene clip to pure white. That’s one reason base ISO is the default for high-contrast scenes like a sunset over the mountains.


Base ISO, Extended ISO and Other Terms You’ll Come Across
You don’t need any of these to take a good photo, but you’ll see them in camera menus and teaching material, so here’s what they mean in plain terms.
Base ISO
Base ISO is the lowest standard ISO your camera offers, usually 100 (64 on some cameras, 200 on others). It gives you the most dynamic range and the cleanest files your sensor can produce. Whenever you’re on a tripod and the scene isn’t moving, base ISO is where I’d leave it.
Extended ISO (L and H)
Many cameras offer settings below base ISO, marked L or Lo (such as ISO 50), and above the normal maximum, marked H or Hi. These aren’t real changes in how the sensor works. The camera is simply exposing differently and adjusting the brightness in processing. The low settings usually cost you highlight detail, and the high ones are mostly for emergencies. If you want a longer shutter speed than base ISO allows, a Neutral Density filter is a better tool than ISO 50.
Dual Native ISO
Some cameras have two base ISOs: the normal one and a second, higher one (often somewhere around ISO 400 to 800, depending on the model) where the sensor switches to a different internal circuit. Just above that second step, images can look cleaner than at the setting just below it. If your camera has this, it’s worth looking up the exact value and testing it for night photography.
ISO Invariance
On many modern sensors, once you go past a certain ISO, raising it in camera gives almost the same result as shooting at a lower ISO and brightening the file later in Lightroom. Cameras that behave like this are called ISO invariant. That’s useful in high-contrast night scenes. If a bright moon or a lit cabin would clip at ISO 3200, you can shoot at ISO 800 to protect those highlights and brighten the rest in post without much penalty. Test your own camera before relying on it, since sensors differ.
Choosing Your ISO in The Field
There’s no single best ISO. The right one depends on whether the camera is on a tripod and whether anything in the scene is moving. These are the situations I run into most, and how I handle each.
On a Tripod, Nothing Moving: Base ISO
This covers most of my landscape photography. With the camera on a tripod, a slow shutter speed costs nothing, so there’s no reason to raise the ISO. I set the aperture for depth of field, leave ISO at base, and let the shutter speed be whatever it needs to be, even if that’s several seconds. This also gives you the dynamic range you need for sunrise and sunset, when the sky is much brighter than the foreground.
Long Exposures: Base ISO, Then an ND Filter
If you want to smooth water or streak clouds, a low ISO helps for a simple reason: it means a longer shutter speed for the same brightness. If you’re at base ISO and still can’t get the exposure time you want, use an ND filter rather than an extended low ISO. My guide to long exposure photography covers this in detail.

Handheld: Raise ISO Until the Shutter Speed is Safe
When I’m hiking without a tripod or the light is fading, the shutter speed becomes the limit. A useful starting point is a shutter speed of at least 1 divided by your focal length (1/50s at 50mm), a bit slower if your camera or lens has stabilization. I set the aperture, set that minimum shutter speed, and raise ISO until the exposure is right. A slightly noisy but sharp photo is always better than a clean but blurry one. You’ll find more on this in my tips for handheld landscape photography.
Moving Subjects: Shutter Speed First
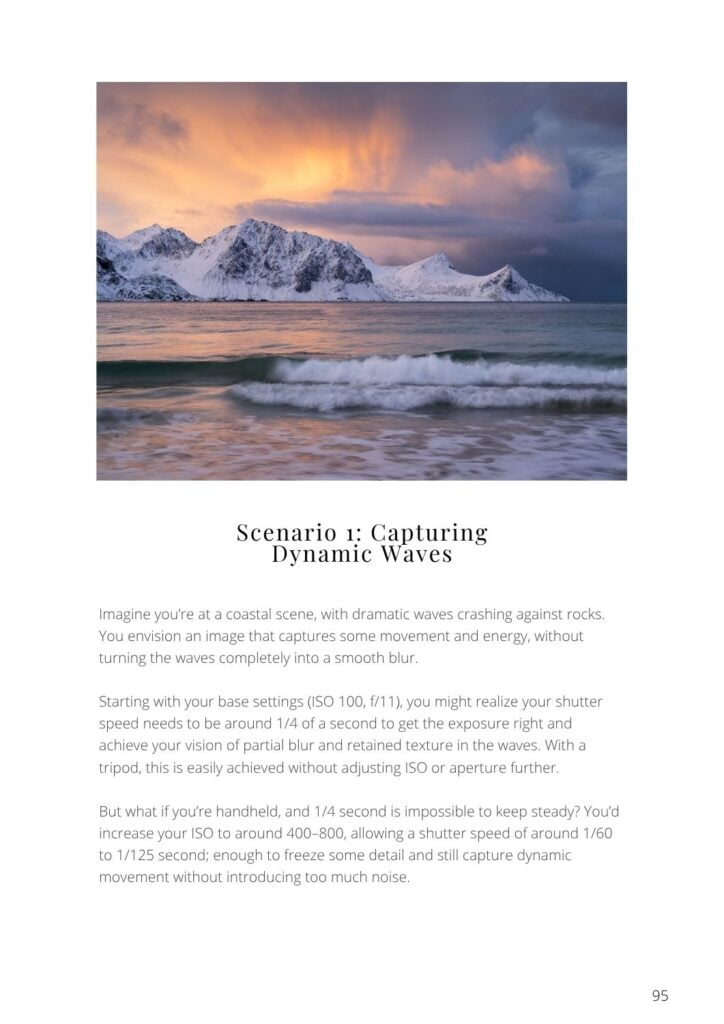
Crashing waves, birds, a person on a ridge, or wildlife on a photo tour all need a fast shutter speed, often 1/500s or faster. On an overcast day, that can easily mean ISO 800 to 3200, and that’s fine. Freezing the moment matters far more than the extra grain.

Night Skies and the Northern Lights: High ISO is Normal
Night photography is where high ISO earns its place. Stars start to trail if the shutter is open too long, and you can’t open your aperture much wider than f/2.8 or so, which leaves ISO as the only setting left. For the Milky Way, I usually start around ISO 3200 to 6400. For the Northern Lights here in Lofoten, I often use ISO3200 or higher, because the aurora is brighter and I want shorter exposures to keep its shapes sharp. Expose as long as the stars allow before raising ISO further.

Starting Points At a Glance
| Situation | Typical ISO | What sets the limit |
|---|---|---|
| Tripod, static scene | Base (64 to 200) | Nothing, so keep ISO at base |
| Long exposure | Base | Use an ND filter for longer times |
| Handheld, good light | 100 to 400 | Shutter speed for sharpness |
| Handheld, blue hour | 800 to 3200 | Shutter speed for sharpness |
| Waves, wildlife, action | 400 to 3200 | Shutter speed to freeze motion |
| Northern lights | 1600 to 3200 | Aurora movement |
| Milky Way | 3200 to 6400 | Star trailing |
These are starting points, not rules. Take a test shot, check the histogram, and adjust.
Should You Use Auto ISO?
For landscape photography, my answer is no. I prefer to set the ISO myself and keep full control over the image.
With Auto ISO on, you choose the aperture and shutter speed, and the camera picks whatever ISO it thinks gives a correct exposure. The problem is that the camera doesn’t know what you’re trying to do. On a tripod, a slow shutter speed costs you nothing, but the camera may still raise the ISO when it doesn’t need to, and you lose image quality without noticing. Setting ISO yourself takes a couple of seconds and means every decision about the image is yours.
Where Auto ISO does make sense is wildlife photography, or any situation where the light changes faster than you can keep up with and you can’t afford to miss the moment. If you do use it, always set a maximum ISO in the camera menu so it never goes higher than you’re comfortable with.
How to Reduce Noise
The cleanest high ISO images come from gathering enough light in the field and then using good noise reduction software afterward. Here’s what makes the biggest difference.
In the Field
Shoot in RAW. A RAW file keeps far more information than a JPG, which gives noise reduction software much more to work with. There are very few reasons not to.
Protect the highlights, even if it means a darker file. You’ll often hear that you should expose as brightly as possible (“expose to the right”). I do the opposite and expose on the darker side. Modern RAW files hold a surprising amount of shadow detail, but highlights that have clipped to pure white are gone for good. A slightly dark exposure also fits the moodier style I like. Just don’t take it too far, especially at night, because lifting very deep shadows will bring out noise.
Shoot the foreground and the sky separately at night. This is what I do most often for night photography. I take one long exposure at a lower ISO for the foreground, which gives it time to gather light and keeps it clean. Then I take a separate frame for the sky with a higher ISO and a shorter shutter speed, usually 10 to 15 seconds, so the stars stay sharp. Blending the two in Photoshop gives you a clean foreground and pin-sharp stars, which no single exposure can do.
Take several frames and average them. This isn’t something I use often, but it’s a useful technique to know. Take four to eight identical shots on a tripod, then stack them in Photoshop using the Mean stack mode. Detail stays the same in every frame, but the noise is random, so averaging cancels much of it out. Four frames roughly halve the visible noise, which is like shooting one stop lower in ISO.
Be careful with in-camera noise reduction. High ISO noise reduction in camera only affects JPGs and previews, so it won’t hurt your RAW files. Long exposure noise reduction is different: it takes a second, dark exposure of equal length after every shot. That can help with hot pixels in very long exposures, but it doubles your waiting time, which is a real problem when the northern lights are moving fast.
In Post-Processing
AI-based noise reduction has improved enormously in the last few years, and it’s the single biggest reason I’m comfortable shooting at ISO 3200 and above today.
- Lightroom Denoise: built into Lightroom and Adobe Camera Raw, and excellent for most photographers since you likely own it already.
- DxO PureRAW: processes your RAW files before you edit them and does a very good job on high ISO night images. See my DxO PureRAW review.
- Topaz Photo: Topaz has folded its older DeNoise AI and Photo AI apps into one subscription product, Topaz Photo. See my Topaz Photo review.
Whichever you use, don’t push it too far. Too much noise reduction can make skin, rock, and foliage look plastic, and a little fine grain usually looks more natural than none at all. If you’re preparing an image for a large print, check it at 100% before you commit.
Final thoughts
If you take one thing away from this article, make it this: ISO doesn’t create light; it only brightens what you’ve captured. Get as much light as your shot allows with aperture and shutter speed, keep ISO at base when the camera is on a tripod, and raise it without guilt when sharpness or the moment depends on it. With today’s noise reduction tools, a sharp photo at ISO 3200 is far more useful than a blurry one at ISO 100.
The best way to make this stick is to go out and test it. Photograph the same scene at a few different ISOs, look at the files at 100% on your computer, and find the point where your own camera’s noise starts to bother you. That number will be more useful to you than any chart.
If you want to see how ISO fits together with the other two settings, continue with aperture, shutter speed and the Exposure Triangle.
Frequently Asked Questions About ISO in Photography
ISO stands for the International Organization for Standardization, the body that set the standard for film speed. In digital cameras, it describes how much the signal from the sensor is brightened.
Not directly. High ISO adds noise and reduces fine detail, which can make an image look softer, but a higher ISO often makes photos sharper overall, because it allows a fast enough shutter speed to avoid camera shake and motion blur.
Use your camera’s base ISO (usually 100) whenever the camera is on a tripod and nothing is moving. Raise it only when you need a faster shutter speed, for example when shooting handheld or freezing movement.
Start around ISO 1600 to 3200 with a wide aperture such as f/2.8 and a shutter speed of a few seconds. Use a lower ISO and longer shutter speed for faint aurora, and a higher ISO with shorter exposures when it’s bright and moving fast.
On most modern cameras the results are similar, but raising ISO in camera is usually slightly cleaner at moderate settings and lets you judge exposure on the back of the camera. Brightening later can help when you need to protect bright highlights in a night scene.
Auto ISO is good for wildlife photography in changing light. On a tripod, set ISO manually and keep it at base.
Conclusion
If you remember one thing from this article, make it this: ISO doesn’t create light, it only brightens what you’ve captured. Get as much light as your shot allows with aperture and shutter speed, keep ISO at base when the camera is on a tripod, and raise it without guilt when sharpness or the moment depends on it. With today’s noise reduction tools, a sharp photo at ISO 3200 is far more useful than a blurry one at ISO 100.
The best way to make this stick is to go out and test it. Photograph the same scene at a few different ISOs, look at the files at 100% on your computer, and find the point where your own camera’s noise starts to bother you. That number will be more useful to you than any chart.
If you want to see how ISO fits together with the other two settings, continue with aperture, shutter speed and the Exposure Triangle.
And when you’re ready to put it all together in the field, from composition to light to planning a shoot, my complete introduction to landscape photography is the next step.


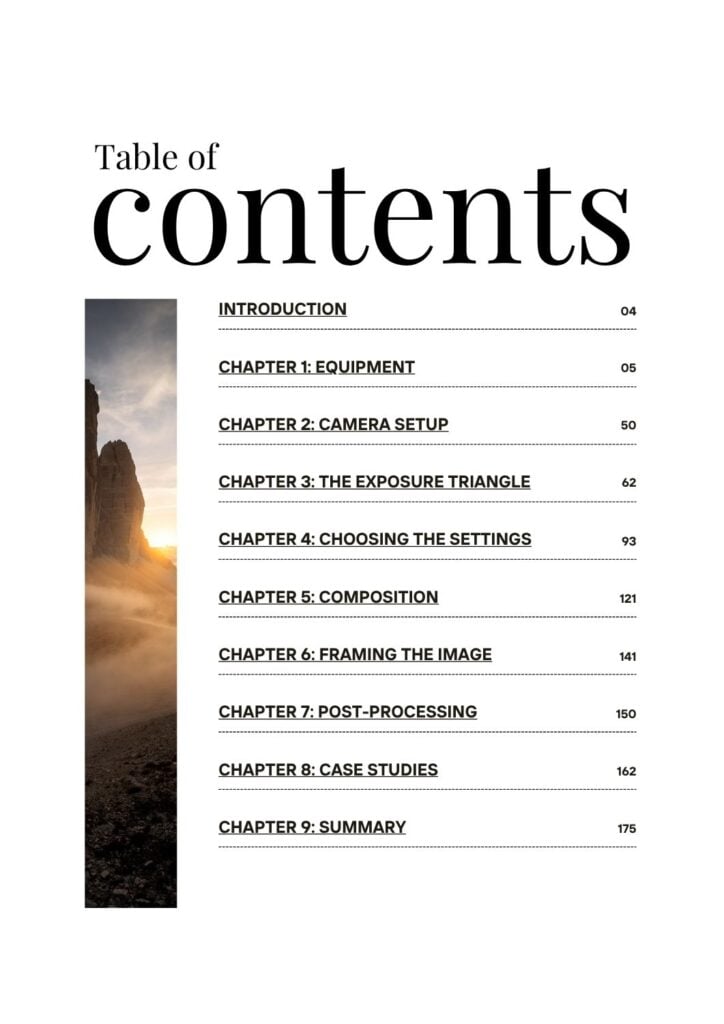
The Foundations of Landscape Photography
Author: Christian Hoiberg
Pages: 177
Format: PDF
Level: Beginner to early-intermediate
Software: Any editing software


Wow! I knew the basic of ISO but you explained it so I understood it even better 🙂 Thanks!
Hi!
I’m happy you found the article useful! 🙂
ISO might feel a little tricky in the beginning but it’s actually not that hard! If there’s anything you need help with I invite you to ask!
Well! You have a lot of articles, so I might get my questions answered there. My biggest problem is knowing/choosing the right light in postproduction.
Just check in regularly and we have new content each week!
Regarding light I think it’s best to have good light when you’re out photographing as you won’t be able to create the same effect in post production. However, in post production you’re able to enhance the mood and subjects in your image!