


If you’ve ever wondered how landscape photographers capture silky smooth waterfalls, glass-like oceans, or clouds stretched into long streaks across the sky, the answer is usually a Neutral Density filter.
ND filters are one of the most useful and versatile pieces of gear a landscape photographer can own. They’ve been part of my kit since the early days of my photography, and the system I use has evolved significantly over the years, from cheap screw-in filters picked up at a local electronics store, through to the magnetic system I use today.
In this guide, I’ll explain what ND filters are, how they work, the different types of filter systems available, and which one I recommend. I’ll also cover the different strengths you’ll encounter and give you honest advice on which to buy first.
What Are Neutral Density Filters?
A Neutral Density Filter, usually referred to as an ND filter, is a darkened piece of glass that mounts in front of your lens to reduce the amount of light reaching the camera sensor. Because less light enters the camera, you need a longer shutter speed to achieve a correct exposure, and that longer shutter speed creates the creative effects ND filters are known for.
A good-quality ND filter is color-neutral, meaning it only affects the amount of light.
Think of it like wearing sunglasses. Your vision dims, but colors don’t shift. Put a quality ND filter in front of your lens, and the scene looks darker to the sensor, which means you need more time to capture it. That time is what blurs the water, smooths the ocean, and stretches the clouds.

Using a shutter speed longer than about 1/30 second in daylight is nearly impossible without an ND filter, even with a narrow aperture. A 6-stop ND filter can extend that to several seconds. A 10-stop filter can push it to minutes. That’s the range of creative possibilities these filters open up.
Recommended Reading: Ultimate Guide to Long Exposure Photography
The Different Types of ND Filter Systems
There are three main types of ND filter systems: screw-in filters, square filters, and magnetic filters. Each has its own advantages, and the right choice depends on how you work and what you prioritize.
Alternative #1: Screw-In Filters
Screw-in filters thread directly onto the front element of your lens. They’re widely available, usually the most affordable option, and take up very little space in a camera bag.

The main advantage of screw-in filters is simplicity. There’s no filter holder, no adapter ring, and very little to go wrong. For photographers who use a single lens and only ever need one filter at a time, they’re a practical option.
The main disadvantage is stacking. Using two screw-in filters at the same time, for example an ND filter and a Circular Polarizer, creates vignetting as the outer rim of the filters becomes visible in the frame. This limits your flexibility, particularly if you want to combine a Circular Polarizer or Graduated ND with a regular ND.
Screw-in filters are also sized to fit a specific lens diameter, which means you may need multiple sizes if you use lenses with different thread sizes, or a step-up ring to adapt them.
| Advantages | Disadvantages |
| Simple to Use Compact and lightweight Many affordable options Minimal light leak | Vignetting when stacking filters One size per lens thread diameter Less flexibility for GND use Can occasionally get stuck on lens |
Alternative #2: Square Filters
Square filters slot into a filter holder that attaches to your lens via an adapter ring. The holder typically has multiple slots, so you can use several filters simultaneously without any vignetting.

This system is more flexible than screw-in filters. You can slide a Graduated ND filter up and down in its slot to align the transition with the horizon, rotate the holder, and combine multiple filters at once. For landscape photographers who regularly use GND filters alongside ND filters, it’s the more capable system.
The downsides are size and cost. The holder and adapters add bulk and weight, and a quality square filter system is a significant investment compared to screw-in alternatives.
| Advantages | Disadvantages |
| Stack multiple filters without vignetting Flexible positioning for GND filters One holder works across multiple lenses (with adapters) Available as complete kits | Bulkier than screw-in Higher initial investment Some light leak with certain brands More components to manage |
Alternative #3: Magnetic Filters
Magnetic filter systems are a more recent development, and the one I’ve settled on for my own photography. Rather than screwing or slotting into a holder, magnetic filters click on and off the adapter ring instantly using a magnetic connection.
This makes swapping filters in the field significantly faster than either alternative. In practice, it means I can add or remove a filter in seconds, without taking the camera off the tripod or fumbling with a holder in cold or wet conditions. For landscape photography where conditions change quickly and you’re often switching between filters, that speed adds up.
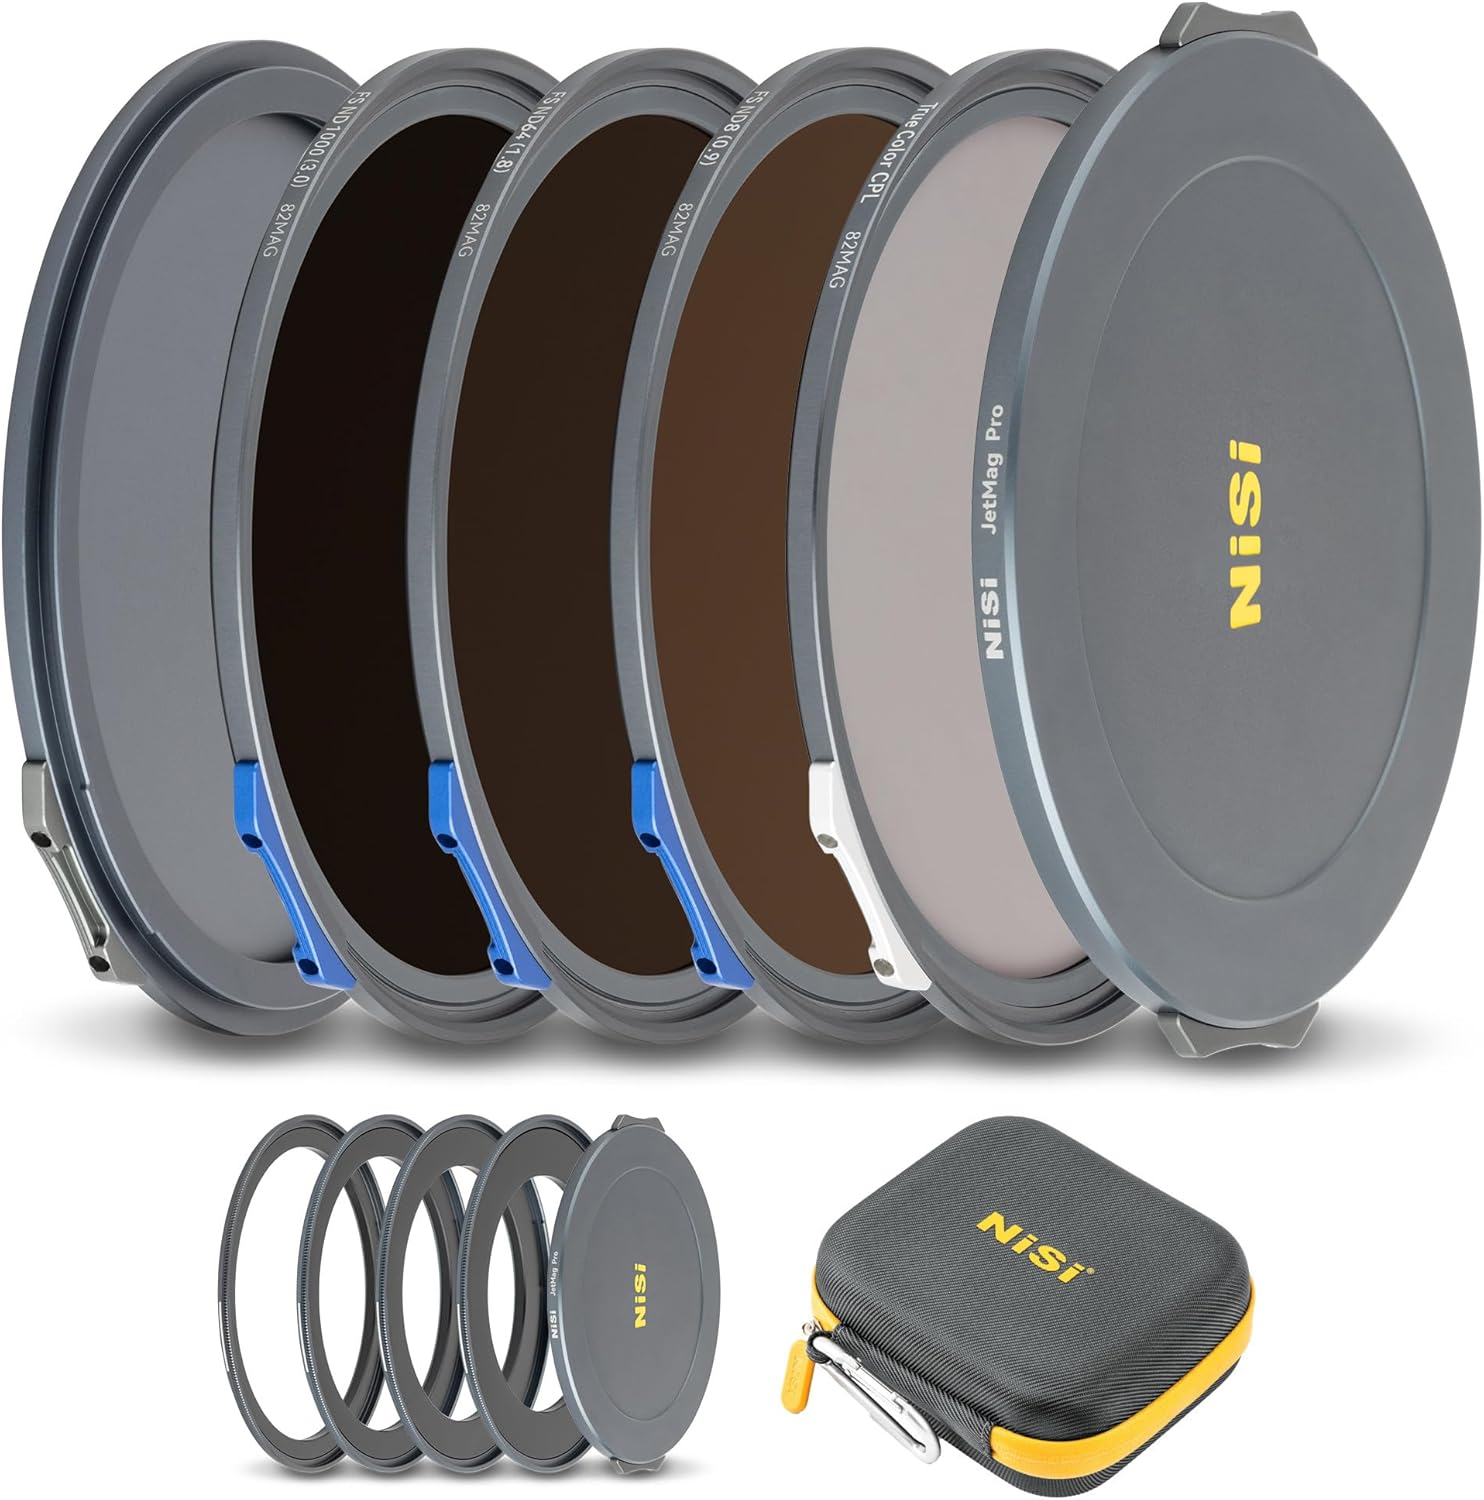
The system I use is the NiSi JetMag, and it’s become the only ND filter system I use. You can read my NiSi JetMag review here. I have the 3-stop, 6-stop, and 10-stop filters plus a Circular Polarizer, which covers every situation I encounter in the field.
The magnetic connection is solid and doesn’t shift in use. Image quality is excellent with no color cast. The JetMag system also handles multiple filters at the same time without vignetting on most lenses, and the slim profile keeps the system compact enough to carry comfortably on longer hikes.
If you’re buying your first serious filter system, or considering an upgrade from an older square filter setup, I’d recommend the JetMag. Use code CAPTURELANDSCAPES for 10% off the NiSi JetMag system and all NiSi filters.
Explore the NiSi JetMag System.
| Advantages | Disadvantages |
| Fast to attach and swap in the field Compact and lightweight No vignetting on most lenses Solid build quality | Slightly higher price than basic screw-in Magnetic mount requires compatible adapter |
A Note on Variable ND Filters
Variable ND filters let you rotate the filter to change its strength without swapping filters. They’re popular for video work where you need to adjust exposure quickly and don’t want to stop and change filters mid-shoot.
For landscape photography, variable ND filters are generally not my recommendation. The darkening effect is less consistent than a fixed filter, and many variable ND filters introduce a cross-pattern artifact (sometimes called an X-pattern) at stronger densities. Fixed ND filters are the more reliable option.
Understanding Filter Strengths: Stops Explained
The darkness of an ND filter is measured in stops, which refers to how many stops of light the filter blocks. Each stop halves the amount of light reaching the sensor, which means you need to double the shutter speed to compensate.
A 6-stop ND filter requires a shutter speed 64 times longer than the base exposure. A 10-stop filter requires a shutter speed 1000 times longer.
Here are the most common ND filter strengths:
| Classification | Stops | Shutter speed multiplier |
|---|---|---|
| ND0.3 | 1 stop | 2x |
| ND0.6 | 2 stops | 4x |
| ND0.9 | 3 stops | 8x |
| ND1.8 | 6 stops | 64x |
| ND3.0 | 10 stops | 1000x |
You may also see filters classified as ND4, ND64, or ND1000; these numbers refer to the factor by which the light is reduced rather than the number of stops, but they describe the same filters. ND64 equals 6 stops; ND1000 equals 10 stops.
Darker filters are also available, including 15- and 16-stop options that allow minute-long exposures even in bright midday light. These are specialized tools for specific conditions.
Which ND Filter Should You Buy First?
If you’re new to ND filters and not ready to invest in a full kit, I recommend starting with a single 6-stop filter.
A 6-stop ND is dark enough to meaningfully blur water and show motion in clouds, even in decent light, but not so dark that you need to worry about very long exposures that require Bulb mode and careful timing. In lower light conditions, around sunrise and sunset, a 6-stop filter gives you shutter speeds in the range of 5 to 30 seconds, which is the sweet spot for most long exposure photography.

I’d avoid anything less than a 3-stop as a first filter. Filters below this range make so little difference to the shutter speed that you won’t immediately feel the benefit, and it can be discouraging.
If you’re ready to invest in a complete system from the start, the NiSi JetMag Landscape Kit bundles the 3-stop, 6-stop, and 10-stop filters plus a Circular Polarizer in one package. This is what I use, and it covers every situation I encounter in landscape photography.
Explore the NiSi JetMag Landscape Kit and use code CAPTURELANDSCAPES for 10% off.
How to Use Neutral Density Filters: Three Examples
So what does using an ND filter actually look like in practice? Here are three common scenarios, each requiring a different filter strength.
Example 1: Subtle Motion Blur (1 to 3 Stops)
A 1 to 3-stop ND filter gives you a slightly longer shutter speed without dramatically changing the scene. In good light, the difference is modest. In lower light around sunrise or sunset, you can reach shutter speeds of several seconds, which adds a smooth quality to moving water while still retaining some texture.
The clouds in this scenario will typically remain sharp unless they’re moving quickly. This is a good starting point for photographers new to long exposure work.

Example 2: Long Exposure (6 Stops)
A 6-stop ND filter is the workhorse of landscape photography. In the golden hours, it allows shutter speeds of 10 to 30 seconds, which smooths the water considerably and begins to blur clouds into streaks.


At 20 seconds, the difference is clear. The ocean is smooth, the movement in the scene is captured as atmosphere rather than detail, and the overall mood of the image shifts significantly compared to the unfiltered version.
Example 3: Ultra Long Exposure (10 Stops)
A 10-stop ND filter produces the most dramatic long exposure effects. Shutter speeds of 60 to 120 seconds or more turn waves into mist, stretch clouds across the sky, and produce a quality of image that simply isn’t possible without this kind of filtration.

Exposures at this length require more planning. I always take a test shot without the filter first to establish the base exposure, then calculate the adjusted shutter speed. An app such as NDCalc handles the calculation automatically if you’d prefer not to do the math yourself.
My Filter Journey
I’ve been using ND filters since the early days of my landscape photography, and the system I use now is very different from what I started with.
My first ND filter was a cheap screw-in from a local electronics shop, around $10. It was far from high quality, but it taught me the relationship between shutter speed and motion blur, and that was enough to make it worthwhile. I used it until I needed something darker.
From there I moved to B+W screw-in filters. Better quality, but the B+W filters at the time had a noticeable red color cast, which I accepted because the longer shutter speeds they allowed were worth it.
A year or so later I switched to a NiSi square filter system when I wanted to start using Graduated ND filters alongside my regular ND filters. The NiSi square system was significantly better than anything I’d used before, with excellent color neutrality and solid build quality.
For the past year, I’ve been using the NiSi JetMag magnetic system, and I haven’t looked back. The speed of swapping filters in the field, the compact size, and the image quality make it the best system I’ve used. It’s now the only ND filter system in my bag.
Conclusion
Neutral Density filters open up a range of creative possibilities that simply aren’t achievable any other way. Whether you’re after subtle motion in a waterfall or a two-minute exposure that turns the ocean to glass, the right ND filter makes it possible.
If you’re starting out, begin with a 6-stop filter and learn how it affects your images before investing in a complete kit. Once you’re ready to build out a full system, the NiSi JetMag Landscape Kit gives you the 3-stop, 6-stop, and 10-stop filters plus a Circular Polarizer in one package, and it’s the system I’d recommend based on my own experience.
Use code CAPTURELANDSCAPES for 10% off the full NiSi range.
For a complete guide to using ND filters as part of a long exposure workflow, including camera settings, planning, and post-processing, see the Ultimate Guide to Long Exposure Photography.


Think you need to add some information in the article. Leefilter released 4.3.2016 a Super Stopper. 15 stop ND. Perfect for light summer days. They have added 2 column table with time calculations. On my wish list. ☺