


Silver Efex is a familiar name to many photographers, especially those passionate about black and white photography. It’s been considered the go-to software for black and white editing for well over a decade.
Photographers of all levels, from beginners to professionals, have long trusted it as part of their post-processing workflow. But does it still deserve that reputation in 2026?
In this Nik Silver Efex 9 review, you’ll learn what makes it so popular, how it works, what’s new in the latest version, and whether it’s worth adding to your editing toolbox. I was given early access to version 9 ahead of its release, so this is based on hands-on testing.
Bonus: DxO has provided CaptureLandscapes readers with an exclusive discount on all Nik Collection products. You’ll find the details and discount code at the end of this review.
Let’s dive in.
What is Nik Silver Efex?
Silver Efex, formerly known as Silver Efex Pro, is widely regarded as the go-to plugin for black and white photo editing. It’s considered one of the most powerful monochrome editing plugins available, trusted by photographers looking to create powerful, dramatic, and timeless black and white images.
It’s part of the popular Nik Collection 9 by DxO (you can grab a free 30-day trial with full access). Along with Nik Color Efex, it remains one of the most valuable tools in the collection for creative photographers.
At its core, Silver Efex is designed to help you convert and process black and white photos. While the concept sounds simple, a surprising level of control and creativity is available under the hood.


You can apply one of the built-in presets, fine-tune the adjustments manually, or combine both approaches. Most photographers find the sweet spot in doing a bit of both; starting with a preset to build a base look, then adjusting the sliders to match the mood and style they’re after.
Silver Efex can be used in two ways:
- As a plugin for Adobe Lightroom Classic, Photoshop, Affinity Photo, or DxO PhotoLab.
- As a standalone application, if you prefer to work outside your main photo editor.
Either way, you get the full feature set and the same powerful tools to bring your black and white images to life.
Recommended Reading: A Comprehensive Introduction to Black and White Photography
What’s New in Silver Efex 9
Version 9 brings a focused set of updates to Silver Efex. The biggest addition for black and white photographers is AI Masks, with further improvements to the everyday workflow that make the software more fluid to use.
AI Masks
AI Masks are the headline new feature in Silver Efex 9. Once you’ve applied a filter or adjustment, you can create an AI Mask by clicking directly on any object in the image, or by drawing a bounding box around it. Silver Efex then generates a precise selection in seconds.
In practice, this works well for landscape images. You can select a tree trunk and darken it to add depth, isolate a subject and brighten it to draw the eye, or reduce the impact of a distracting element in the background. For images where you want precise control over individual elements, it’s a useful tool that removes the need to leave Silver Efex for serious masking work.
That said, it’s not flawless. In areas with complex textures such as branches, foliage, or overlapping leaves, the masks are good but not always perfect, and you may need to refine edges manually. Mask generation is also slightly slower than in Lightroom. For most images, it’s not an issue, but it’s worth knowing.
If you already handle your masking in Lightroom or Photoshop before opening Silver Efex, AI Masks won’t change your workflow much. But for photographers who prefer to do more of their editing within Silver Efex itself, this is a meaningful upgrade.
Depth Masks
Also new in version 9, Depth Masks use AI to analyze your image and generate a depth map, letting you target adjustments based on distance from the camera. Sliders with adjustable feathering let you define the depth range from foreground to background, creating smooth and natural transitions without manual masking.
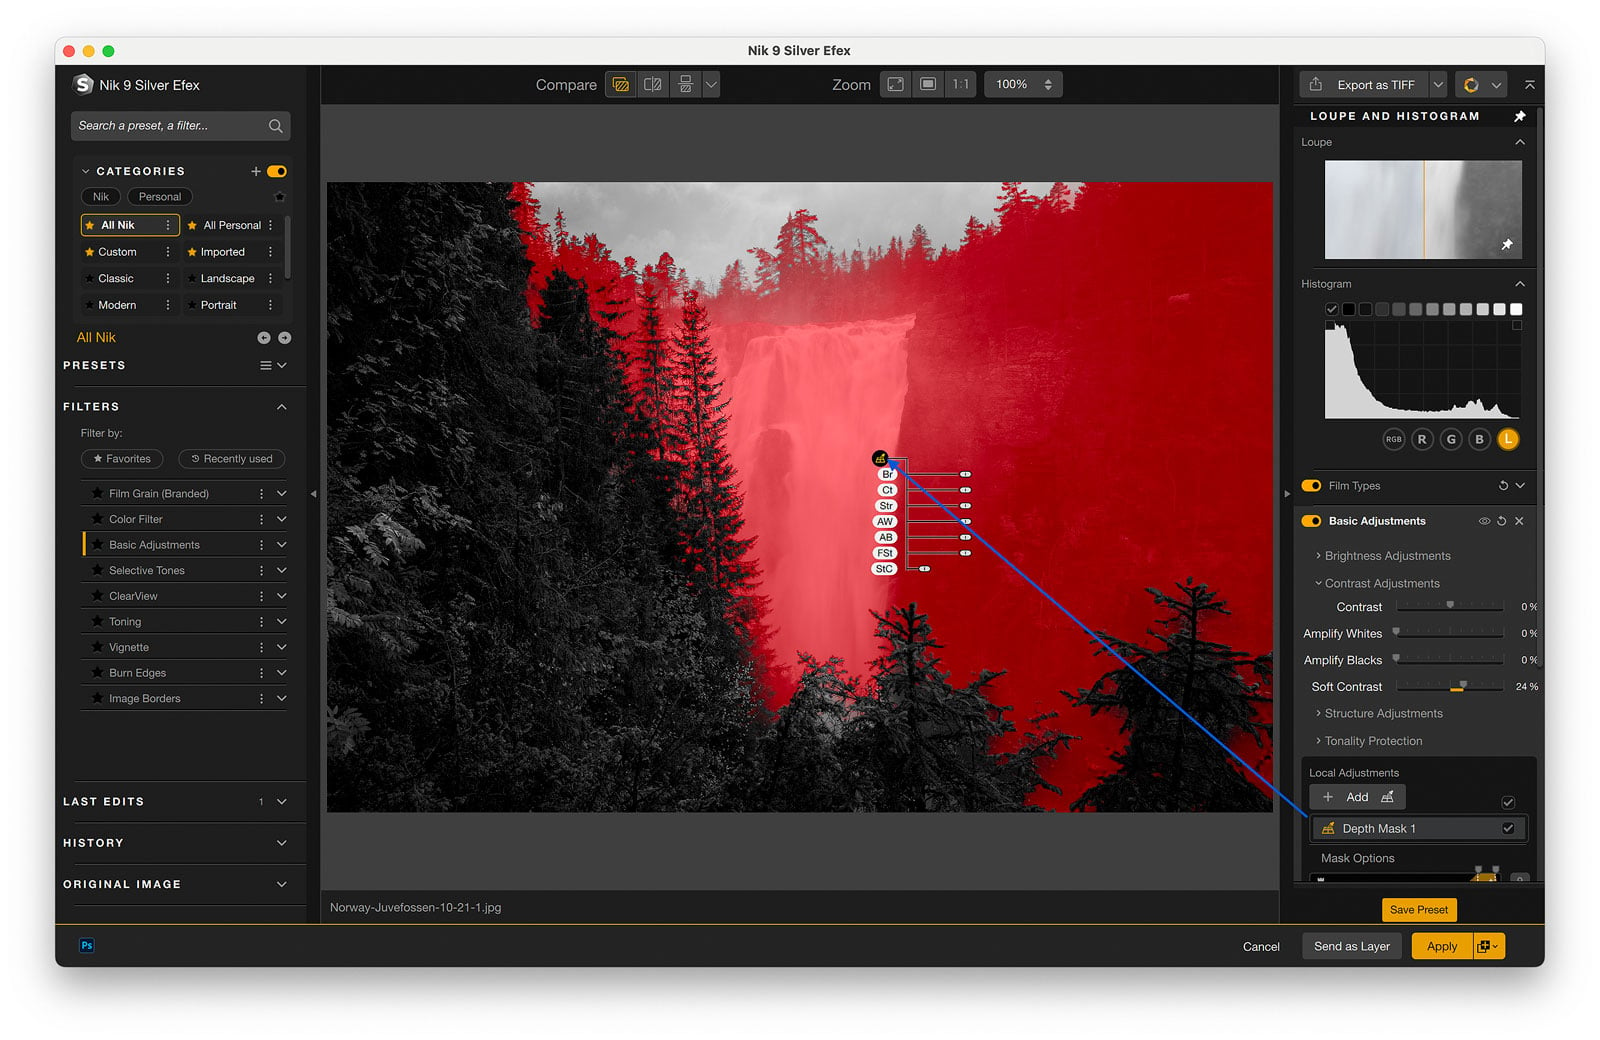
For landscape photography, this has real potential. Selectively brightening the foreground or darkening the background based on depth, rather than drawing a graduated filter or manual mask, can produce more natural-looking results.
Workflow Improvements
Version 9 also introduces several smaller updates that improve the day-to-day experience across the Nik Collection. Preset Hover Preview gives you a real-time preview when browsing presets without clicking each one individually. It’s a welcome addition in Silver Efex, given how many presets there are to browse. Mask Overlays let you see your local adjustments clearly without obscuring the image. And local adjustments can now be copied and pasted between images using a keyboard shortcut, which is useful when working on a series of similar shots.
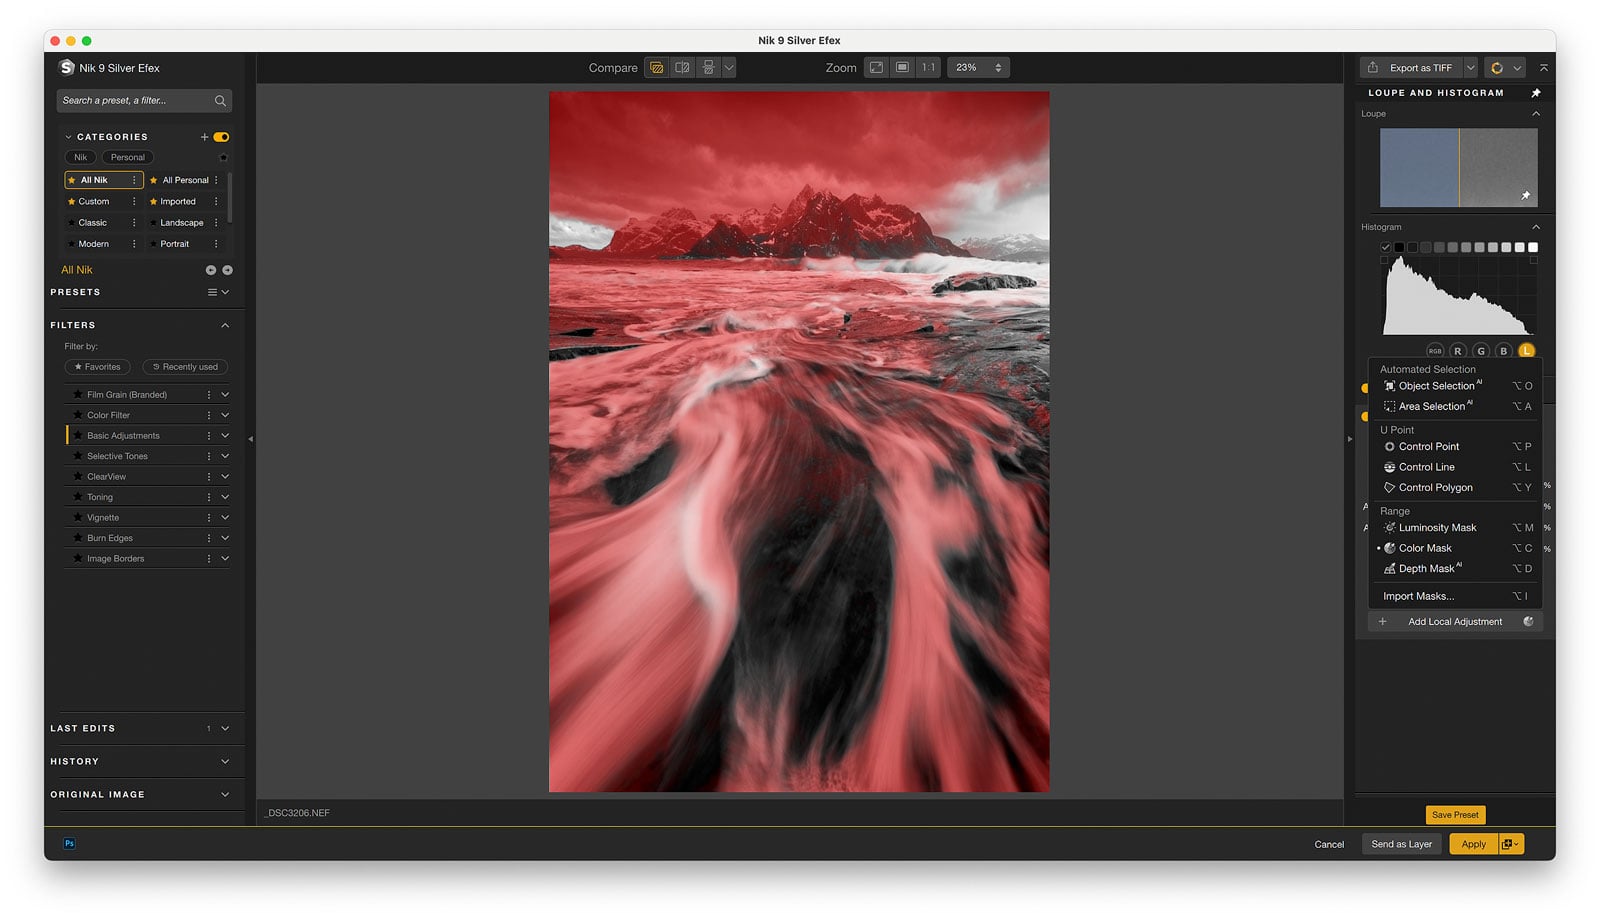
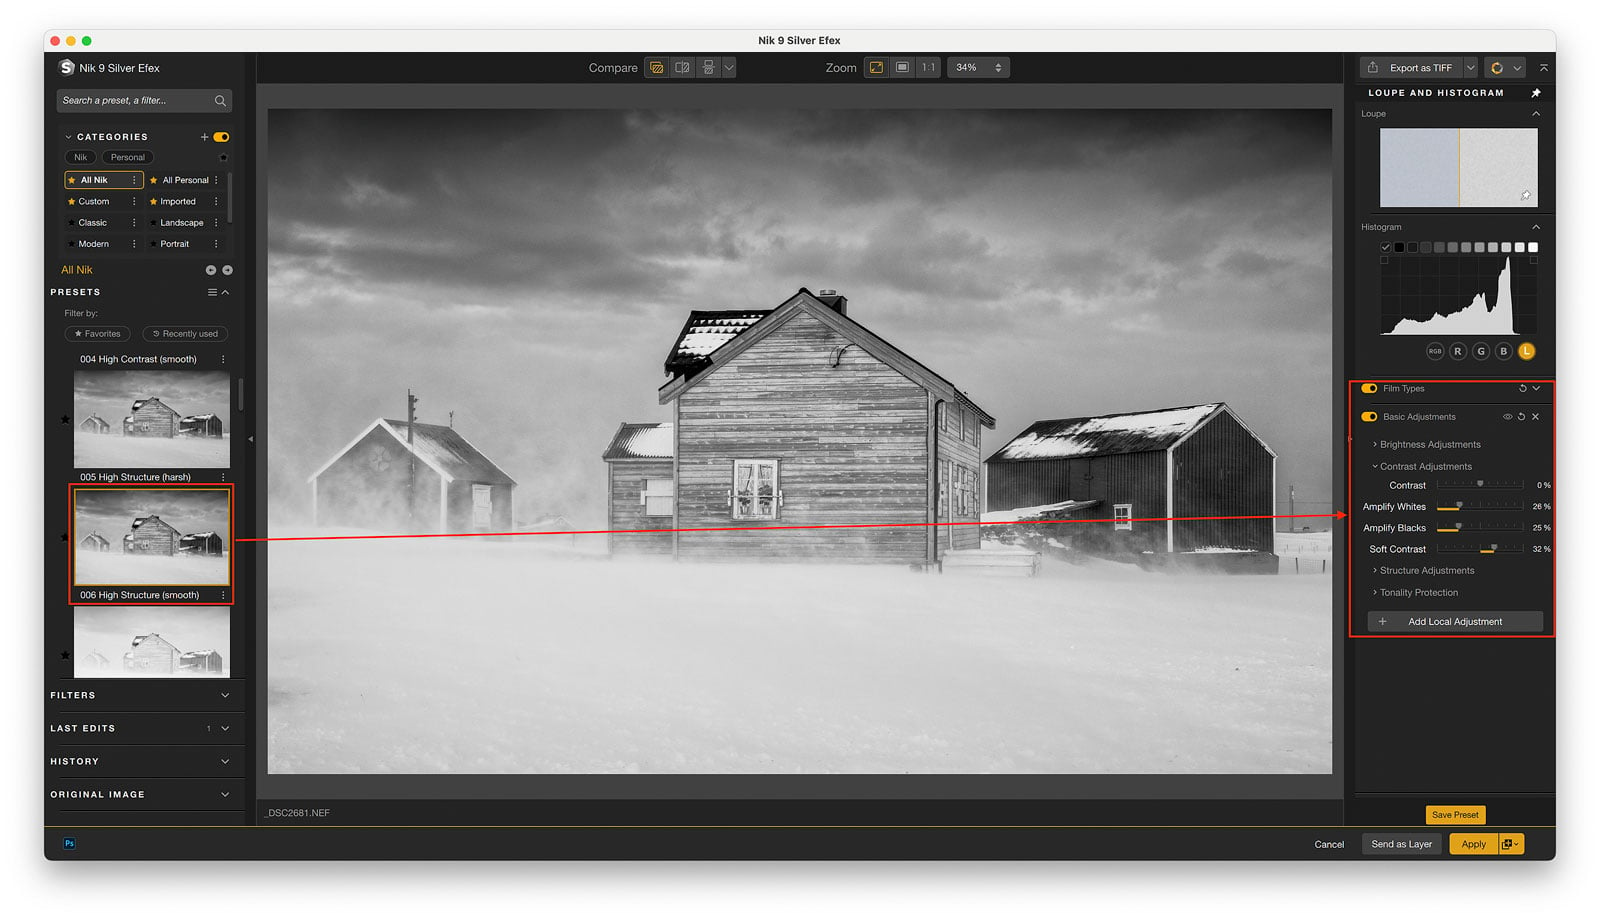
Nik 9 Silver Efex Interface and User Experience
If you’ve used Color Efex or any other Nik Collection plugins before, the Silver Efex interface will feel instantly familiar.
The workspace is made up of six sections:
- The Menu Bar
- The Upper Toolbar
- The Image Display Area
- The Left Panel
- The Right Panel
- The Lower Toolbar
I won’t go into every single button and menu here (check out the user manual for the full breakdown), but there are a few key areas worth highlighting.
What You’ll Find in the Left Panel
In earlier versions, the left panel was mainly used for browsing presets. That’s still true in version 9, but it has been expanded to give you more control and faster access to your workflow tools.
Here’s what you’ll now find in the left panel:
- Presets – As before, all the built-in presets are displayed as thumbnail previews. Clicking one applies the look instantly to your image.
- Filters – You can browse the available filters directly in the left panel. This brings Silver Efex in line with Color Efex and Analog Efex, making the workflow more intuitive across the Nik Collection.
- Last Edits – Quickly jump back to your most recent adjustments without starting from scratch.
- History – Access your edit history to step back through previous changes.
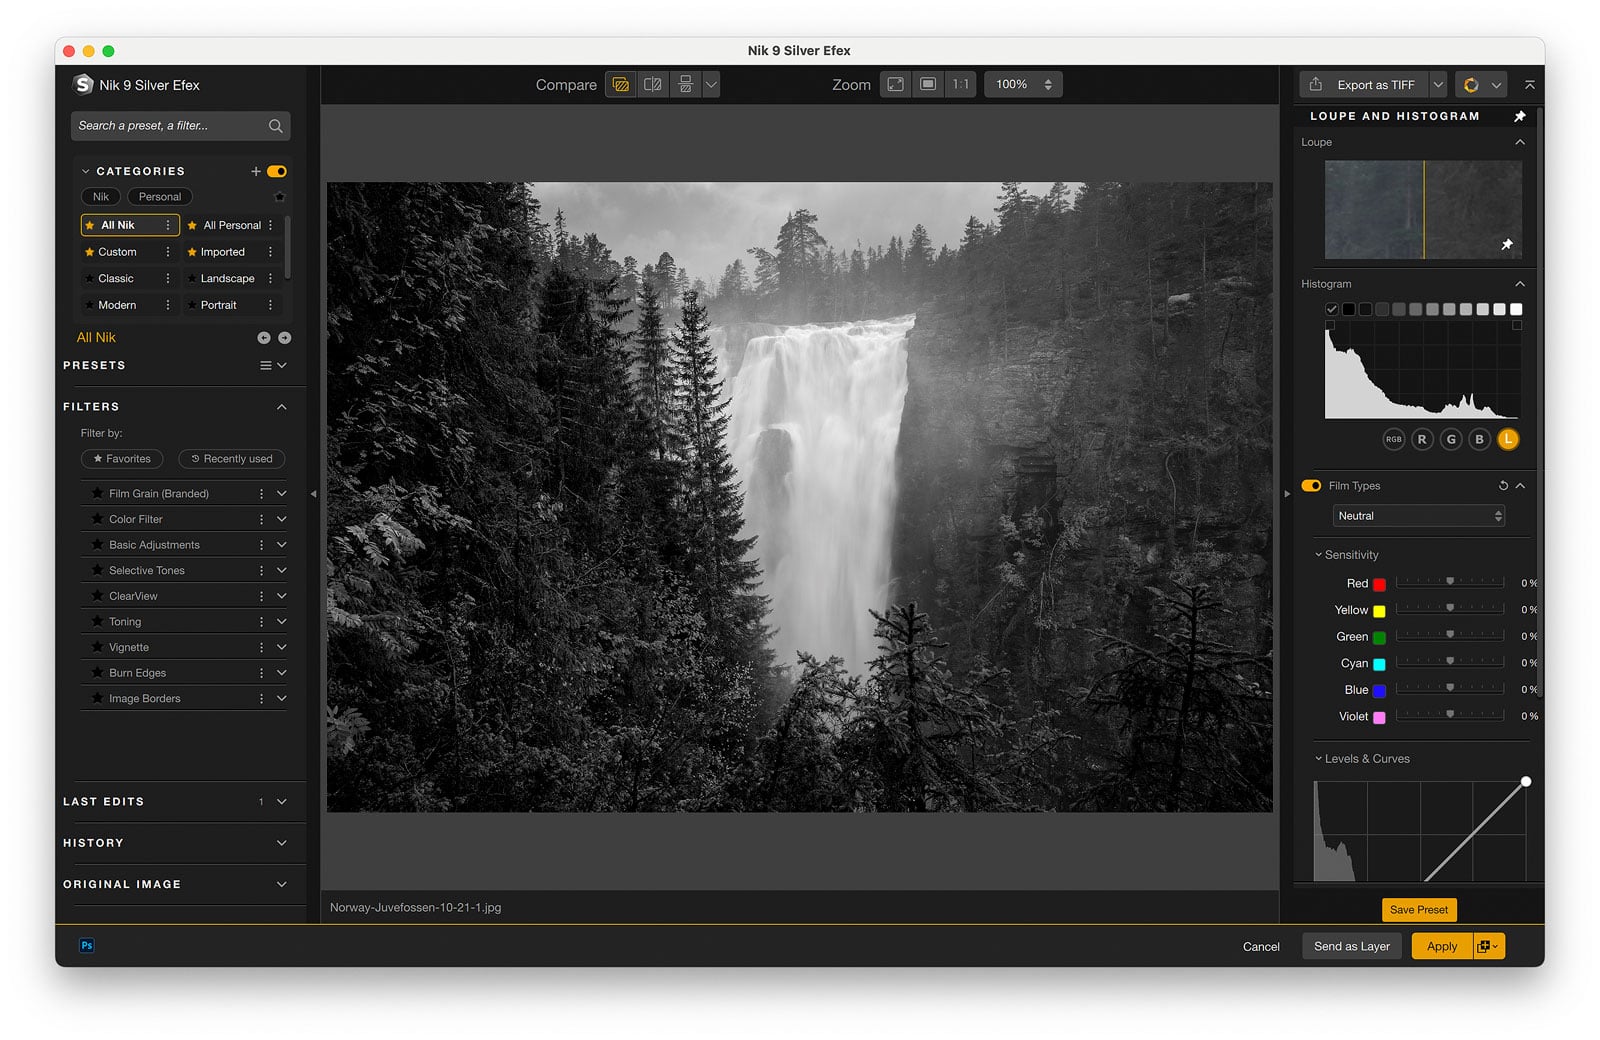
- Original Image (Color Reference) – View your original color image alongside your black and white conversion. This is incredibly useful when applying color-based adjustments like Color Filters or Sensitivity tweaks.

Fine-Tuning on the Right Panel
The real power comes when you start fine-tuning those settings in the right panel. Every adjustment you make updates your image in real-time, allowing you to build on the preset or start from scratch to create your own custom look.
Whether you’re applying global adjustments or jumping into the new local adjustments introduced in version 9, the live preview ensures you always know exactly what you’re getting.
Silver Efex vs Lightroom: Do You Actually Need It?
This is a question worth addressing, because if you’re reading this, there’s a good chance you already use Lightroom, and Lightroom does have its own black and white tools. So what does Silver Efex actually give you that you can’t get elsewhere?
The honest answer is: more depth and more control, particularly for dramatic edits.
Lightroom’s B&W panel lets you adjust the luminance of individual color channels, and it works well for straightforward conversions. But Silver Efex goes further in several areas that matter for landscape photographers.
The Structure slider is one of the most useful. Similar to Clarity in Lightroom, but more refined. You can apply it independently to shadows, midtones, and highlights, giving you far greater control over texture and micro-contrast without affecting the entire tonal range. For images where you want to bring out rock texture or tree bark without blowing out the sky, this distinction matters.
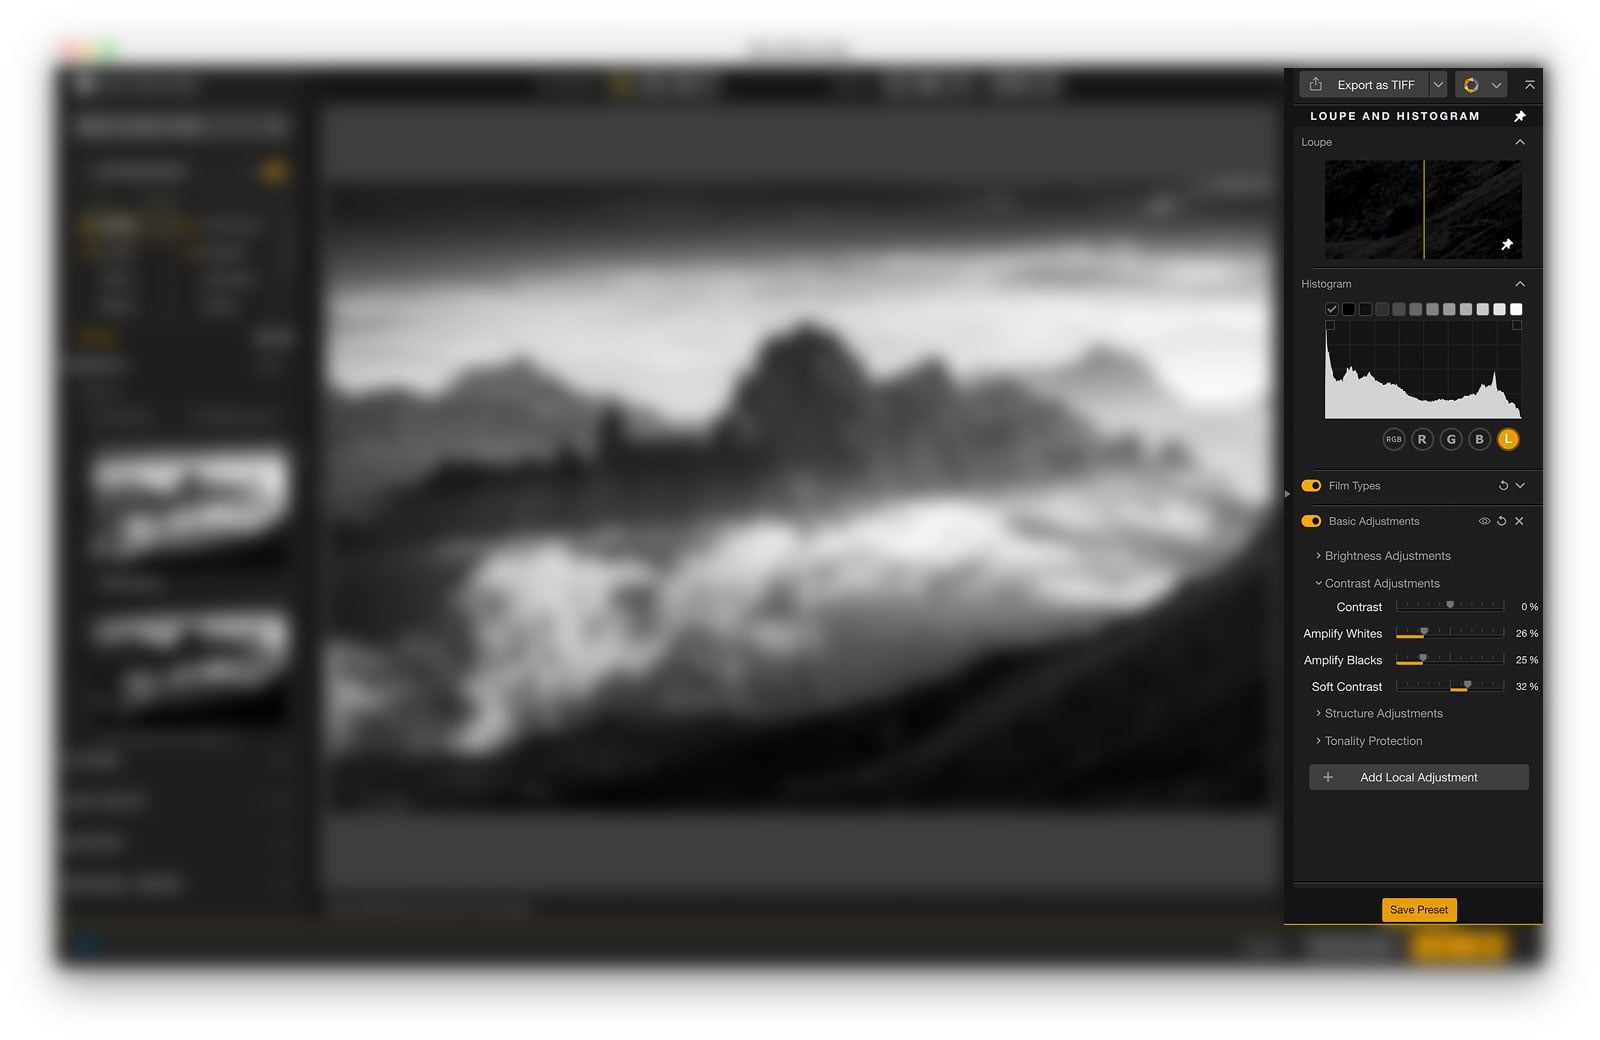
The contrast controls are more extensive, too. Where Lightroom gives you a single contrast slider, Silver Efex has dedicated controls for Amplify Whites, Amplify Blacks, and Soft Contrast, giving you more precise control over how you push tones at either end of the range.
Film emulation is another differentiator. Silver Efex includes authentic simulations of classic black and white films, complete with grain structures that are noticeably more natural-looking than Lightroom’s grain tool. If you want images that feel like they were shot on film rather than digitally converted, this is where Silver Efex earns its place.
Finally, the presets. Silver Efex’s 64 built-in presets aren’t just filter looks; they’re complete starting points built around specific visual directions, from high-contrast editorial to soft vintage to graphic fine art. They’re a genuinely useful starting point, especially for photographers who don’t do black and white work every day and want a fast way to explore what an image could become.
Could you recreate Silver Efex results in Lightroom? For simple conversions, probably yes. But for more dramatic and purposeful black and white work, Silver Efex gets you there faster and with more control.
Using Presets in Nik 9 Silver Efex
Presets play a big role in Silver Efex, perhaps more than they do in any other photo editing plugin. In fact, many photographers find they can achieve great-looking monochrome photos by simply applying one of the built-in black and white photo presets.
As of writing this, there are 64 unique presets to choose from. These range from neutral monochrome conversions to high-contrast, grainy, or sepia-toned effects. There really is something for everyone.
That said, you probably won’t use all of them. Most photographers quickly find a handful of go-to presets that suit their style. You can click the star icon next to any preset thumbnail to mark it as a favorite, making it easy to find later.
Tip: You can try all of these presets for yourself using DxO’s free 30-day trial of Nik Collection 9.
How to Create Your Own Presets in Nik 9 Silver Efex
If you find yourself applying similar adjustments across multiple images, it’s a good idea to create your own custom preset. Here’s how:
- Apply your chosen filters and adjustments in the right panel.
- Click the “Save Preset” button at the bottom of the panel.
- Name your preset something descriptive so you’ll recognize it later.
- Check “Save with Control Points” if you want to include your local adjustments.
- Click “Save”.
You’ll find your new preset in the Custom section of the left panel. You can rename it or favorite it by clicking the star icon.
Remember, presets are just starting points. It’s always a good idea to fine-tune the adjustments for each individual photo to get the best result.
How to Import Presets in Silver Efex
Purchasing presets for Lightroom is quite common, and there is an abundance of providers (both photographers and companies) out there. While preset packs are more common for Lightroom and Photoshop, you can also import custom presets into Silver Efex:
- Go to the Presets section in the left panel.
- Click on the three horizontal lines (menu icon) and choose “Import Preset”.
- Navigate to the preset file on your computer and click “Open”.
Your imported presets will now appear in the Imported section. You can also rename or favorite these for quick access.
How I Use Silver Efex in My Landscape Photography Workflow
I’ll be upfront: black and white photography isn’t the main focus of my work. Most of what I shoot and share is in color. But when I do decide to go monochrome, Silver Efex is where I go.
My workflow usually starts in DxO PureRAW to optimize the RAW file, getting the noise reduction and lens corrections sorted before anything else. From there, I move into Lightroom for basic adjustments: exposure, contrast, and getting the tonal foundation right. Then I pass the image to Silver Efex when I want to take the conversion in a more creative direction.
Whether I start with a preset or build from scratch depends on the image and what I have in mind. If I can see a preset that gets me close to the mood I’m after, I’ll use that as a starting point and adjust from there. If I have a clear idea of the direction, I’ll often build it up manually. It’s different every time.
What I find Silver Efex particularly well-suited for is dramatic black and white edits, images where I want strong contrast, defined tonal separation, and a sense of weight. The Structure slider is one I come back to regularly for landscape work, letting me bring out texture in foreground elements without the heavy-handed look that over-applying Clarity can produce.
Silver Efex isn’t part of every workflow, but for the images where black and white feels right, it’s the right tool for the job.
Create Local Adjustments Using Control Points and Masks in Nik 9 Silver Efex
Many photographers are familiar with Layers and Masks in software like Adobe Photoshop or Affinity Photo. While these traditional layer-based tools aren’t part of the Nik Collection, Nik 9 Silver Efex has its own powerful ways of making selective adjustments.
Local Adjustments in Silver Efex include:
- Object Selection
- Area Selection
- Control Points
- Control Lines
- Polygon Tool
- Luminosity Masks
- Color Masks
- Depth Mask
These tools let you target specific areas of your photo, giving you the freedom to apply or protect adjustments exactly where you want them. Whether you’re adding contrast to the sky, brightening a subject, or applying a vignette effect to the edges, Local Adjustments make it possible. With tools like Control Points, Lines, Polygon Masks, Luminosity Masks, and Color Masks, you get full control over your black-and-white editing workflow. They might take a little practice to master, but they are what set Silver Efex apart from simpler black-and-white editors.
Recommended Reading: Global vs Local Adjustments in Post-Processing
How Control Points Work
Control Points have long been a core part of the Nik Collection. In Silver Efex, they let you apply adjustments only to the selected area without affecting the rest of the image.
Here’s how to use them:
- Open a filter and click the Control Point icon in the right panel.
- Click on the area you want to adjust. A circle appears, marking the mask area.
- Resize the circle by dragging the radius slider. This changes how much of the image is affected.
- Refine the mask using the sliders under Color Selectivity and Selective Tones.

Control Points intelligently analyze the tone, texture, and brightness of the selected area. This allows you to make localized edits without harsh edges or manual masking. You can move, resize, or duplicate Control Points at any time.
How the Polygon Tool Works
The Polygon Tool is perfect when you need to define custom shapes for your masks, something Control Points can’t always do precisely.
Here’s how to use it:
- Apply a filter, then click the Polygon Tool icon.
- Click around your subject to add points and form a custom shape.
- Close the shape by connecting the last point back to the first.
- Refine the mask by adjusting the shape or adding local sliders.
This tool is ideal for selecting buildings, mountains, or other geometric subjects where circular masks fall short.
How Luminosity Masks Work
Luminosity Masks let you target adjustments based on brightness, perfect for applying changes to just the highlights, midtones, or shadows.
Here’s how it works:
- Click the Luminosity Mask icon in the right panel.
- Use the numbered buttons (0–10) to choose which brightness range to target (0 = darkest shadows, 10 = brightest highlights).
- Refine the mask range using the sliders below the scale.
This is ideal for creative effects like applying a subtle vignette only to the shadows or adding brightness only to the highlights.

Recommended Reading: An Introduction to Luminosity Masks
How Color Masks Work
The Color Mask allows you to target a specific color range in your photo, even in a black-and-white workflow. This is especially useful when combined with the Color Reference Image feature.
Here’s how to use it:
- Activate the Color Mask tool from the right panel.
- Click on a color in the Color Reference Image (your original color photo).
- Refine the color range using the mask sliders.

This is great for targeting color-specific adjustments that impact the luminance or contrast in your monochrome image.
Who Should Use Silver Efex?
Nik 9 Silver Efex is, in my opinion, a must-have plugin for anyone interested in black-and-white photography.
It’s beginner-friendly thanks to its built-in presets, which make it easy to convert your photos to monochrome with just one click. But it doesn’t stop there. The real power comes from its customizable filters and local adjustments, giving more experienced photographers complete control over the final result.
It’s also worth mentioning that Silver Efex isn’t limited to just one type of photography. Whether you’re working with landscapes, architecture, street photography, or portraits, you’ll find tools here that help you create stunning black-and-white images.
If black-and-white photography is something you enjoy, or want to explore more seriously, Silver Efex is absolutely worth having in your toolbox.
Are you unsure whether to get Nik 8 Silver Efex? I strongly suggest downloading the free 30-day trial to see if it fits your needs.
Should You Upgrade from Silver Efex 8 to 9?
If you already own Nik Collection 8, the upgrade to version 9 is priced at $99.99.
For Silver Efex specifically, the main addition is AI Masks. Whether that justifies the upgrade depends on how you currently work. If you rely on Silver Efex for detailed local adjustments and selective edits within the plugin, AI Masks give you a faster and more intuitive way to work. Combined with the new Depth Masks and the workflow improvements, the upgrade does make the experience noticeably more fluid.
If you do most of your masking and selection work in Lightroom or Photoshop before sending images to Silver Efex, the case is less compelling. The core conversion tools haven’t changed, and the new features are concentrated in the masking workflow.
It’s also worth noting that the bigger updates in version 9 are in Color Efex, with Color Grading, Blending Modes, and AI Masks, making that plugin a more complete editing environment. If you use both Color Efex and Silver Efex regularly, the upgrade is easier to justify across the collection as a whole.
If you’re coming from version 7 or earlier, the upgrade is a straightforward yes.
DID YOU ENJOY THIS ARTICLE? THEN DON’T FORGET TO SHARE!
Conclusion: Is Nik 9 Silver Efex Worth It?
Nik 9 Silver Efex remains the industry’s leading tool for black-and-white photo editing, and for good reason. It offers an impressive combination of simplicity and advanced control, making it a valuable addition to just about any photographer’s workflow.
While Lightroom, Photoshop, and other editors include black-and-white conversion tools, they often lack the specialized features, creative filters, and intuitive local adjustments that set Silver Efex apart.
The only real downside? You can’t buy Silver Efex on its own. It comes bundled as part of the full Nik Collection, which includes seven other plugins. Luckily, DxO offers a free 30-day trial, so you can explore Silver Efex and the rest of the collection risk-free.
Not sure if it’s worth the investment?
Start with the free 30-day trial and see how it fits your workflow.
And if you decide to buy, DxO has offered something special for CaptureLandscapes readers; an exclusive 15% discount on all new Nik Collection purchases, including Silver Efex.
Simply use the code capturelandscapes at checkout on the DxO website to claim your discount.
")

