Few things transform a landscape quite like fog. Imagine walking through an autumn-colored forest as mist softens the light and hides the distance, or standing above a valley where layers of fog drift slowly between the hills.
When fog appears in the right landscape, it brings a mood unlike anything else: mystery, calmness, and depth all at once. It also simplifies a scene, allowing you to isolate subjects or reveal subtle layers that would otherwise go unnoticed.
But fog photography can be tricky. The soft, low-contrast light often requires a different approach, and without understanding how to work with it, your photos can easily look dull or flat.
In this article, you’ll learn everything you need to capture the mood of foggy landscapes, from camera settings and composition tips to creative ways of using fog to add depth, atmosphere, and storytelling to your images.
#1 Embrace the Mood and Simplicity of Fog
One of the biggest challenges in landscape photography is dealing with visual clutter. Nature rarely arranges itself neatly, and if we’re unable to “organize the chaos,” our images can quickly feel busy or unfocused.
That’s part of why so many landscape photographers love fog: it simplifies the scene. By softening or hiding the background, fog removes distractions and directs attention toward the main subject. This not only creates a stronger composition but also adds mood and mystery to the image.

Take the photo above as an example. Without the fog, you’d see layers of trees in the distance, competing for attention and flattening the image. With the fog, those trees disappear, isolating the front layer and turning it into a clear focal point. The result is a cleaner, more atmospheric composition that tells a stronger visual story.
When photographing fog, try to embrace minimalism. Don’t feel you need to fill the frame; let the empty spaces and soft transitions between layers become part of the composition. This use of negative space helps convey calmness and depth, qualities that fog naturally enhances.
Recommended Reading: Composition in Landscape Photography: The Complete Guide
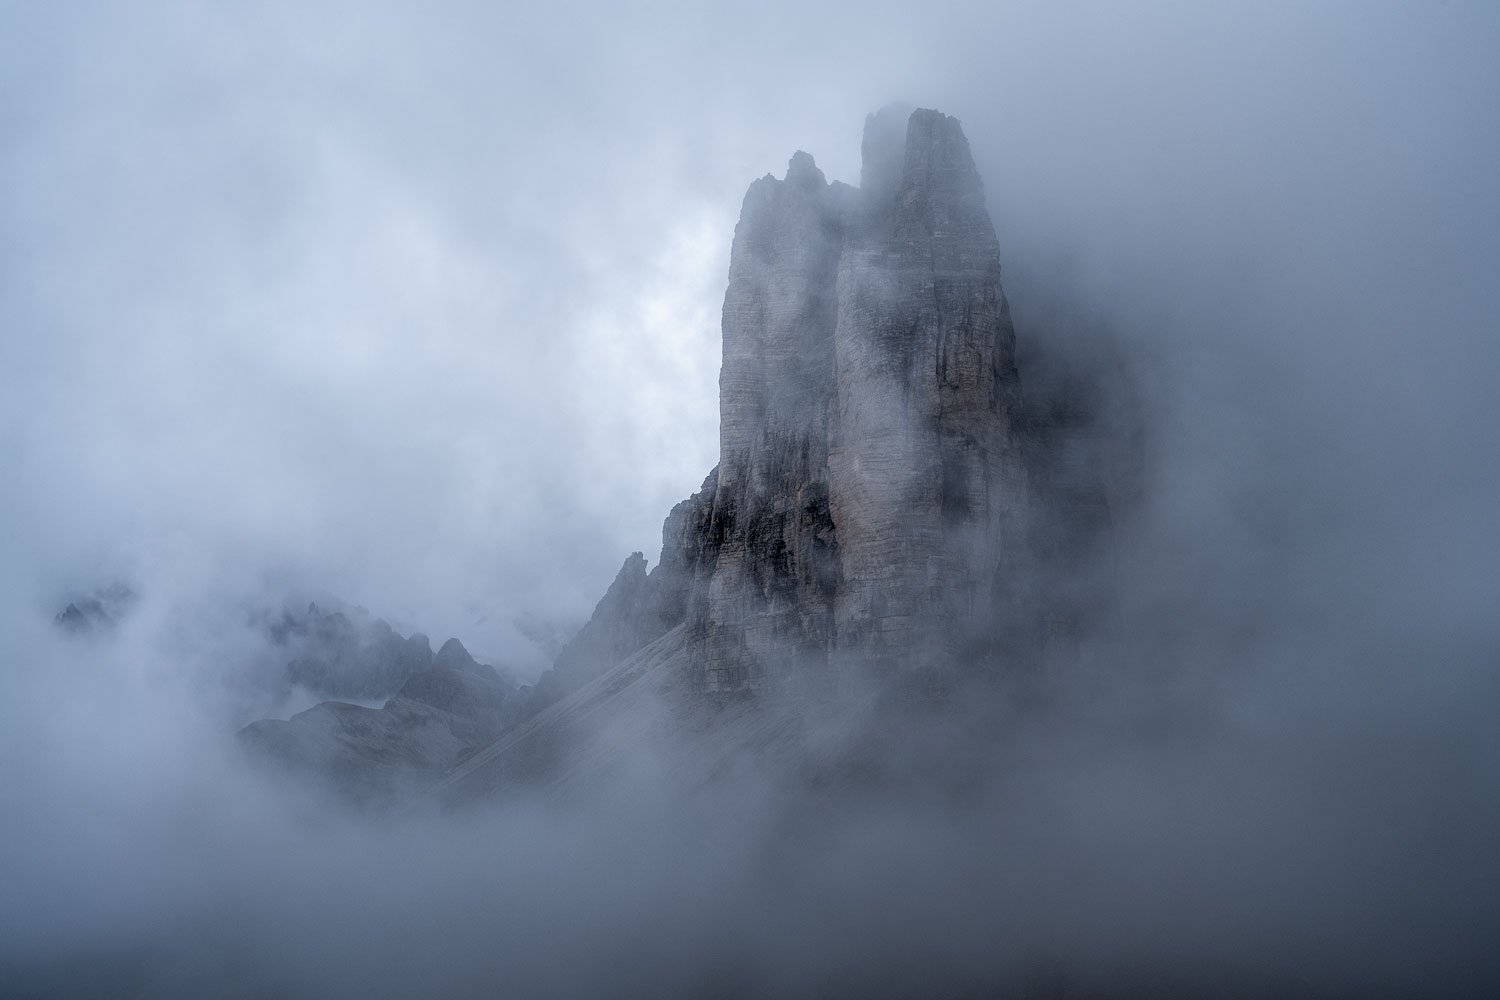
#2 Focus on Shape, Silhouette, and Separation
When fog reduces contrast and visibility, bold shapes become more important than fine details. Trees, ridgelines, and rocks take on new visual strength when seen as simple outlines against the mist. Thinking in terms of shape rather than texture can help you compose more striking foggy landscapes.
Use the fog to create separation between layers. When different parts of the scene fade at varying degrees, it naturally introduces a sense of depth. Try composing so that foreground elements are crisp while background layers gradually dissolve into lighter tones. This layering effect gives a three-dimensional feel that’s unique to fog photography.
Silhouettes also work beautifully in these conditions. A lone tree, mountain ridge, or cabin surrounded by mist instantly captures attention. By placing these shapes against the brighter tones of fog, you can convey mystery, scale, or solitude without needing dramatic light or color.
If you’re photographing in forests, look for pockets of fog drifting between the trees. The soft diffusion of light adds atmosphere, while vertical trunks or repeating shapes can provide a sense of rhythm and order.
#3 Use a Tripod and Adjust Your Camera Settings for Fog
Fog often comes with soft, dim light, which means your shutter speeds will naturally be slower. To avoid camera shake and ensure sharp images, it’s best to use a tripod whenever possible. It also allows you to refine your composition and wait for subtle changes in the fog, something that’s more challenging when handholding the camera.
As a starting point, use ISO100 to maintain image quality and set your aperture around f/8 to f/11 for balanced depth of field and sharpness. In forest scenes, you can open up slightly to around f/5.6 if you want to diffuse the background and separate your main subject from the layers behind it.
If you’re shooting handheld, don’t hesitate to increase the ISO to 800 or higher to keep your shutter speed fast enough for sharp results. Modern sensors handle this well, and it’s better to have a bit of grain than motion blur.
Recommended Reading: Noise Reduction in Photography: In Field & Post-Processing
When light levels are very low, such as before sunrise or under dense fog, using a tripod becomes essential. I personally use a Leofoto tripod for most of my work; it’s lightweight, stable, and quick to set up, which makes a big difference when you’re working in misty conditions.
Finally, keep an eye on your histogram, as fog can trick your camera’s meter into underexposing the scene. Adjust your exposure as needed to keep the fog looking natural.
Also, check your lens regularly. Moisture can quickly build up on the front element, softening your image unintentionally. A quick wipe with a microfiber cloth is often all it takes to keep your shots clear.
Recommended Reading: The Exposure Triangle in Photography [Comprehensive Guide]
#4 Be Careful With White Balance and Contrast
White balance plays a significant role in how your foggy landscapes feel. Because fog softens both light and color, even small changes in temperature can dramatically shift the mood of an image.
Auto White Balance often tries to neutralize the scene, which can remove some of the atmosphere that makes fog special. That’s why it’s worth taking control of yourself. For a neutral and natural look, try setting the Kelvin value between 5000 and 6000, or use your camera’s Cloudy or Shade preset as a starting point.
That said, White Balance is one of the most personal creative choices you can make. It’s where your interpretation comes in. I often prefer to keep mine slightly on the cooler side to emphasize the calm, moody character of fog, while others might warm it up to create a gentler, dreamier atmosphere.
When editing, make minor adjustments and trust your instincts; aim for a color balance that reflects how the moment felt rather than how the camera recorded it.
Finally, be cautious with contrast and clarity. Fog naturally lowers contrast, which is part of its charm. Boosting those sliders too much in post-processing can destroy the softness that makes the image work. Instead, embrace the subtle transitions between tones and let the fog carry the mood.
Recommended Reading: Mastering White Balance in Photography: How to Get Perfect Colors
#5 Use Fog to Add Depth to Your Composition
Fog is one of the best tools nature gives us for creating depth in a landscape. It softens distant elements, reduces contrast, and gradually lightens tones as objects recede, all of which mimic the way we perceive depth in the real world.
When composing a scene in fog, think in layers rather than individual objects. Use trees, ridgelines, or rocks in the foreground to anchor the viewer, then let the background fade softly into lighter shades. This gradual transition gives the image a sense of distance and dimension that’s difficult to achieve in clear conditions.
In forest scenes, pathways or leading lines work exceptionally well. They draw the eye deeper into the frame, while the fog hides what lies beyond, adding mystery and visual flow.

Take the image above as an example. The winding path naturally leads us into the scene, while the layers of trees gradually disappear into the mist. Without the fog, the forest would appear chaotic and flat. With it, the image gains structure, depth, and atmosphere.
When you find yourself in foggy conditions, look for scenes that already have a sense of layering or natural separation. The fog will enhance those relationships, helping you turn a simple view into a more compelling composition.
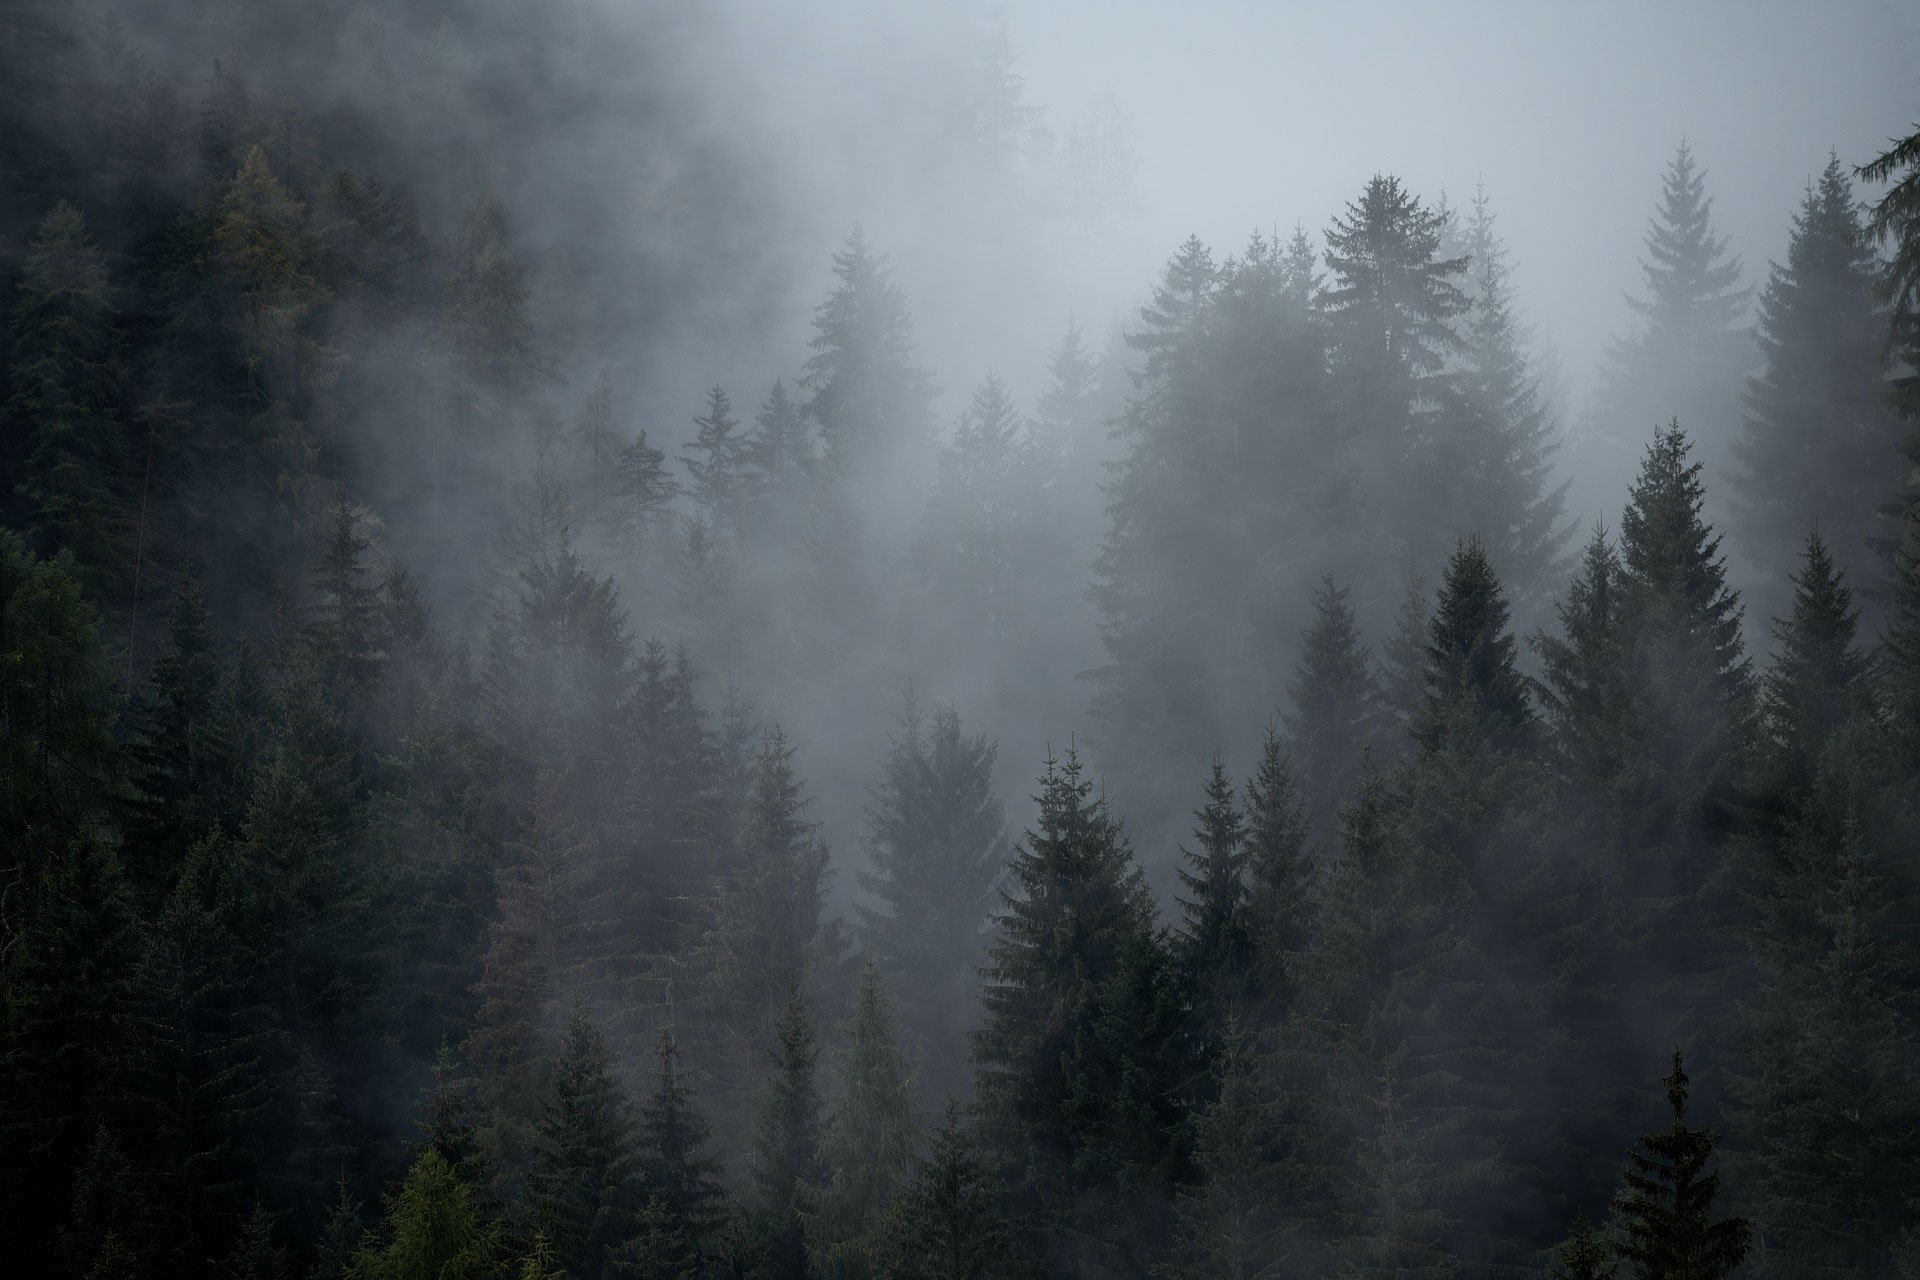
#6 Explore Forests and Valleys on Foggy Days
Certain places come alive when fog rolls in, and forests and valleys are among the best. Fog tends to settle in lower terrain and linger between trees, which makes these locations perfect for atmospheric landscape photography.
In forests, fog works like a natural diffuser. It softens the light and reduces contrast, which makes the scene feel calm and evenly lit. The gentle light helps bring out shapes and textures in the trees that can easily get lost on sunny days. And if a bit of sunlight breaks through the mist, you might even see soft beams of light appearing between the branches.

Valleys, on the other hand, often hold fog well into the morning. Shooting from slightly higher ground lets you capture layers of fog drifting across the landscape. If you’re lucky, you might even witness an inversion, where fog fills the valley below while the peaks remain clear, a perfect opportunity for dramatic wide-angle compositions.
Because these conditions can change quickly, it’s worth checking forecasts and revisiting familiar locations. A place that looked ordinary one day might be magical the next when the fog rolls through.
#7 Post-Processing Tips for Fog Photography
When it comes to editing foggy landscapes, subtlety is key. The beauty of fog lies in its softness and atmosphere, so strong global adjustments can easily remove what made the image interesting in the first place.
Start by preserving the mood. Avoid pushing global contrast or clarity too far, as this can remove the smooth transitions between tones that make fog so appealing. If you want to add definition, do it locally, for example, using a soft brush or mask to gently increase contrast on a tree trunk or foreground element.
Color balance also plays a big role. Even small shifts in temperature or tint can completely change how the image feels. For a colder, more moody look, lean slightly toward cooler tones. For a softer or more inviting atmosphere, add a touch of warmth in the highlights.
When working in Lightroom, DxO PhotoLab, or Photoshop, be cautious with the Dehaze tool. Instead of increasing it to cut through fog, try lowering it slightly to emphasize the haze and make the fog stand out more clearly. This works especially well when applied locally through a layer mask.
Finally, consider guiding the viewer’s eye through light and shadow. Techniques like dodging and burning can be used to selectively brighten or darken parts of the image, subtly shaping the composition and drawing attention to your main subject. You can also use tools such as the Linear or Radial Gradient masks to darken the edges or background, creating depth and focus while keeping the edit natural.
#8 Don’t Limit Yourself to Golden Hour
Unlike many other situations, fog can be photographed beautifully throughout the day. The soft, diffused light acts like a natural filter, reducing contrast and allowing you to shoot even in the middle of the day without harsh shadows or blown highlights.
That said, Golden Hour can bring something extra. When the sun sits low on the horizon, the fog can catch the warm light and glow with golden or orange tones, a phenomenon often described as the fog “catching fire.” It’s fleeting, but when it happens, the combination of soft mist and warm light can be magical.

The takeaway is simple: don’t pack up when the sun rises. Whether it’s morning, midday, or late afternoon, fog brings its own kind of light, soft, even, and full of atmosphere.
Conclusion
Fog photography has a unique way of transforming a landscape. It simplifies what’s in front of you, adds mystery, and turns familiar locations into something entirely new. But like any natural condition, it rewards patience and observation.
By learning how to work with the light, understanding how fog interacts with your surroundings, and taking a careful approach to both composition and editing, you’ll begin to see opportunities that others might overlook.
The next time you wake up to fog outside your window, don’t stay in bed; grab your camera and head out. Whether you’re in a quiet forest, a mountain valley, or along the coast, there’s a good chance you’ll find something special waiting in the mist.
Frequently Asked Questions About Photographing Fog
Start with ISO100 for clean image quality, and use an aperture around f/8–f/11 for balanced sharpness and depth. In forests, you can open up to about f/5.6 to further diffuse the background. Since fog can dim the light, use a tripod when possible, or increase your ISO to 800 or more if shooting handheld.
Fog can make autofocus struggle, especially if the contrast is low. Try focusing manually on a clear subject close to you, such as a tree trunk or rock. Using focus peaking (if available) or magnified live view can help ensure accuracy.
Fog often appears around sunrise and lingers through the early morning, but you can photograph it all day. Midday fog produces soft, even light, while Golden Hour can create beautiful, warm tones as the fog catches sunlight.
Filters are rarely essential for fog photography, but a circular polarizer can help reduce glare on wet foliage and deepen colors.
Keep your adjustments subtle. Lowering contrast and clarity slightly preserves the softness of the scene. Try reducing Dehaze to emphasize the fog, and use dodging and burning or local masks to guide light where you want the viewer’s attention.
When moving between warm and cold environments, condensation can form on your lens. Keep your gear in the camera bag for a few minutes to let it adjust to the temperature. Carry a microfiber cloth to remove any moisture that appears.