Dodge and Burn is a post-processing technique that’s used to adjust the exposure in specific areas of an image. Photographers have used this technique since the very beginning to create more dynamic and visually pleasing photographs.
In other words, it’s far from a new technique. While the concept is still the same, the actual steps and possibilities have changed a lot with the digital darkroom. Now, we’re able to use it in ways that weren’t possible before.
We have previously written about how you can Dodge and Burn in Photoshop and, in some ways, that’s what we’re going to look at today as well.
However, instead of looking at the manual steps of creating these layers, I want to show you an even easier (and better) method of doing it. This method gives you greater control of exactly where the dodging and burning is applied.
In order to use this technique, you need to use the Raya Pro Photoshop Panel. This is a panel I’ve written extensively about here on CaptureLandscapes and one that’s been a crucial part of my processing workflow for the past decade.
What is Dodge and Burn?
As mentioned above, Dodge and Burn is a technique that’s been used by photographers since the beginning. It’s a technique that allows you to adjust the exposure of specific parts of an image.
Unlike Curves or Levels adjustments which, by nature, are global adjustments, Dodging and Burning is only applied to the areas you select.
The most common way to do this is by either using the Dodge Tool (brighten) or the Burn Tool (darken) and brushing onto the areas you want to be affected. For every brush stroke, you darken or brighten those areas depending on the settings you’re using.
This, however, is not the best way to do it anymore. Tools such as Raya Pro allow you to get much greater control of how your Dodging and Burning is applied.
Let’s take a closer look:
Method #1: Traditional Dodge and Burn Using Raya Pro
The first method is, by far, the easiest. Manually creating Dodge & Burn layers isn’t that time-consuming but who can say no to having it done in one single click? Because that’s what Raya Pro does.
Navigate to and open the Dodge and Burn panel in Raya Pro. This is where, amongst others, you’ll find the tools to Dodge and Burn.
At first, it might seem a little overwhelming but in reality, there’s only one button you need to know about: 50% Grey.
By clicking this button Raya Pro creates a neutral 50% grey layer set to Soft Light. This is the layer you will apply your dodging or burning to. However, instead of using the Dodge or Burn tool as you might be used to from before, you instead use a soft white or black (or in some cases another color) brush set to a low opacity of 5 to 10 percent.
This method is known as a non-destructive adjustment. That means you’re not actually changing the image itself, but a neutral layer. This is beneficial for those that work with multiple layers in their post-processing as you can always go back and adjust older layers without having to start over.
Note: You can also choose to create a Merge Layer and use the Dodge or Burn tool on it. Keep in mind that this prevents you from making changes to previous adjustments you’ve applied.
Method #2: Dodge and Burn Using Luminosity Masks in Raya Pro
The first method is the go-to option for most scenarios. Personally, I use it 80% of the time. However, there are times when you need to be more precise.
That’s where Luminosity Masks come into the picture. Dodging and burning through such a mask allows you to affect only a very specific area.
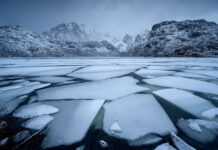
Let’s take the image we’ve used so far as an example. It has a nice and mysterious atmosphere but it could benefit from a slight increase of exposure in the highlights. Particularly in the white water.
Using Method #1 works fine but you risk also increasing the brightness in the darker areas around the white water. This isn’t ideal.
A better option is to apply a Luminosity Mask to our Dodge and Burn layer. Luckily, this is quite easy in Raya Pro:
- Open the Dodge and Burn panel
- Click on either the Highlights, Midtones, or Shadows buttons depending on what mask you want to create. In this case, we choose Highlights.
- Use the Levels adjustment that automatically opens to refine the mask. Remember that white reveals and black conceals (i.e., your adjustment will only be visible in white areas)
- Select the Brush Tool (B), set the opacity to 5-10%, and change the foreground color to black (to burn) or white (to dodge).
- Make sure that the layer is selected (not the mask) and brush onto the areas you want to affect
Voila! It’s not that much more complicated than the traditional Dodge and Burn method but it allows you to apply a very targeted adjustment.
Why Should You Dodge and Burn Through Luminosity Masks?
I think this question has partially been answered in the previous section but let’s talk a little more about why using Luminosity Masks can be a good option for Dodging and Burning.
Dodging and burning through Luminosity Masks allows for more precise control over the brightness levels of specific areas within an image.
When using traditional dodging and burning techniques, it can be difficult to make adjustments to specific tonal ranges without affecting other areas of the image too.
Luminosity masks use selections based on the brightness values of the pixels in an image, making it possible to target specific tonal ranges for adjustments. This allows for more localized and subtle adjustments, resulting in a more natural-looking result.
Does That Make Traditional Dodging and Burning Bad?
No. Absolutely not.
The traditional methods (traditional in the digital darkroom that is) are still widely used by photographers today and I don’t see that changing anytime soon.
As I mentioned previously, it’s the traditional method you’ll be using most of the time. Dodge and Burn with Luminosity Masks is only necessary when you have very specific needs.
In fact, sometimes the freedom to brush anywhere can be widely beneficial and allow for adjustments you wouldn’t otherwise be able to create.
Conclusion
Dodging and Burning in Raya Pro is both easy and efficient. It allows you to quickly make adjustments that traditionally would’ve taken you additional steps to achieve.
Is it possible to create this effect without the Raya Pro plugin? Yes, of course. However, those that spend a lot of time in Photoshop will find it to be a lot more convenient than manually making the layers and masks.
Keep in mind that the Dodge and Burn tools are just a fraction of what you’ll find in this plugin. It’s mainly used for Luminosity Masks but there’s a whole library of adjustments that can be made with just a few clicks.
DID YOU ENJOY THIS ARTICLE? THEN DON’T FORGET TO SHARE!


