


Adding a vignette can be a powerful way to enhance both the mood and the composition of an image.
By subtly adjusting the light and darkening parts of the frame, you can guide the viewer’s eye more naturally through the scene and towards the main subject. Done well, it’s something you don’t really notice. Done poorly, it quickly becomes distracting.
There are several ways to create a vignette in Lightroom. In this article, we’ll look at two of the most common methods, and more importantly, when you should use each of them.
Prefer to see it in action? I’ve demonstrated both methods in the video below:
Why Use a Vignette?
Before looking at how to create a vignette, it’s worth understanding why it’s such an effective tool.
Our eyes are naturally drawn to the brightest areas of an image. At the same time, darker areas help guide the eye toward those brighter points.
This means that the distribution of light plays a major role in how a photo is experienced.
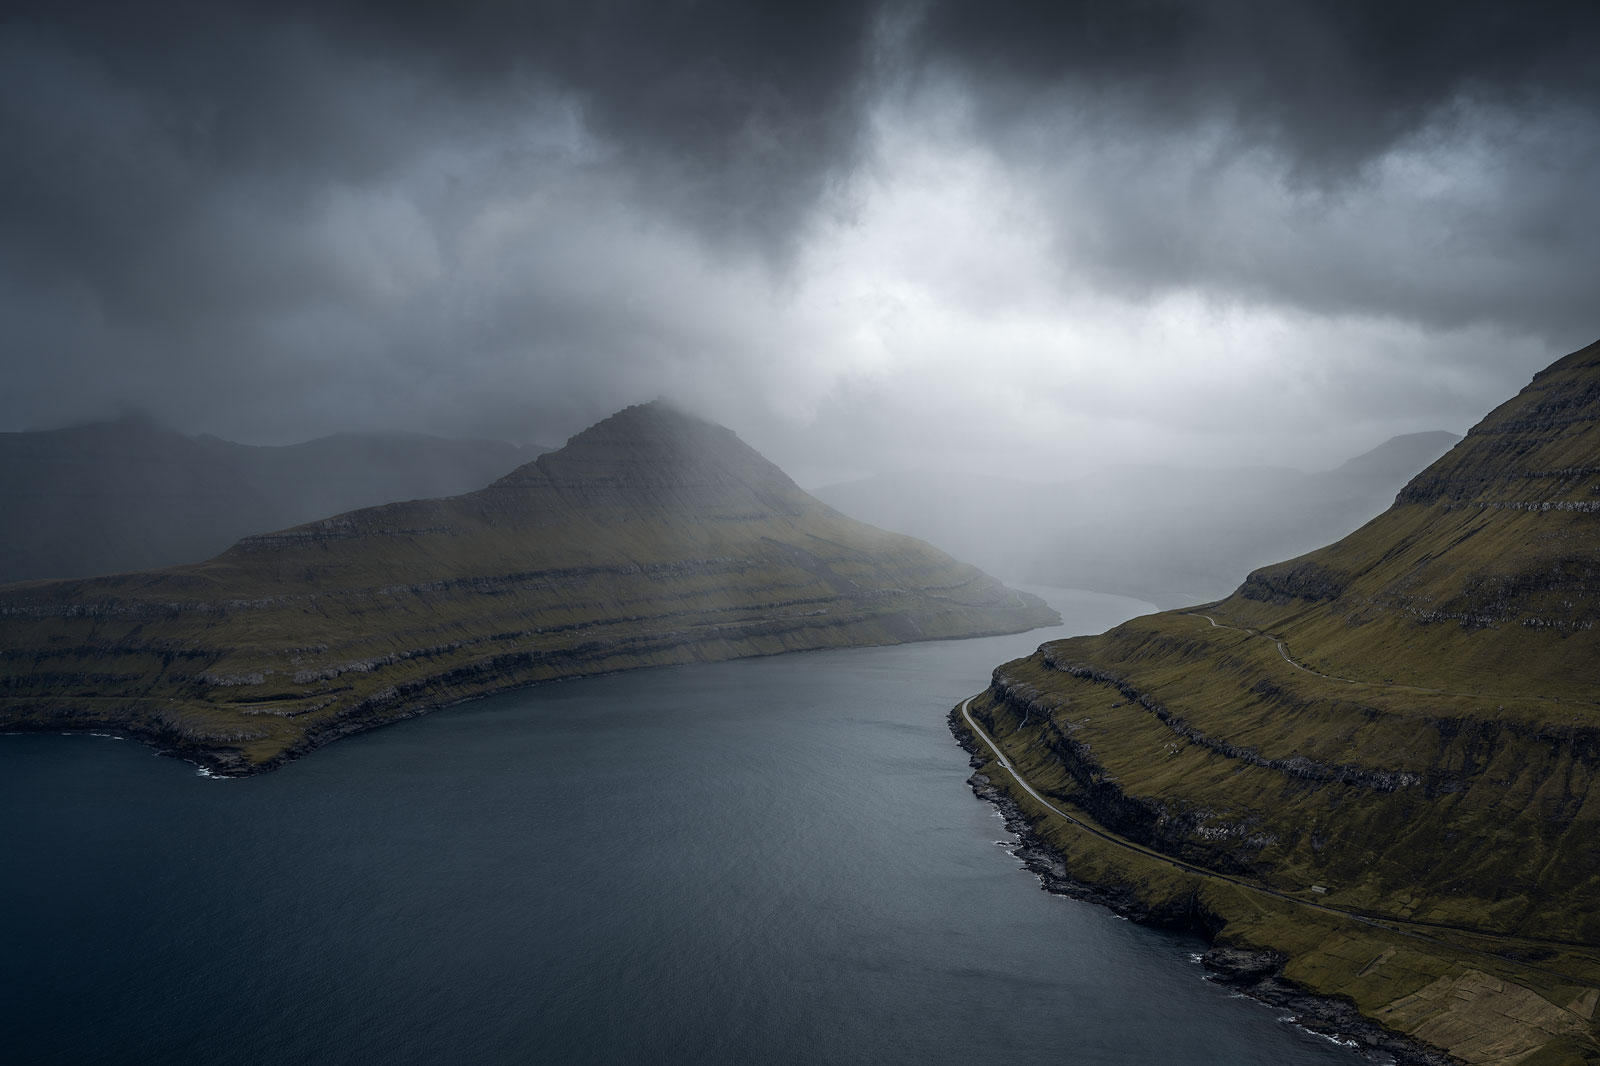
If the brightest parts of your image are near the edges, the viewer’s attention can easily drift out of the frame. A subtle vignette helps prevent this by gently darkening those areas and guiding attention back toward the main subject.
It’s not about making the edges dark. It’s about shaping the light to support the composition.
Recommended Reading: Composition in Landscape Photography: The Complete Guide
Two Ways to Create a Vignette in Lightroom
There are multiple ways to create a vignette in Lightroom, but in practice, it usually comes down to two approaches:
- Using the Post-Crop Vignette tool
- Creating a custom vignette using masking
Both can work, but they behave quite differently.
Method #1: The Post-Crop Vignette Tool
The easiest way to add a vignette in Lightroom is to use the Post-Crop Vignetting tool in the Effects panel.
This is the method most people start with.
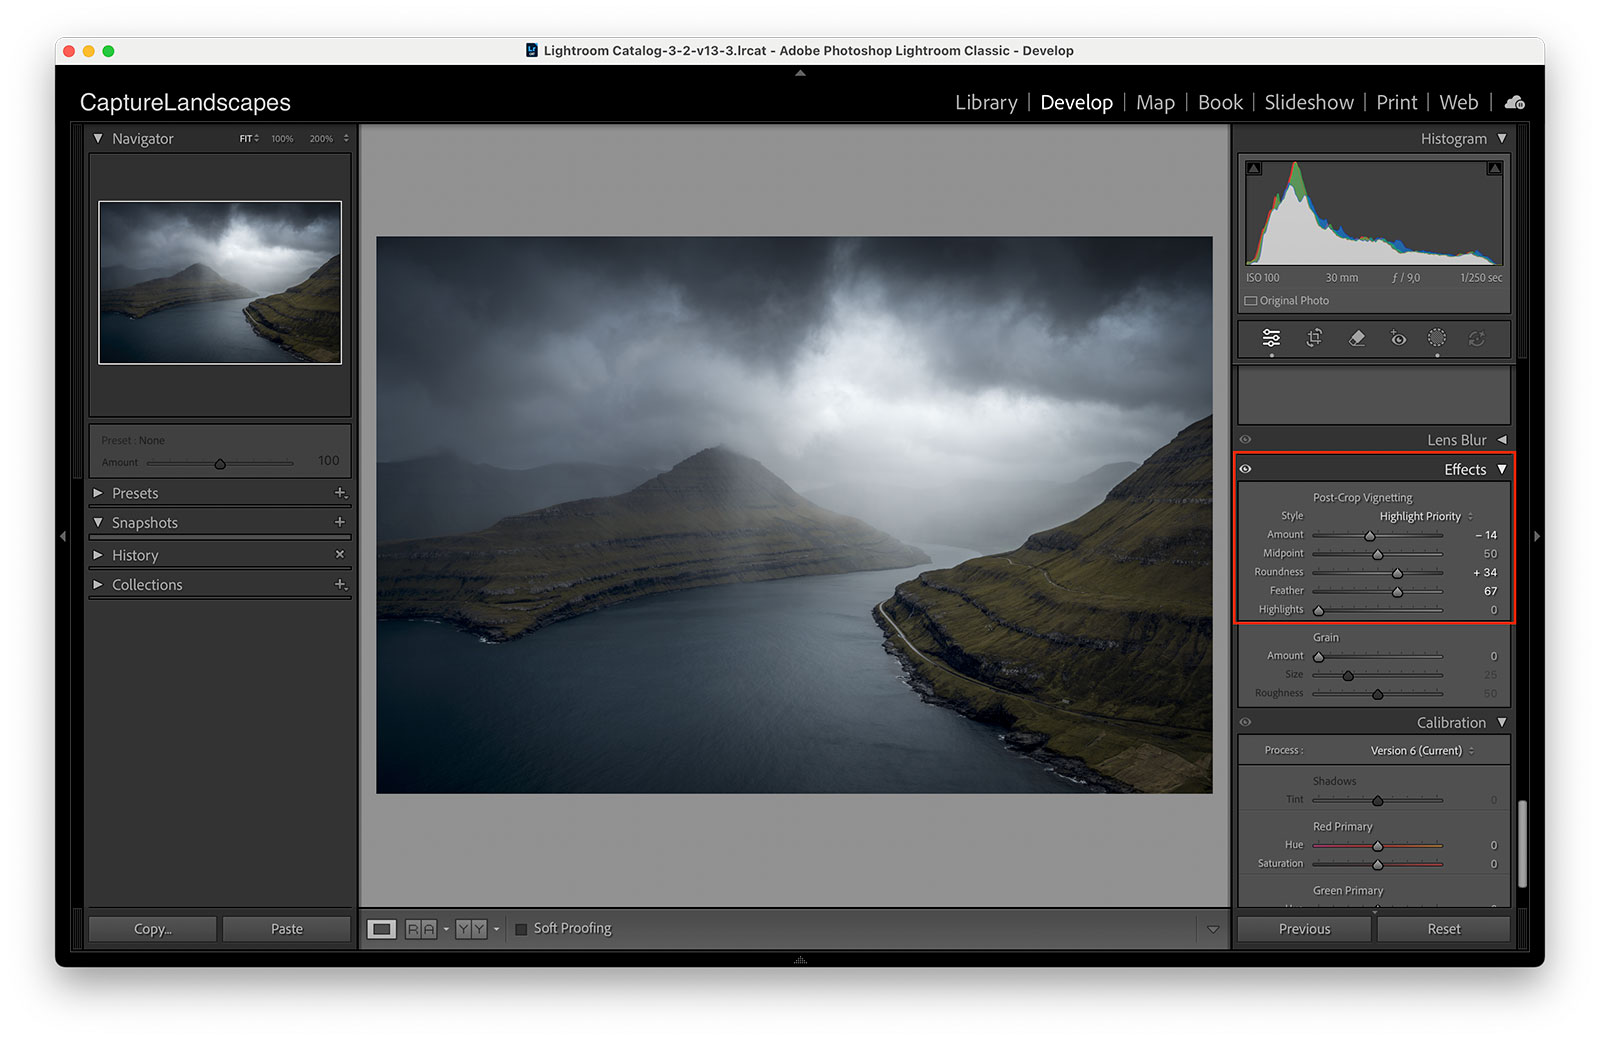
The Amount slider controls the strength of the vignette. Moving it to the left darkens the edges, while moving it to the right brightens them.
In most cases, you’ll want a subtle darkening, often somewhere around -10 to -20, depending on the image.
The Midpoint slider controls how far the vignette reaches into the image. A lower value makes the vignette extend further towards the center, while a higher value keeps it closer to the edges.
Roundness changes the vignette’s shape. Moving it towards the left creates a more rectangular effect, while moving it towards the right makes it more circular.
Feather controls how soft the transition is. This is an important one. A low feather creates a very obvious and often unnatural edge, while a higher value results in a smoother, more natural transition.
The Highlights slider can be used to protect brighter areas, though in many cases you won’t need to rely on it too much.
The Problem With This Method
While the Post-Crop tool is quick and easy to use, it has one major limitation:
It treats every image the same.
The vignette is applied evenly around the entire frame, regardless of what’s actually in the scene. This means it can easily darken areas that shouldn’t be darkened, especially if parts of the image are already naturally darker.
In simple scenes, this might not be a problem. But in more complex images, it often leads to a vignette that feels slightly off.
Method #2: Creating a Custom Vignette (Recommended)
A more flexible way to create a vignette is by using Lightroom’s masking tools, specifically the Radial Gradient.
This takes a little more time, but it gives you much more control over how the effect is applied.
Instead of darkening the entire frame evenly, you can shape the vignette based on your composition.
How to Create a Custom Vignette
Start by selecting the Radial Gradient tool (Shift + M).
Click and drag to create a large oval that covers the main area of your image. This doesn’t need to be perfect; you can always adjust it later.

Next, enable Invert Mask so that the adjustment affects the outer area instead of the center.
Now, slightly reduce the Exposure. In most cases, a small adjustment is enough, typically somewhere between -0.2 and -0.5.
Increase the Feather to keep the transition soft and natural.
At this point, you’ve created a vignette similar to the Post-Crop tool, but with much more control.
If you’d like a more detailed walkthrough of the custom method, including how to refine and combine masks, I’ve covered that in-depth here: How to Create a Custom Vignette in Lightroom
Refining the Vignette
This is where the custom method really becomes useful.
Because you’re working with a mask, you can refine exactly where the vignette is applied.
If there are darker areas near the edges of your image, you can use a soft brush to remove the effect from those areas. This prevents them from becoming too heavy or unnatural.

You can also adjust the shape of the mask to better match the scene, rather than being locked into a centered effect.
A Small Adjustment That Makes a Big Difference
One thing I often do when creating a vignette is to also slightly brighten the center of the image.
This isn’t always necessary, but it can help strengthen the effect in a very subtle way.
To do this, you can duplicate the mask, turn off the inversion, and increase the exposure slightly in the center.

It’s a small adjustment, but combined with the darker edges, it helps guide the viewer’s eye more naturally through the image.
Which Method Should You Use?
Both methods can work, and there isn’t a single correct answer.
If you’re making quick adjustments or working with a simple composition, the Post-Crop Vignette tool is often enough.
But if you want more control, or if the light in your image is more complex, the custom method will usually give you a better result.
Over time, most photographers tend to move towards a custom approach.
Final Thoughts
A vignette is a subtle adjustment, but it can have a big impact on how an image is perceived.
The key is to use it with intention.
If it helps guide the viewer’s eye and strengthens the composition, it’s doing its job. If it becomes noticeable, it’s usually too much.
Like most things in post-processing, it’s not about applying an effect. It’s about understanding why you’re using it in the first place.
Vignetting is one of the finishing adjustments included in the Lightroom Toolbox presets, where it’s applied as part of a complete landscape workflow rather than as a standalone effect.
DID YOU ENJOY THIS ARTICLE? DON’T FORGET TO SHARE!

")


Really liked how you explained both methods instead of just relying on the basic vignette tool. The comparison between the Post-Crop Vignette and the custom radial mask approach was super helpful. I especially agree that the custom method gives much more control and looks more natural. Also, the point about keeping the effect subtle really stands out—easy to overdo, but when done right, it makes a big difference 👍