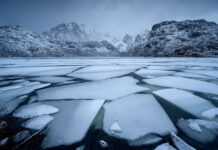
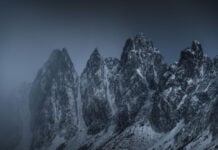
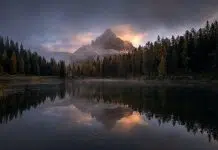
Dodging & Burning has been around since the beginning of photography and the fact that it’s still being used in the digital darkroom is a testament to its effectiveness and a great reason why you could implement this editing style into your post-processing workflow.
Emphasizing the main subject leading the viewer’s eyes to it is a common use of Dodge & Burn. Often when shooting landscapes there is a compositional element that leads the viewer’s eye to the subject. This could be a road, path or river, which can be brightened or darkened in post-processing to help guide the eyes to the main subject, perhaps a mountain in the distance.
Dodging & Burning is typically done directly on a 50% gray layer or on a Merged Layer but this isn’t necessarily the best way. There are several reasons why you should consider applying Dodging & Burning through a Luminosity Mask instead. Let’s look at some.
How to Create a Dodge & Burn Layer
Before we jump into the pros and cons of using Luminosity Masks with this adjustment, I’ll show you an easy way to create a Dodge & Burn layer. There are a few different methods but my personal favorite is to use a 50% gray layer.
Follow these simple steps to create it:
- Option/Alt + click on the Create new layer… icon
- In the new dialog, rename the layer to Dodge & Burn, change the Mode to Overlay and check the box next to Fill with Overlay-neutral color (50% gray).
- Click OK
The new 50% gray layer is now created and located in the Layers Panel.
If you haven’t used this type of layer before, it works by using a soft white or black brush at an opacity of 10-12% and 0% hardness to paint on the picture; the areas that you paint will be darkened or brightened depending on the brush color.
Why Dodging & Burning Through Luminosity Masks
Dodging and Burning directly on a 50% gray layer is an efficient method and in many cases it’s sufficient. However, it doesn’t take the luminosity into consideration and the effect is applied globally to the areas you paint. That means that you might end up darkening already dark parts or vice versa.
That’s why many photographers began using Luminosity Masks in their Dodge & Burn workflow. This mask applies the effect to only specific parts of the image, allowing us to Dodge & Burn only specific areas.
There’s not one correct way to apply the Dodging & Burning; sometimes you prefer dodging the shadows while other times you want to avoid it. But using a Luminosity Mask when applying it will increase the accuracy of your painting to make sure that you’re not affecting areas that should be left alone.
How to Dodge & Burn Through Luminosity Masks
When Dodging & Burning through Luminosity Masks we don’t necessarily need to apply the selection to a Layer Mask. Yes, that is a perfectly fine option but I prefer painting directly through the Luminosity Mask selection instead. The reason for this is that I can at any time deselect or select another Luminosity Mask that better suits a different area of the image.
This makes the process quite easy. After creating the Dodge & Burn layer select and activate the Luminosity Mask you want to use, let’s say Brights 2. Marching ants tell you that the selection is active but go ahead and hide these (Ctrl/Cmd + H).

Next, you grab a soft white brush at an opacity of 10-15% and start painting over the areas you want to brighten. Notice that only the brighter parts of the image (the parts selected in by the Luminosity Mask) are being affected. The dark parts are left alone.
You’ve now successfully Dodged through a Luminosity Mask.
Burning is done by following the exact same steps as above, with the only difference that you use a black brush. Which Luminosity Mask you choose depends on which one targets the desired area best.
Examples of When to do it
When photographing seascapes and the receding waves with a semi-slow shutter speed you’re left with beautiful lines in the foreground but straight out of the camera these lines might not be as eye-catching as you envisioned.
Increasing their exposure might make them more interesting but there still needs to be a certain amount of contrast; brightening the entire foreground won’t make the leading lines stand out.
What you want is to leave the shadows alone (or perhaps darken them) and brighten only the brightest parts. This is easily done by using a Brights or Midtones Luminosity Mask on a D&B 50% gray layer.
I’ve exaggerated the effect slightly in the image above to better show what you could achieve by following a few simple steps.
In this image, I created a 50% gray layer and applied a Midtones 1 Luminosity Mask. I chose a Midtones mask rather than a Brights mask as the Brights mask wasn’t able to target the water as well as the Midtones mask.
With the mask applied to the Dodge & Burn layer, I selected a white brush at a medium opacity (you can use a higher opacity when dodging through a mask than without a mask) and painted along the white lines.
Note: You can increase the Brush Opacity to make the adjustment more intense but I recommend first adding additional brushstrokes, as it’s easier to control the effect and correct mistakes this way.
A Photographer’s Guide to Luminosity Masks is your go-to eBook for an in-depth introduction to basic and advanced masks in Photoshop. Whether you’re just getting started with Photoshop or have used it for years, this eBook is a natural place to begin expanding your knowledge. The information shared throughout A Photographer’s Guide to Luminosity Masks will teach you everything you need to know in order to take advantage of layers and masks in Photoshop.


