

Autumn is one of the most rewarding seasons for photographers. Vibrant leaves, misty mornings, and golden light can transform an ordinary scene into something unforgettable. But as inspiring as fall colors are, they can also be tricky to capture. Dull skies, flat light, or oversaturated tones often leave images looking less impressive than what you saw in the field.
That’s why I’ve put together these practical autumn photography tips. In this guide, you’ll learn how to:
- Use light and weather conditions to your advantage
- Capture the full vibrancy of autumn leaves and fall colors
- Choose the right filters and settings for maximum impact
- Find compositions that highlight the season’s beauty
Whether you’re photographing a misty forest, a colorful mountainside, or a single leaf on the ground, these techniques will help you create images that capture the true atmosphere of autumn.
#1 Photograph Autumn Landscapes During Golden Hour
Few things enhance the colors of autumn like the soft light of Golden Hour. When the sun is low on the horizon, shortly after sunrise or before sunset, it casts a warm glow that makes yellows, oranges, and reds appear even richer. Instead of the harsh tones you often get at midday, Golden Hour light gives your images depth, atmosphere, and that extra pop of color.
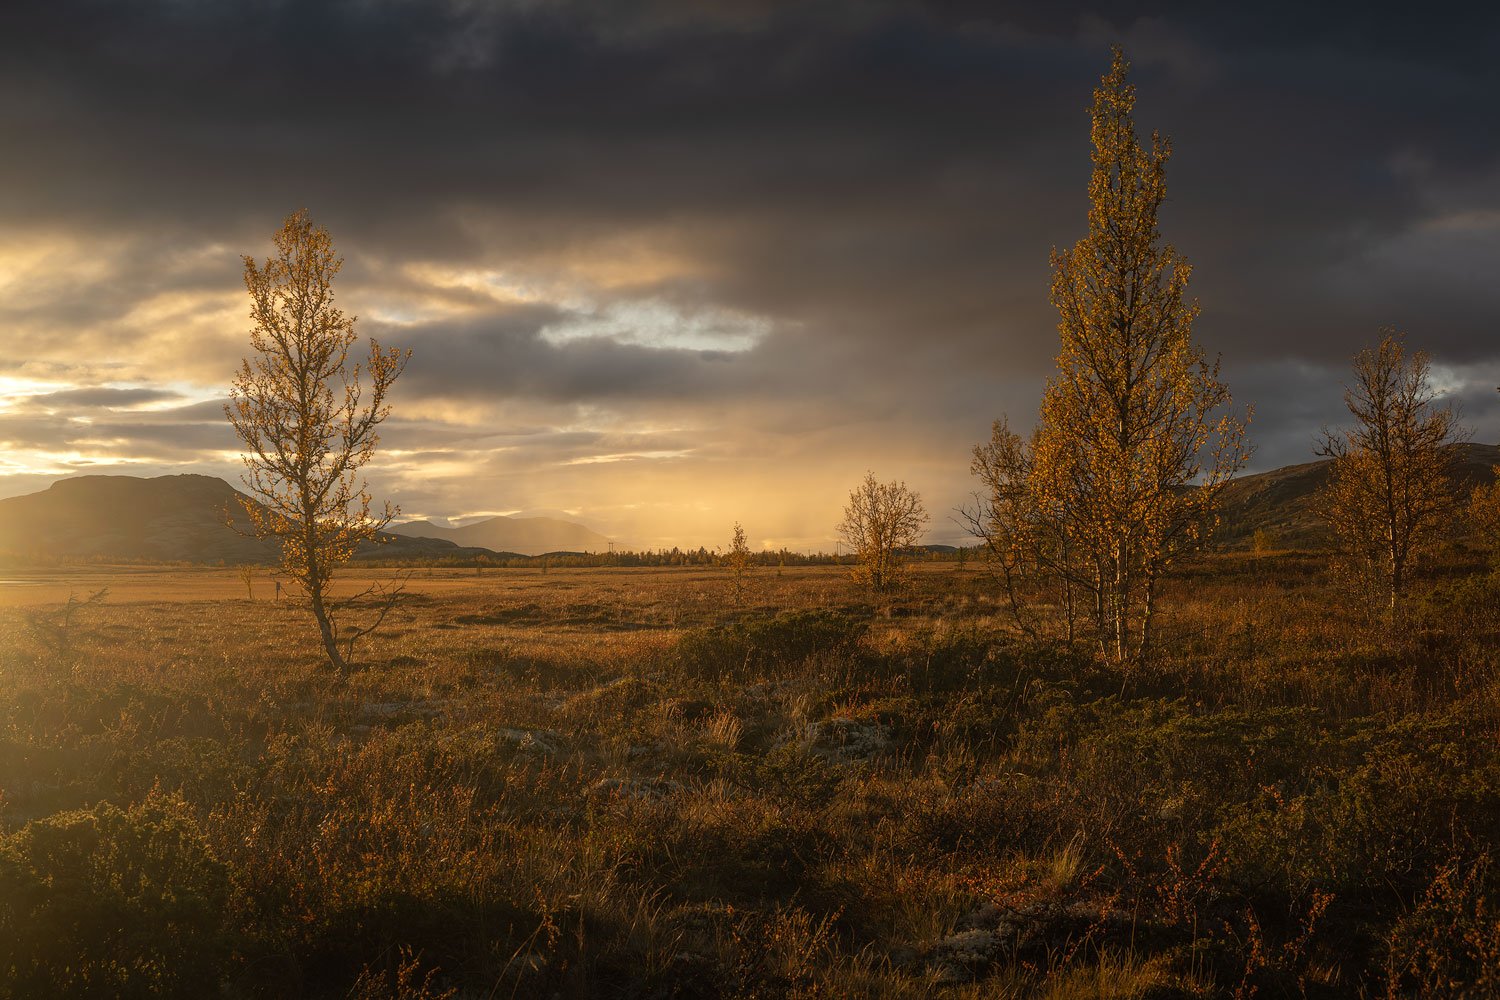
In autumn, this effect is even more powerful. The sun sits lower in the sky compared to summer, meaning the golden light often lasts longer and feels more intense. Combine that with vibrant foliage and you have the recipe for stunning images.
To make the most of Golden Hour:
- Be ready before the best light arrives; conditions often change quickly.
- Look for backlit leaves, as they often glow beautifully when the sun shines through them.
- Bring a tripod if you’re working in low light.
- Try both wide-angle and telephoto lenses to see how the light transforms the scene at different scales.
Not every autumn day will bring clear skies, but when the sun breaks through after rain or fog, Golden Hour can make even an ordinary landscape look extraordinary.
Recommended Reading: Sunset Photography Tips: 8 Simple Ways to Improve Your Shots
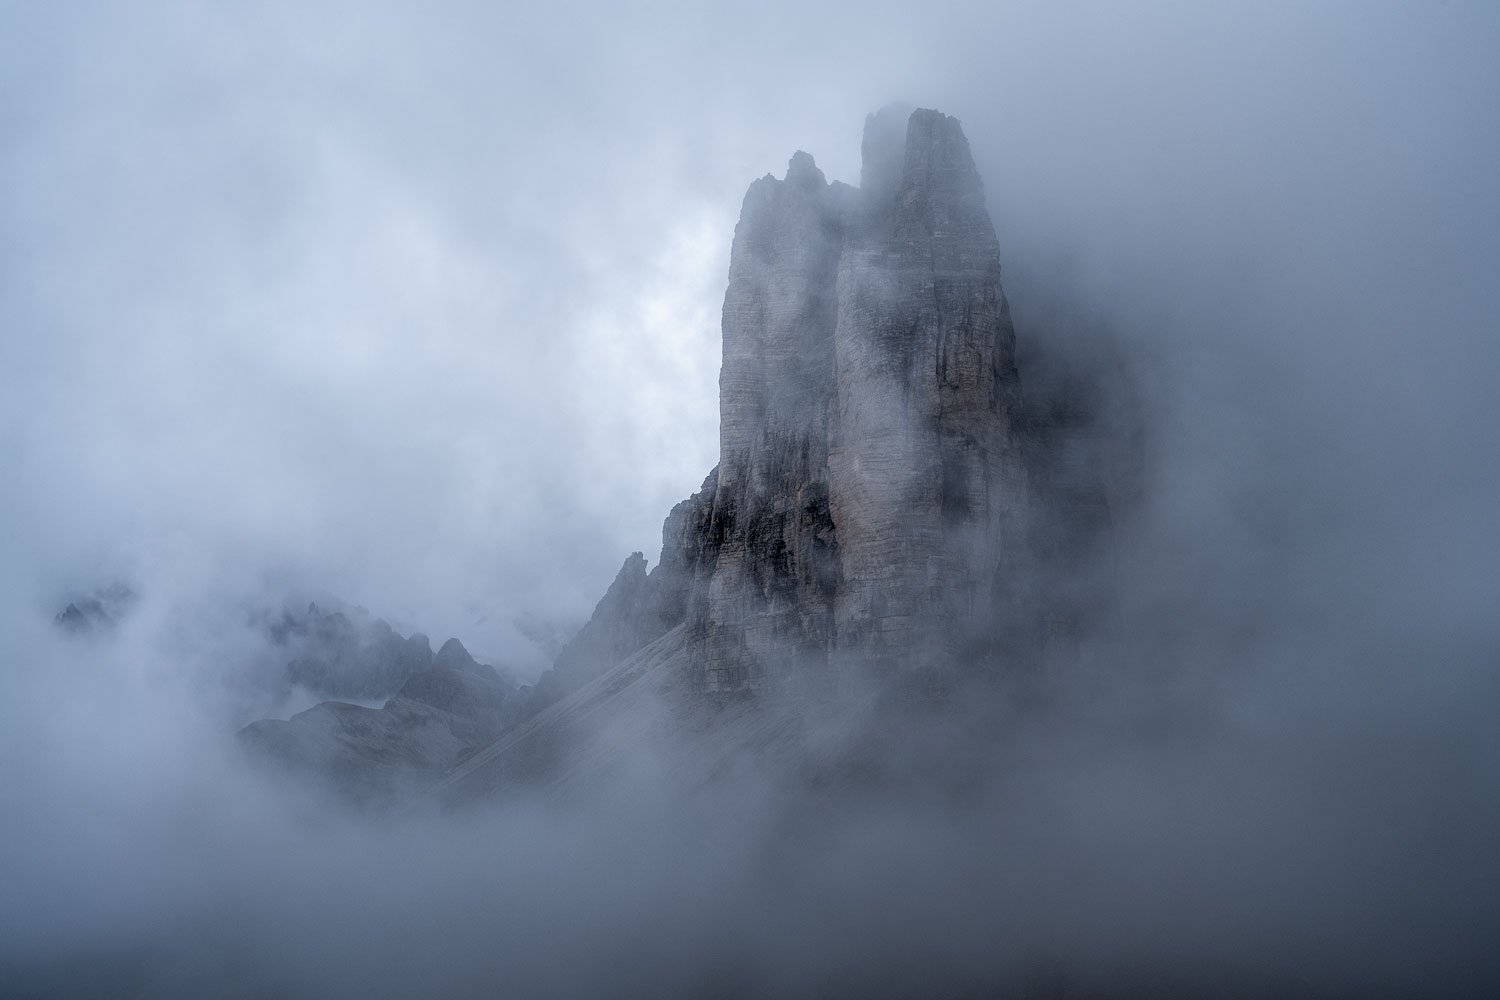
#2 Embrace Fog and Overcast Days for Moody Autumn Photos
Autumn isn’t just about crisp, sunny days. In fact, some of the most atmospheric images happen when the weather turns gray. Fog, mist, and overcast skies can give your photos a soft, moody quality that suits the season perfectly.
While these conditions may tempt you to stay indoors, they’re well worth exploring with a camera. The diffused light means you can shoot throughout the day without the harsh contrast you’d normally get under midday sun. Forests, rivers, and lakes often look their best in these conditions, as the muted skies make colors appear richer and more balanced.

Here are a few ideas to try on foggy or overcast days:
- Look for color separation: bright leaves or heather will stand out beautifully against a muted background.
- Use leading lines like paths, streams, or rows of trees that fade into the fog.
- Pay attention to negative space; misty backgrounds naturally simplify a scene and make your subject stronger.
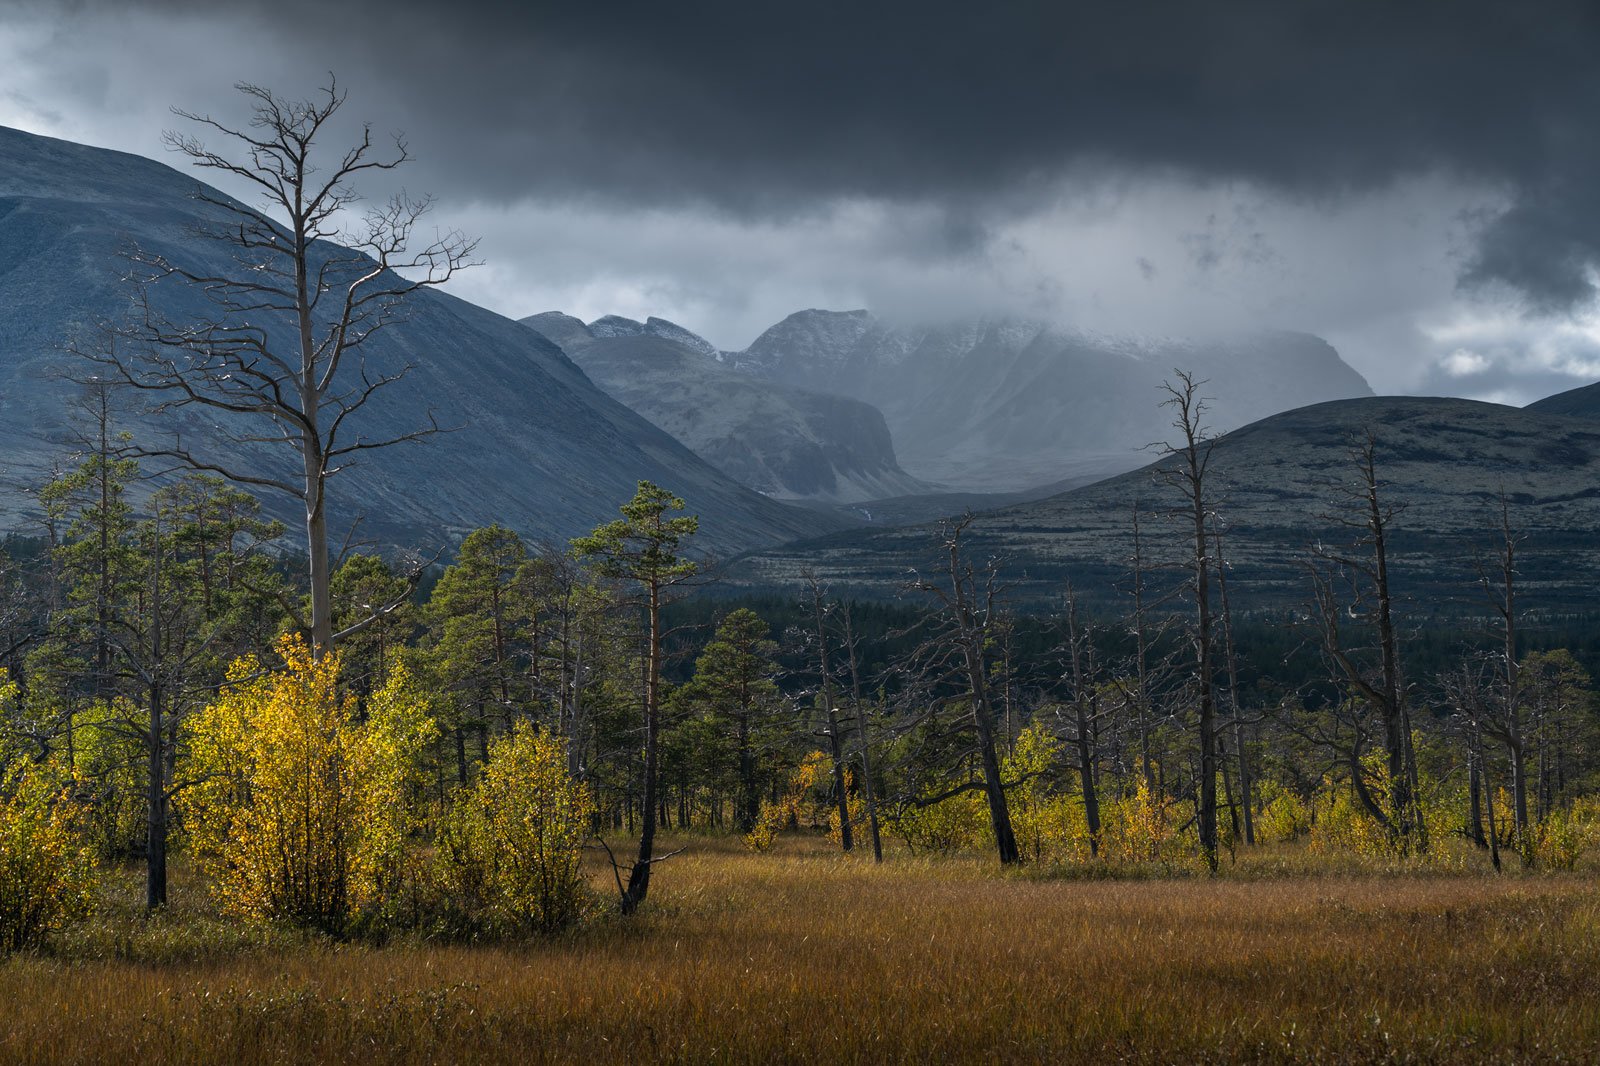
Don’t think of fog and clouds as bad weather. In autumn, they’re part of the story and often what makes your images stand out.
Overcast days can bring a lot of exciting moments. The photo below is a good example, taken around midday as the sun briefly broke through the clouds, casting beautiful light on both the trees and the surrounding mountains.
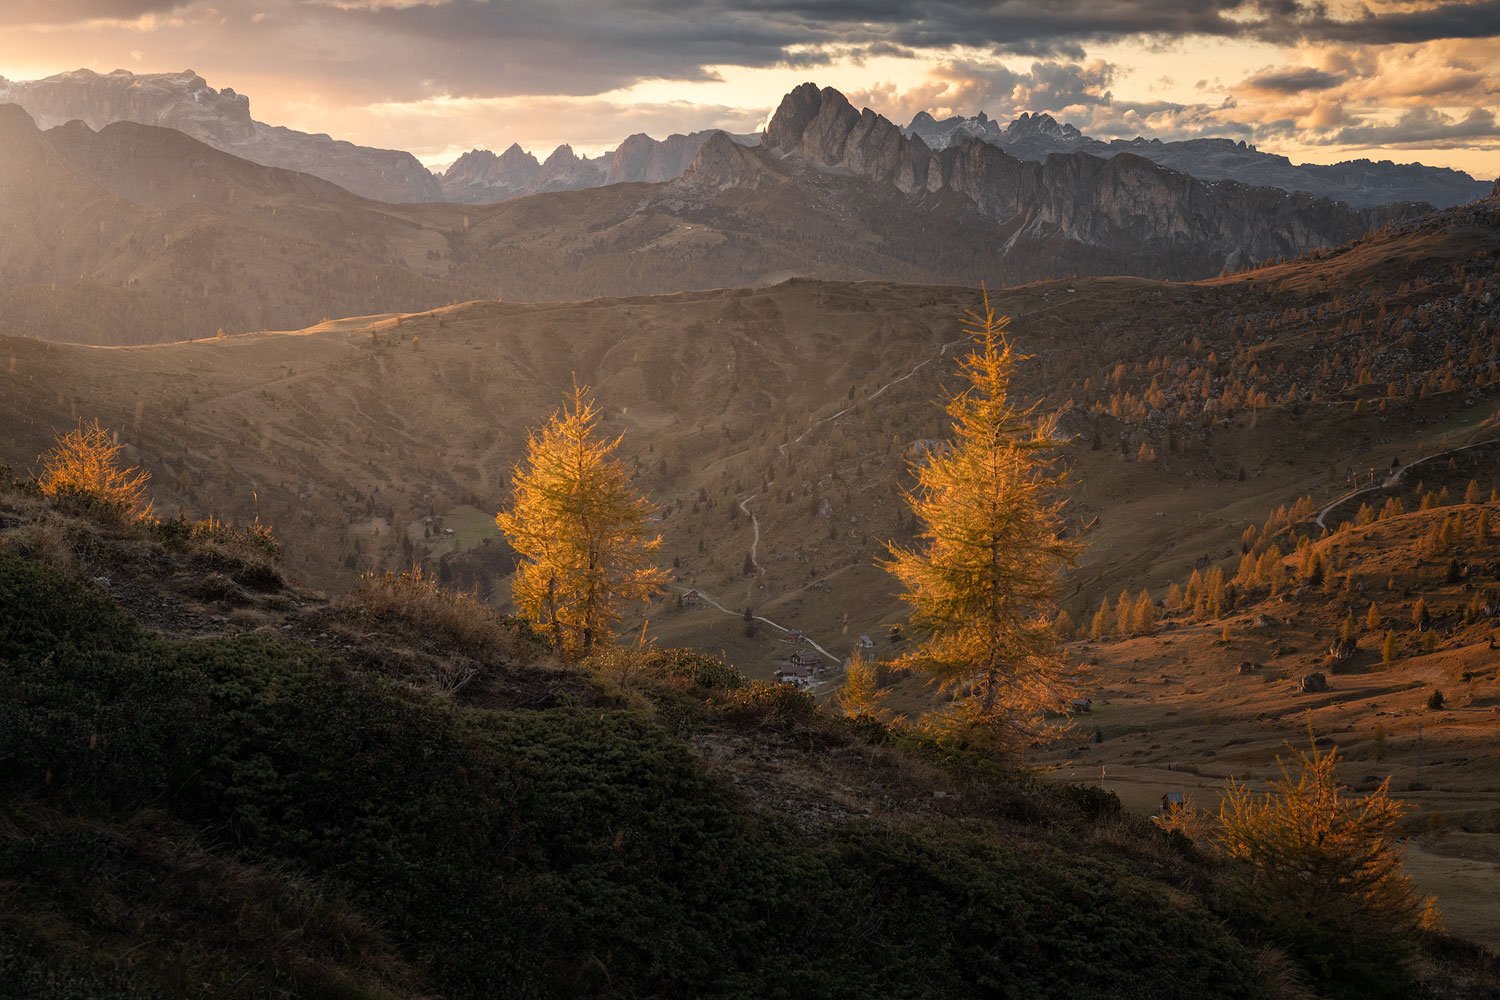
#3 Use Natural Framing to Highlight Autumn Colors
Autumn offers countless opportunities for natural framing. Branches, leaves, or entire trees can act as frames that guide the viewer’s eye toward your main subject. This technique helps simplify the composition while still adding depth and context.
When done well, natural framing emphasizes the subject without distracting from it. A layer of colorful leaves can frame a waterfall, or an arching branch might create a window into a distant mountain scene. Even something simple, like placing a cluster of red leaves around the edge of your frame, can make the composition feel more intentional.
Some practical ways to approach natural framing in autumn:
- A telephoto lens makes it easier to isolate frames like overhanging branches.
- Wide-angle lenses can work too, but they often require getting closer to your framing element.
- Pay attention to depth of field; sometimes a slightly blurred frame in the foreground adds a nice sense of depth.

Framing isn’t about filling the entire image with leaves or branches. Instead, use just enough to guide the eye toward your subject and to give your autumn photos a stronger sense of story.
Recommended Reading: Composition in Landscape Photography: The Complete Guide
#4 Use a Circular Polarizer to Enhance Autumn Colors
A circular polarizer is one of the most useful filters you can carry in autumn. It helps reduce glare on wet surfaces, enhances contrast, and makes colors look richer without over-saturating them. On clear days, it also deepens blue skies and makes clouds stand out, adding extra drama to your images.
After a rain shower, a polarizer becomes especially valuable. By cutting through the glare on wet foliage, it allows the reds, yellows, and oranges to appear more saturated and true to life, something that can make a huge difference in your autumn images.
When photographing rivers or streams, a polarizer also allows you to use slightly slower shutter speeds, helping you capture smoother water flow while keeping the rest of the scene sharp.
Just remember that the filter reduces light by about 1.5 stops, so you may need to increase your ISO or use a tripod in dim conditions.
If you’re considering a polarizer, look for one that’s as color-neutral as possible. Some cheaper filters can add an unwanted color cast. Personally, I use the NiSi JetMag system. Its magnetic design makes swapping filters much faster in the field, which is particularly useful when working in cold autumn weather.
#5 Be Careful When Shooting in Direct Sunlight
Strong midday sunlight is one of the most challenging conditions for autumn photography. The harsh light often creates deep shadows, reduced saturation, and high contrast that makes it difficult to capture the richness of fall colors. Shooting directly into the sun can also cause lens flare, which is hard to remove in post-processing.
That doesn’t mean you should never point your camera toward the sun. At sunrise or sunset, when the light is softer and lower in the sky, backlighting can create a beautiful glow through colorful leaves. The key is to be selective and avoid the harsh overhead light that flattens a scene.

If you do want to photograph in strong sunlight, here are a couple of options:
- Bracket exposures and blend them later to balance bright skies with dark foregrounds.
- Look for shaded areas, such as a forests or a mountainside in shadow, where the light is more even.
In general, autumn scenes benefit from softer light, whether it’s during Golden Hour, on overcast days, or when the sun is filtered through clouds. Direct sunlight can work in some situations, but most of the time it’s best to avoid it.
Recommended Reading: There’s No Such Thing as Bad Light
#6 Adjust White Balance to Bring Out Autumn Tones
Your camera’s Auto White Balance often tries to neutralize colors, which can work against you when photographing autumn. Instead of letting the camera decide, take control of your white balance to highlight the warmth of the season.
A good starting point is to increase the Kelvin value to somewhere around 5500–6500. This gives reds, oranges, and yellows a natural glow without making the entire scene look unnatural. Be careful not to push it too far, though; an overly warm white balance can add a heavy color cast that looks artificial.
If you’re not yet comfortable using Kelvin mode, experiment with your camera’s presets. Options like “Cloudy” or “Shade” often add just the right amount of warmth for fall colors.
For those who shoot RAW, remember that white balance can always be fine-tuned later in post-processing. But by getting it close in-camera, you’ll spend less time editing and more time enjoying the season.
Recommended Reading: Master White Balance Like a Pro
#7 Look for Autumn Details and Intimate Scenes
Not every autumn photo needs to be a sweeping landscape. Some of the most memorable images come from slowing down and noticing the small details around you. A single red leaf in a puddle, reflections of colorful trees in still water, or a cluster of branches losing their last leaves can all make for striking compositions.
Exploring these more intimate scenes also helps when the weather isn’t cooperating. On gray or rainy days, focusing on smaller subjects can produce stronger results than trying to capture the whole landscape.

To capture details effectively:
- Try a telephoto or macro lens to isolate patterns, textures, or single leaves.
- Pay attention to reflections in puddles, lakes, or rivers.
- Look for contrasting colors, such as a yellow birch leaf resting on dark, wet rock.
Photographing autumn details is a great way to add variety to your portfolio. It also helps tell a fuller story of the season, balancing grand landscapes with the smaller, fleeting moments that often go unnoticed.
Recommended Reading: 4 Tips for Photographing Nature’s Smaller Scenes
#8 Plan Your Location and Timing
Autumn colors don’t last long. In many places, the peak season for fall foliage may only last a week or two before the leaves fade or drop. That’s why planning is just as important as the photography itself.
Start by researching when colors typically peak in your area. Local tourism boards, social media, or even past years’ photos can give you a good idea of timing. Keep in mind that elevation and tree species play a big role; higher altitudes often turn earlier, while valleys and lower areas change later.
Scouting locations ahead of time can save you from wasting precious days during peak color. Visit spots earlier in the season to plan compositions and note how the light moves through the landscape. That way, when the colors arrive, you’ll already know the best angles and times of day to return.
Finally, be flexible. Weather, wind, and temperature can shift the timing by days or even weeks. By keeping a few backup locations in mind, and checking conditions often, you’ll maximize your chances of being in the right place at the right time.
#9 Be Prepared for Autumn Weather
Autumn can be unpredictable. One moment you’re photographing golden light, the next you’re caught in rain, fog, or even the first snow of the season. Being prepared for changing conditions not only keeps you comfortable, it also helps you protect your gear and stay ready when the best moments happen.
A few simple precautions make a big difference:
- Keep a microfiber cloth handy to wipe rain or mist off your lens.
- Use a lens hood to reduce the chance of raindrops hitting the front element.
- Pack a lightweight rain cover or even a plastic bag to protect your camera in sudden showers.
- Dress in layers so you can stay out longer without worrying about the cold.
Some of the most dramatic autumn photos happen in unstable weather. By preparing ahead, you’ll be able to focus on capturing the scene instead of worrying about your gear.
#10 Post-Processing Autumn Images
Capturing a great image in the field is only the first step. To bring out the full potential of autumn colors, careful post-processing is essential. The goal isn’t to change the scene into something unrealistic, but to fine-tune contrast, color, and light so the image reflects the atmosphere you experienced.
It doesn’t matter if you use Lightroom, Photoshop, DxO PhotoLab, or the Nik Collection; the principles are the same. The key is to make subtle adjustments that enhance, not overwhelm, the natural colors.

Here are a few ways to approach editing autumn photos:
- Adjust contrast carefully to add depth without crushing the shadows or blowing out highlights.
- Fine-tune colors using tools like HSL or color wheels to balance reds, yellows, and oranges so they look vibrant but natural.
- Work selectively with saturation, sometimes boosting one color while reducing another gives a more balanced result than global saturation.
- Experiment with color grading to introduce subtle warm or cool tones in shadows and highlights, which can dramatically shift the mood.
- Shift light locally using masks or brushes to guide the viewer’s eye and emphasize the most important parts of the image.
- Apply selective sharpening to your main subject, which helps it stand out against softer backgrounds.
The best edits are often the ones that don’t call attention to themselves. By working carefully, you’ll enhance the atmosphere of your autumn photos without making them look over-processed.
Recommended Reading: Post-Processing for Landscape Photography: The Complete Guide
Conclusion
Autumn is a season full of opportunities, but it doesn’t last long. The colors shift quickly, the weather changes by the hour, and before you know it the leaves are gone. That’s part of what makes photographing this time of year so rewarding.
By planning ahead, paying attention to light and weather, and experimenting with both grand landscapes and intimate details, you’ll be able to capture images that reflect the true atmosphere of autumn. A little preparation, and a willingness to embrace changing conditions, goes a long way toward creating photos you’ll be excited to share.
If you’d like to take your images even further, I recommend diving into my Post-Processing Guide, where I go deeper into editing techniques that can bring out the best in your autumn photos.
So grab your camera, head outside, and enjoy the season while it lasts. The fleeting nature of autumn is exactly what makes it so magical.
Frequently Asked Questions About Autumn Photography
There isn’t one “perfect” setting since it depends on the light and subject, but a good starting point is to keep your ISO low (100–200) to preserve image quality, use an aperture of f/8–f/11 for sharpness, and adjust your shutter speed depending on whether you want to freeze or blur motion. Bracketing can help when you’re dealing with bright skies and dark forests. For a deeper dive into camera settings, see my Exposure Triangle Guide.
A wide-angle lens (14–24mm or 16–35mm) is great for capturing sweeping landscapes and the full scale of autumn colors. For more intimate scenes, a telephoto (70–200mm or 100-400mm) lets you isolate details like single leaves, patterns, or reflections.
While not strictly necessary, a tripod makes a big difference in autumn. It allows you to use slower shutter speeds for flowing rivers and waterfalls, keeps your images sharper in low light, and makes it easier to fine-tune compositions. A lightweight travel tripod is usually the best balance between stability and portability. I recommend the FotoPro X-Aircross for hiking and travel, and the Leofoto LN-364C for heavy-duty work.
The key is to work selectively. Instead of boosting global saturation, adjust individual colors (reds, yellows, oranges) with HSL tools, and balance them against each other. Adding a touch of contrast and experimenting with subtle color grading can enhance atmosphere without making the scene look unnatural. For editing software, I personally use and recommend Lightroom, Photoshop, DxO PhotoLab, DxO Nik Collection, and Topaz Photo AI.
Golden Hour (shortly after sunrise or before sunset) gives the warmest, most flattering light for autumn colors. But don’t overlook foggy mornings or overcast days; these can create soft, moody conditions that make colors pop. Midday is usually less ideal unless you’re working in shaded areas like forests.
Fog forms when cool air meets warmer ground or water, so early mornings are often best. Use a tripod if the light is dim, and slightly underexpose to preserve atmosphere. A telephoto lens works well for compressing layers of fog, while a wide-angle can show how it interacts with the landscape.


