


Let me start with this statement: every landscape photographer should own a circular polarizer.
If you’re tired of unwanted glare and reflections, struggle to make wet surfaces look good, or can’t seem to get the contrast and colors to pop in your image, a polarizing filter is exactly what you need.
This isn’t the solution to all your problems but it’s a tool that works wonders. It’s one that most landscape photographers love and it’s one that should be in your camera bag too.
Let’s take a closer look at why you should use a circular polarizer for landscape photography:
What are polarizing filters?
Simply put, a polarizing filter is a filter that’s placed in front of the lens in order to reduce reflected light reaching the camera’s sensor. This has several advantages, most of which we’ll look at in this article, but the biggest one is its ability to make even flat and lifeless images more interesting.
I won’t be going into the technicalities of how polarization works but, for those interested, I recommend reading this article from the Physics Classroom.
Why are polarizing filters important in landscape photography?
There are many advantages of using a circular polarizing filter for landscape photography. You’ll find it particularely useful when working with shiny surfaces, during daytime, or when you want to make colors and contrast pop.
We’ve already briefly mentioned a few of the advantages but let’s take a closer look:
#1 They remove unwanted glare and reflections
The number one reason most photographers have a polarizer in their camera bag is that it can effectively reduce unwanted glare and reflections from shiny objects. This is a common struggle when photographing wet surfaces, especially during bright light.
It’s a common misconception that this a useful feature only for those who photograph tropical beaches on sunny days but, take it from someone who lives north of the Arctic Circle, that’s not true.
A polarizing filter works just as well for any shiny surface; be it in the Maldives or the Arctic.

Let’s take an example:
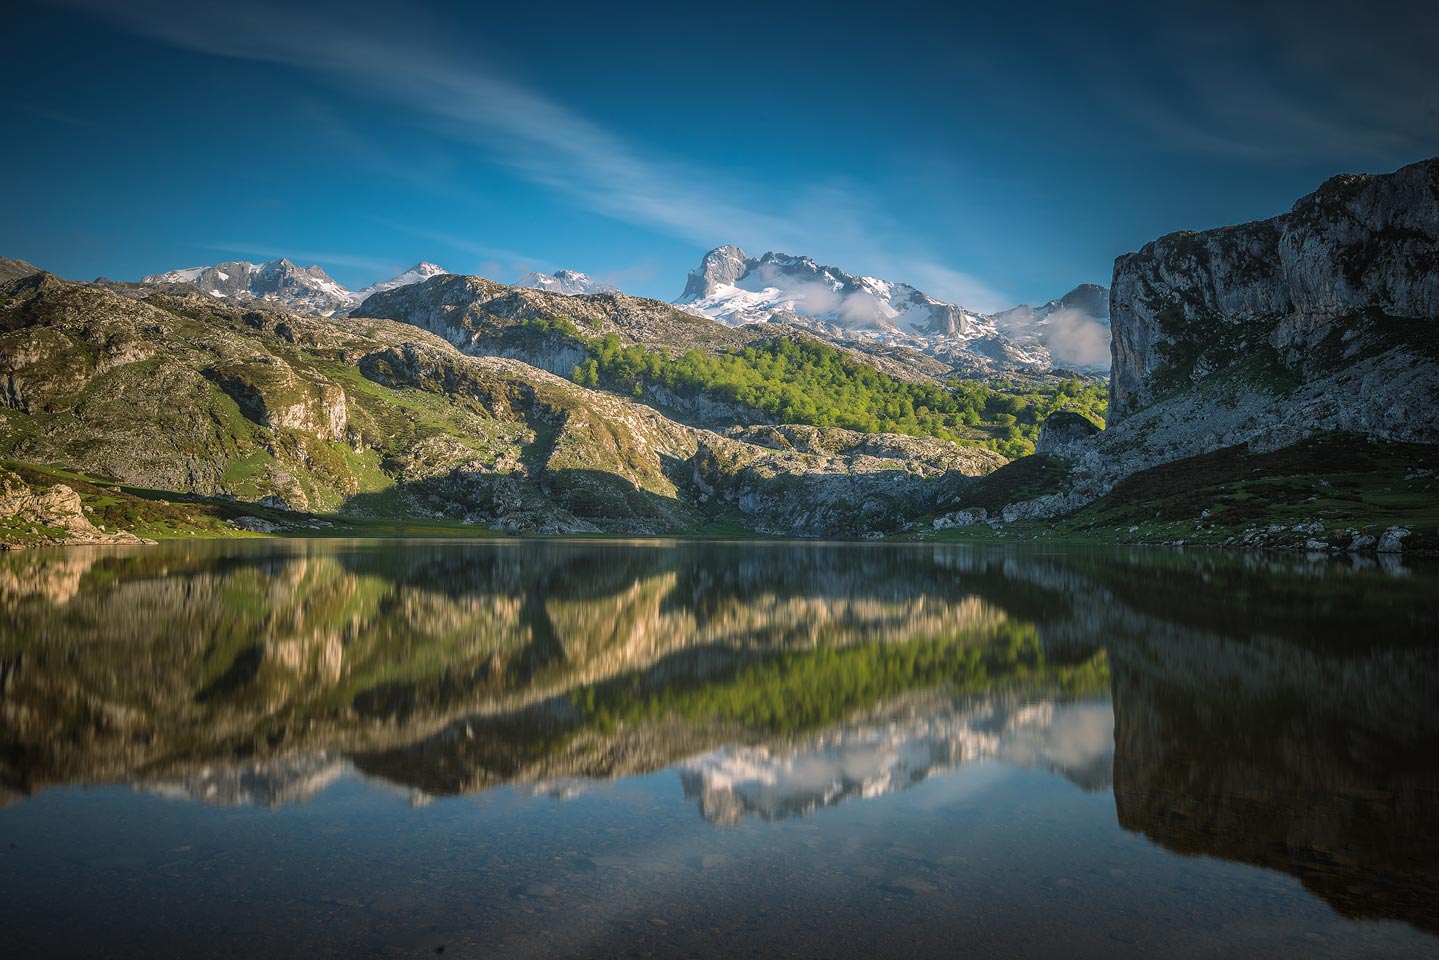
You’re out photographing a lake, but due to the shiny surface, you’re unable to capture an image that looks appealing to you. What looks great in person looks harsh and unwelcoming on the display of your camera. Mounting the polarizer to your lens eliminates this issue; you’re now able to remove the worst glare and bring back the colors of the lake.
#2 They enhance colors
Another big advantage of a polarizing filter is its ability to enhance the colors in a photo. Exactly how much the colors are impacted depends on the particular filter you’re using (as there are some differences between brands and models). That being said, most filters made for landscape photographers are able to increase the saturation in foliage and make an image slightly warmer.

The most visible impact it has on color tends to be in the sky. Especially when there’s a blue sky in between some clouds. In those cases, the blue saturation sees a significant increase.
It can also be used to increase the saturation of foliage, such as when photographing trees and forests. I also find it to do a good job when photographing autumn scenes.
#3 They increase contrast in the sky
As I mentioned in the previous point, the most visible impact tends to be on a blue sky, especially when there are some nice fluffy clouds too. This is one of the main reasons why landscape photographers use a circular polarizer during daytime.
But it’s not only the saturation that it affects. It also has an impact on the contrast.
This is something that makes it a great tool for daytime photography but it’s also nice when photographing in different types of light. I find that it does wonders when photographing scenes such as this too:

This goes to prove that a circular polarizer filter can be used for more than just daytime photography. This image was captured late afternoon and the filter helped cut down some of the reflecting snow, while increasing the contrast throughout the image.
When to use a Circular Polarizer
The examples above might already have given you a general idea of when a Circular Polarizer can be beneficial but here are a few scenarios where landscape photographers should consider using one:
- When photographing waterfalls and rivers – The Circular Polarizer is a favorite among landscape photographers when photographing rivers and streams. Not only does it remove the glare and reflections from wet surfaces, it also enhances the colors of the landscape around.
- During daytime photography – The CPL is a common filter to use during daytime photography as it adds contrast to the sky. It’s also a lightweight and easy-to-use filter that is perfect for travel photography.
- When photographing through glass – Photographing through glass might not be an everyday scenario for a landscape photographer but it’s one worth mentioning. This is a challenge for photographers as you get a lot of reflecting light in the glass – the polarizing filter does a great job reducing the glare, helping you achieve a better shot.
- When photographing forests – When you’re in dense woods or forests the Circular Polarizer will help enhance the colors in the foliage. It also removes glare from wet leaves and surfaces that are distracting for the viewer.
How to Use a Circular Polarizer
There are a few different filter systems but I strongly recommend going for a circular version of the polarizer (personally, I use the NiSi JetMag Pro system). This is a much better option for this filter as you’re more flexible when it comes to how it works a scene.
I recommend that you spend a few minutes pointing the camera towards the sky or a shiny subject and rotate the filter to see how it affects the image. You’ll see that the glare in the foreground is only removed when the filter is in a particular position. This is something you need to keep in mind when using a polarizing filter: always rotate it to fit the subject you’re photographing.
Remember to re-adjust the filter when you switch between horizontal and vertical orientations! What works for one, won’t work for the other.
It’s also worth noting that some polarization filters have an impact on the brightness of an image. Certain filters require up to a 1.5 or 2 stop longer exposure. This is a good reason to take a test shot or two after mounting a filter.
Recommended Reading: Landscape Photography Tips and Techniques: A Comprehensive Guide
A tripod might be necessary when using a Circular Polarizer during sunrise or sunset sessions. The alternative is to increase the ISO or use a wider aperture.
How to choose the best Circular Polarizer for landscape photography
If you have read my other articles on how to use filters in landscape photography, you might remember that there are three types of filter systems: screw-in (circular), drop-in (square), and magnetic (circular).
There are pros and cons, and I won’t go into detail about them now, but when it comes to the polarizer, it should be a circular version. This makes you more flexible when adjusting the polarization to work best for a particular scene. Remember, rotating the filter makes the effect take place in different places throughout an image.
Circular Polarizing filters aren’t the cheapest but I strongly recommend that you do spend the extra bucks and invest in a quality option. Filters do have an impact on the image sharpness and low-quality glass tend to be rather harmful.
There are many brands and models out there and I urge you to spend some time reading up on the pros and cons of the different ones. Personally, I have been using a NiSi Circular Polarizer for several years and am very happy with it. Prior to that, I have had good experiences with the B+W CPL.
It’s important that you pay attention to the diameter of the filter and the diameter of your lens. If you plan to use the filter on different lenses you should purchase one that fits your biggest lens and also get a few step-down rings. These rings are mounted onto the lens and make it possible to use bigger filters on smaller lenses.
Conclusion
There are many advanced processing techniques out there and, quite frankly, it’s no possible to re-create many filter effects in a software. This isn’t the case with a polarizer. While there are photo editors, such as Color Efex Pro, that include Polarization Filters, they aren’t able to do what an actual filter can.
That’s one of the main reasons why a Polarizer still is one of the most important filters a landscape photographer can own.
The filter has many advantages and can be used in many settings. It’s most popular for its unique ability to reduce unwanted glare but it’s also used to enhance colors, increase contrast, or simply make a photo ‘pop’.
I want to end with the same statement I started with: every landscape photographer should own a circular polarizer.
DON’T FORGET TO SHARE THIS ARTICLE


