


Do you find post-processing daunting and time-consuming but battle through it because you want your images to look better? Or perhaps you simply ignore it and avoid it at all costs?
You’re not alone. Post-production can be one of the most exhausting parts of photography. Not only do you need to spend time learning new software but you also need to spend time figuring out how to best use the tools provided. Yet all you want is to be outside photographing.
Luckily, there are alternatives that make it possible to edit images with only one click, drastically cutting down your time spent in front of the computer.

Save time by using presets
You might look at post-processing as a burden but the hard truth is that our images benefit from some type of editing. Images tend to be both flat and lacking details and contrast straight out of the camera, something that’s relatively easy to fix using software such as Adobe Lightroom or Luminar 4.
Now, post-processing can be a very personal thing and there’s no doubt that this is one of the places where photographers are able to really stand out by defining their style. How time-consuming and difficult this is, is up to you.
Lightroom Presets and Luminar Looks have become extremely popular amongst complete beginners and full-time professionals alike. The number of sliders and tools in these photo-editors can make you sweat just by looking at them. That’s where the biggest power of presets and looks come in; simply click one and it alters the sliders for you!
A preset is simply a saved formula that can be applied with one click. It automatically makes all the adjustments for you, meaning you don’t need to spend hours trying to figure out which sliders or tools to use.
Fine-tune the presets for better results
Does every preset work for each image? No, certainly not.
It’s important to remember that all images are different and will react differently to specific settings. It would’ve been great to have a one-fit-all preset but that’s simply not possible.
That being said, a well-made preset does 99% of the job for you (in some cases it might even take you all the way!). To really make the most out of the used preset, I do recommend that you fine-tune the settings to fit the image you’re using. This might sound daunting again but, as always, there’s a solution.
In my Dramatic Landscapes preset pack for Lightroom, I’ve included 35 stackable adjustments that are used to fine-tune the presets without ever touching a slider yourself (it’s even possible to only use these to edit an image). So how exactly does this work? Let’s say that you’ve applied my personal favorite preset, the Mysterious Dark. However, your image was a little underexposed to begin with and now the shadows are simply too dark. But the overall atmosphere is exactly what you want. Then simply scroll down to the stackable adjustments and select Brighten Shadows or Smart Exposure +1. These two stackable adjustments will then increase the exposure of the image and make the image look better.
Still a little confusing? Take a look at the video below where I explain and show step-by-step how this works:
For instance, I use the 16 all-in-one presets found in my Dramatic Landscapes kit as the foundation of the majority of my images. I know what look I’m going after and choose the preset that fits best. From there, I fine-tune and often further develop the image in Photoshop.
That workflow saves me a lot of time. Especially when editing series of images that have a similar feel to them.
Examples of how presets work
An image says a thousand words they say, so let me save you some time and show you some examples of how presets work:
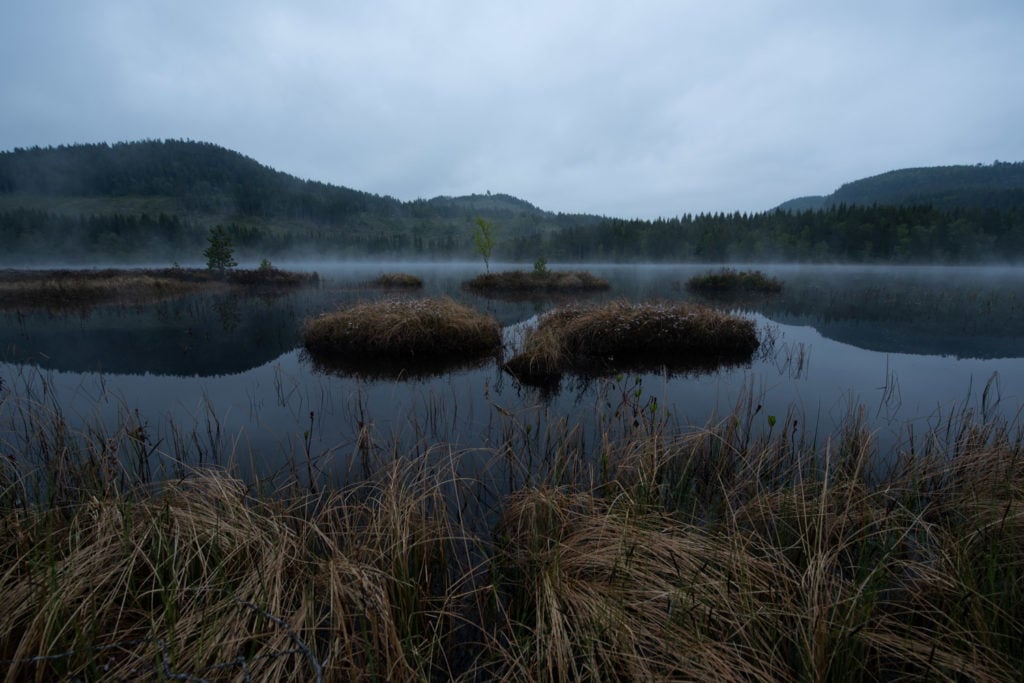
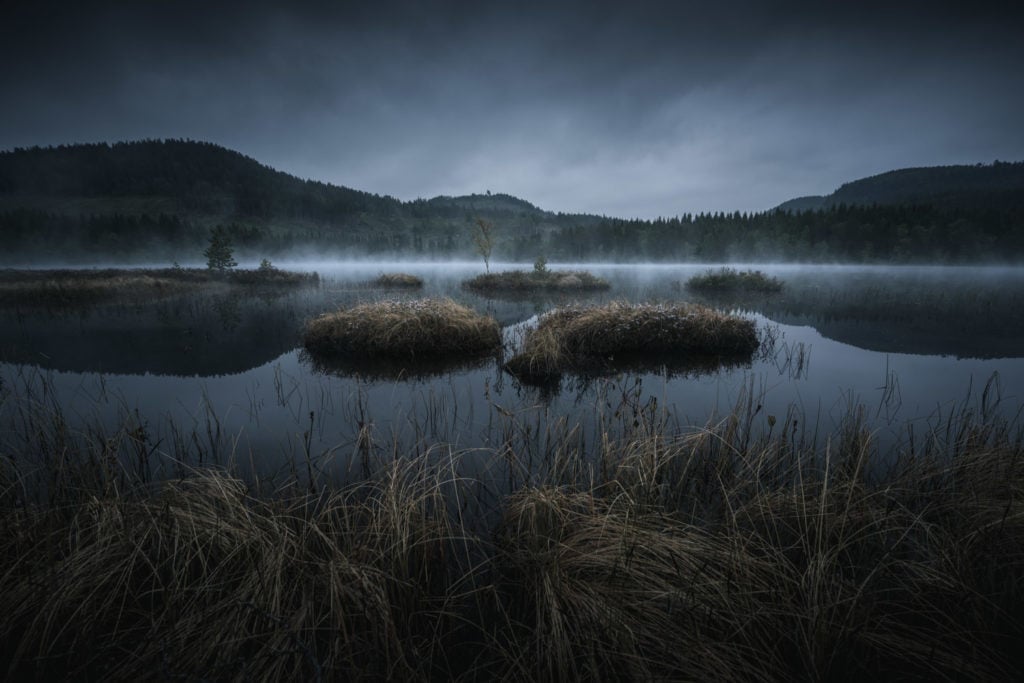
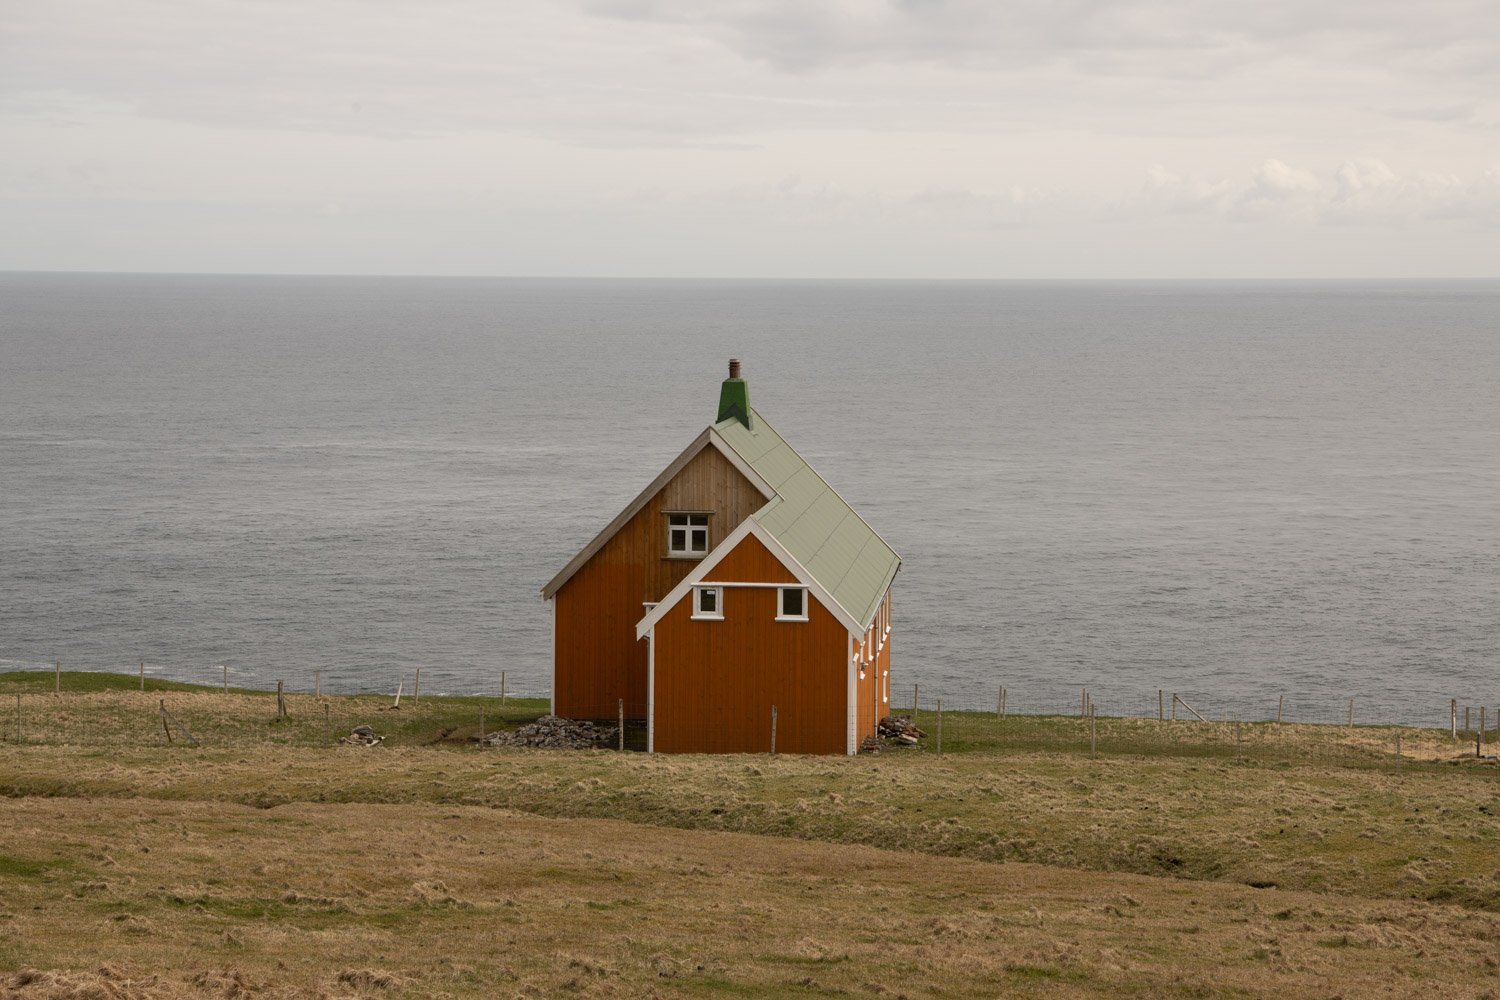
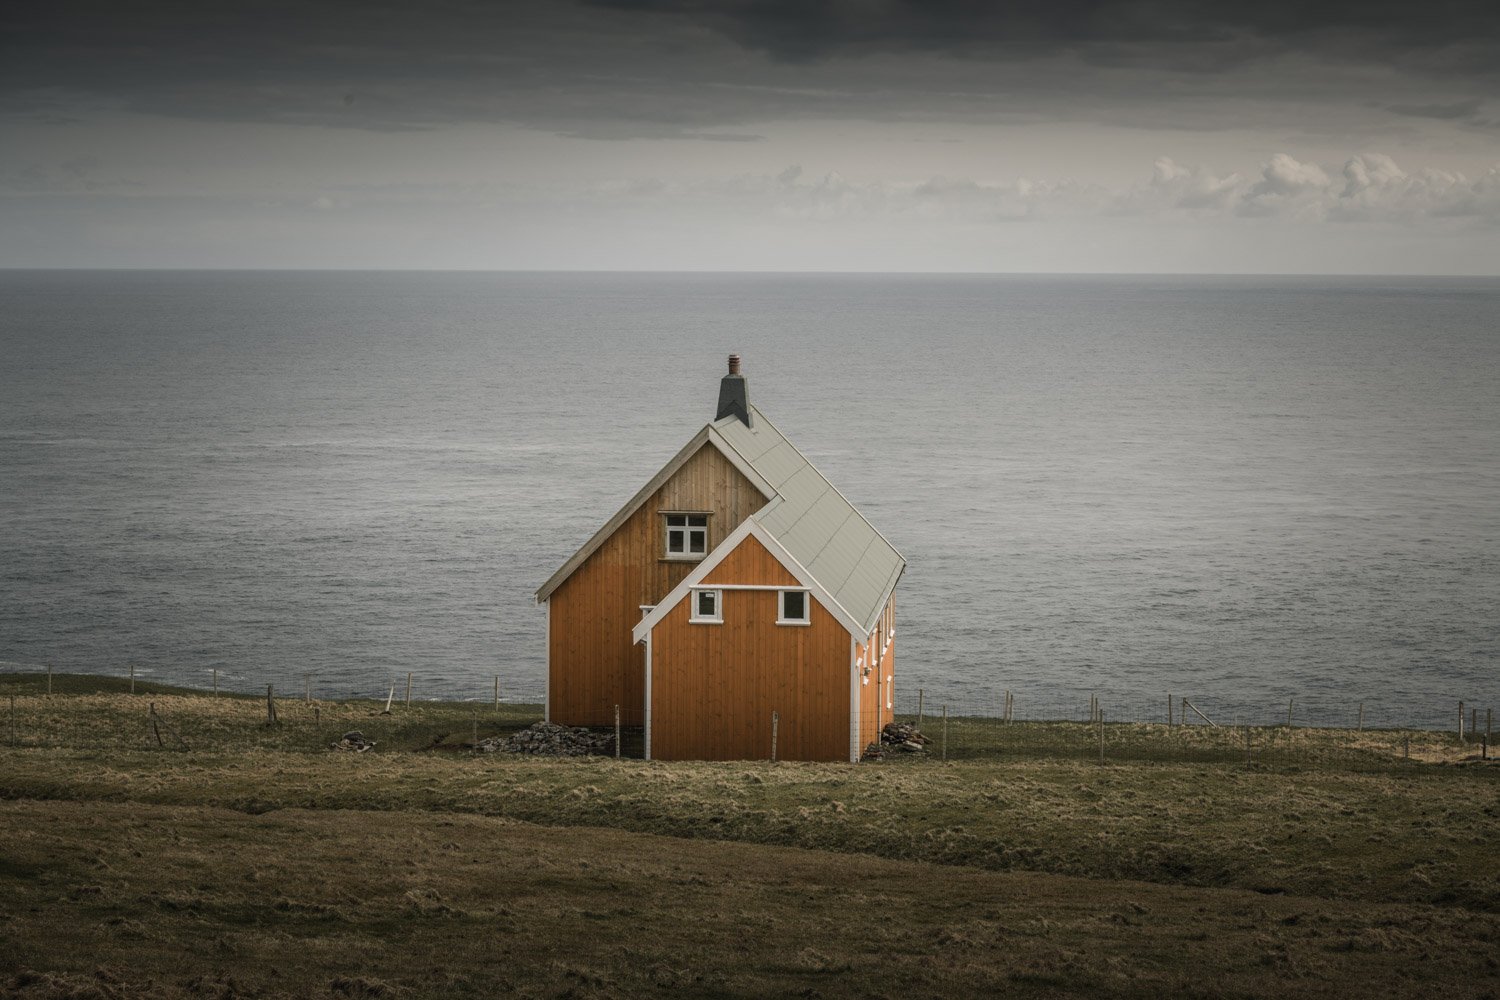
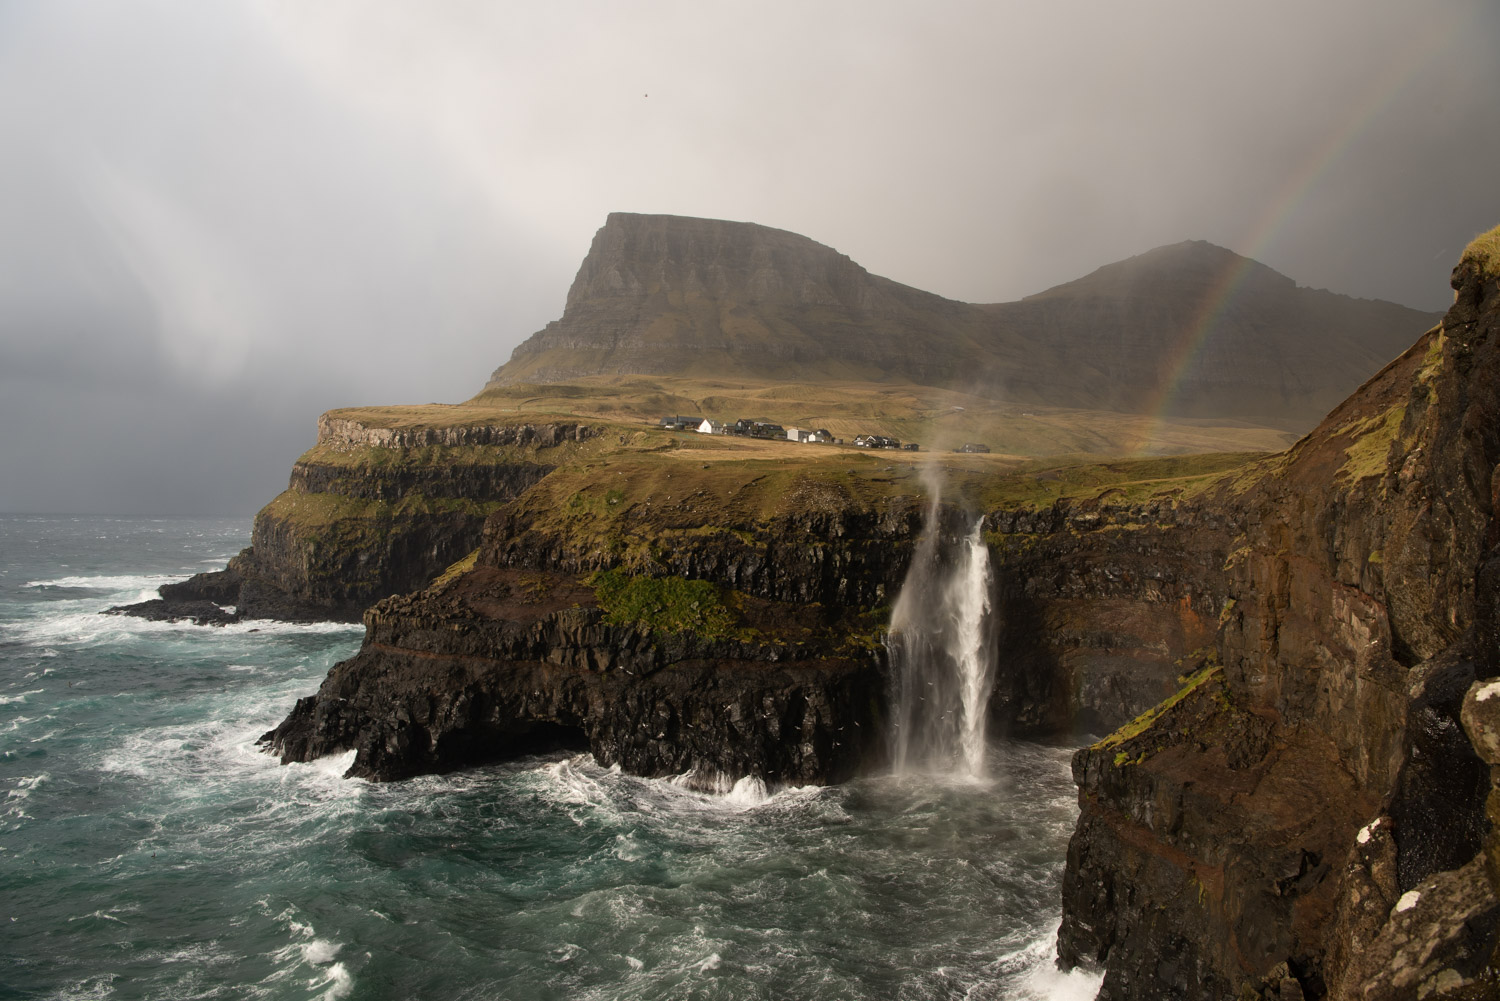
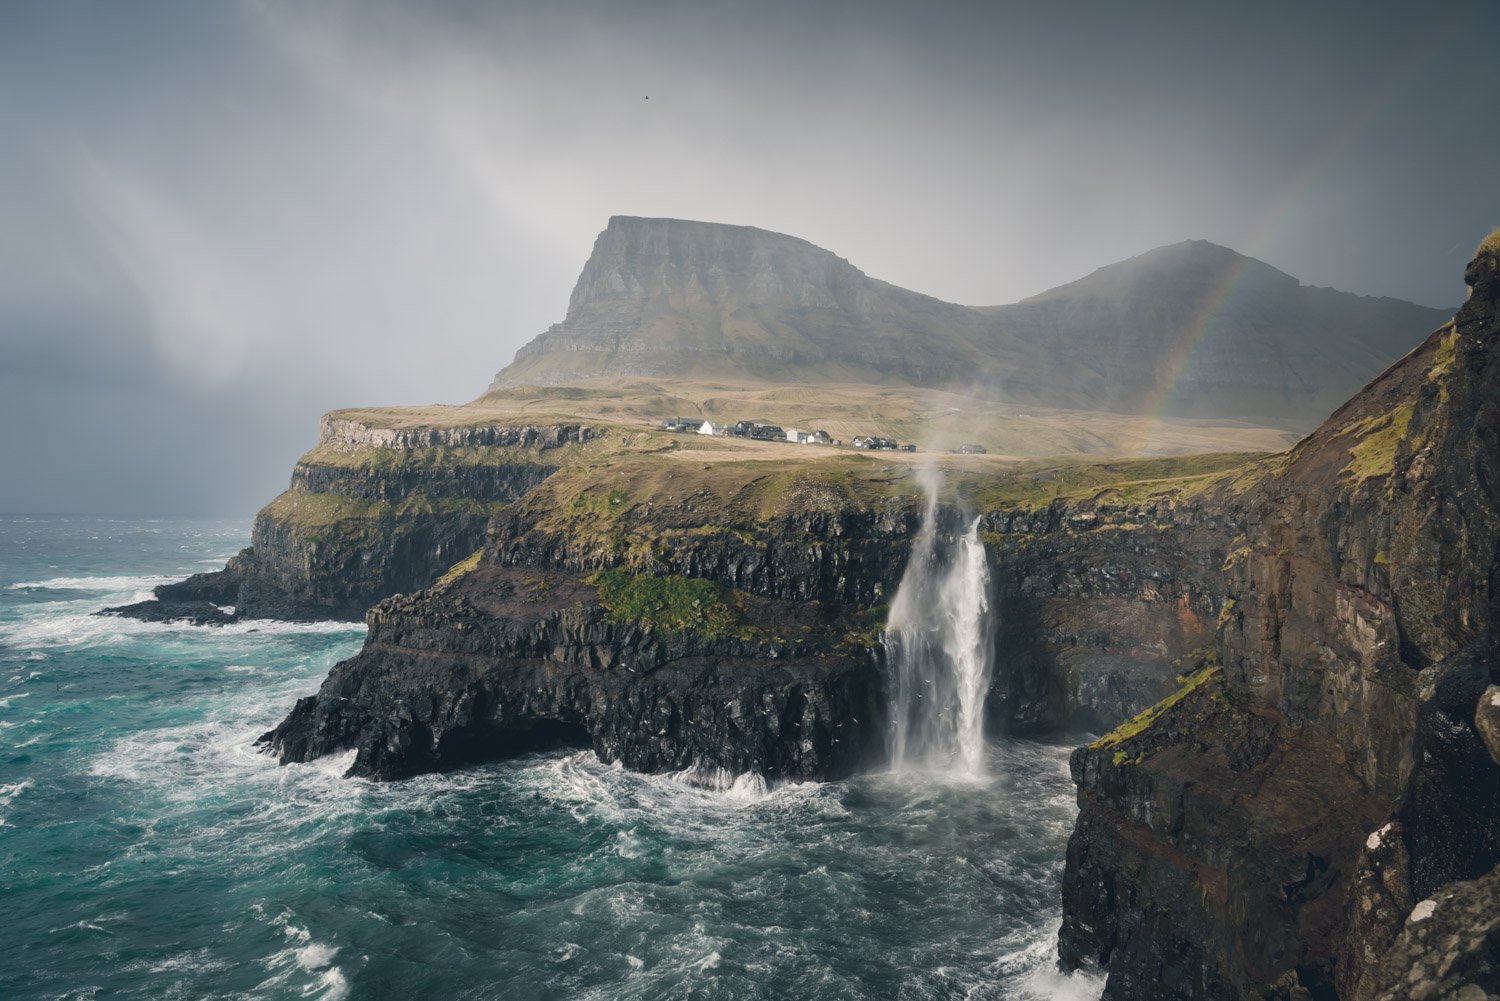
All of the images above were edited using one of the all-in-one presets found in my Dramatic Landscapes preset kit. You can learn more about these presets by clicking the link below.


Great article! I don’t use presets at the moment but this has inspired me to try them out!
I’m happy to hear that, Nick! I haven’t been a big user of presets myself but this really simplifies the workflow in many cases.