


Optimizing RAW files is one of the most important steps in post-processing.
Today’s cameras deliver incredible dynamic range and resolution, but how those RAW files are processed can make a noticeable difference in detail, noise, and overall clarity. Lightroom and Photoshop offer solid tools for noise reduction and sharpening, and for many photographers, that’s enough.
DxO PureRAW takes a different approach.
Rather than being a full editing program, PureRAW is a specialist tool designed specifically to improve RAW files before you begin editing. It focuses on advanced noise reduction, sharpening, and optical corrections using DxO’s lens and camera profiles.
I’ve used DxO PureRAW for the majority of my RAW files in recent years, particularly those that appear slightly soft or are shot at higher ISO values. What stands out to me isn’t just the noise reduction, but how the software renders fine detail and applies optical corrections. In many cases, I find that it interprets the RAW file better than Lightroom alone.
In this review, I’ll look at how DxO PureRAW fits into a real-world landscape photography workflow, who it’s best suited for, and whether it’s worth adding to your own process.
What is DxO PureRAW?
DxO PureRAW is not a photo editor in the traditional sense.
It doesn’t replace Lightroom, Photoshop, or PhotoLab. You don’t use it to adjust exposure, color, or contrast. Instead, PureRAW works at an earlier stage in the workflow.
Its purpose is simple: to improve the technical quality of your RAW files before you begin editing them.
When you process a RAW file in PureRAW, the software applies advanced demosaicing, noise reduction, sharpening, and lens corrections based on DxO’s camera and lens profiles. The result is a new DNG file that is imported back into Lightroom or another editor for normal processing.
In practical terms, you can think of PureRAW 6 as a pre-processing step.
Rather than relying solely on Lightroom’s built-in noise reduction and sharpening, you allow PureRAW to handle the technical optimization first. You then continue your usual editing workflow with a cleaner, more refined starting file.
This distinction is important.
PureRAW isn’t trying to compete with your editor. It’s designed to complement it.
Who Is DxO PureRAW For?
DxO PureRAW isn’t for everyone.
If you primarily enjoy taking photos for casual sharing and don’t spend much time processing your files, Lightroom’s built-in tools are often enough.
But if you care about getting the most out of your RAW files, PureRAW starts making a lot more sense.
For photographers who print their work, submit images to competitions, license photographs, or simply want the cleanest possible starting point before editing, the difference in detail rendering, noise handling, and optical corrections can be noticeable.
I see PureRAW 6 as a quality upgrade rather than a creative tool.
It doesn’t change your vision. It doesn’t alter your style. But it gives you a technically stronger foundation to build on.
It’s particularly beneficial if you:
- Work at higher ISO values, such as in low light or night photography
- Use telephoto lenses where small softness becomes more visible
- Recover shadow detail regularly
- Shoot with older cameras or lenses that don’t perform as cleanly as newer systems
In those cases, PureRAW makes a difference.
Modern cameras are excellent, but even today, RAW processing quality still depends heavily on how the file is interpreted. And in my experience, PureRAW often extracts more usable detail from the same file than Lightroom and other photo editors.
That’s why it has become part of my standard workflow.
What’s New in DxO PureRAW 6?
The latest version of DxO PureRAW introduces several updates, some incremental and one particularly meaningful.
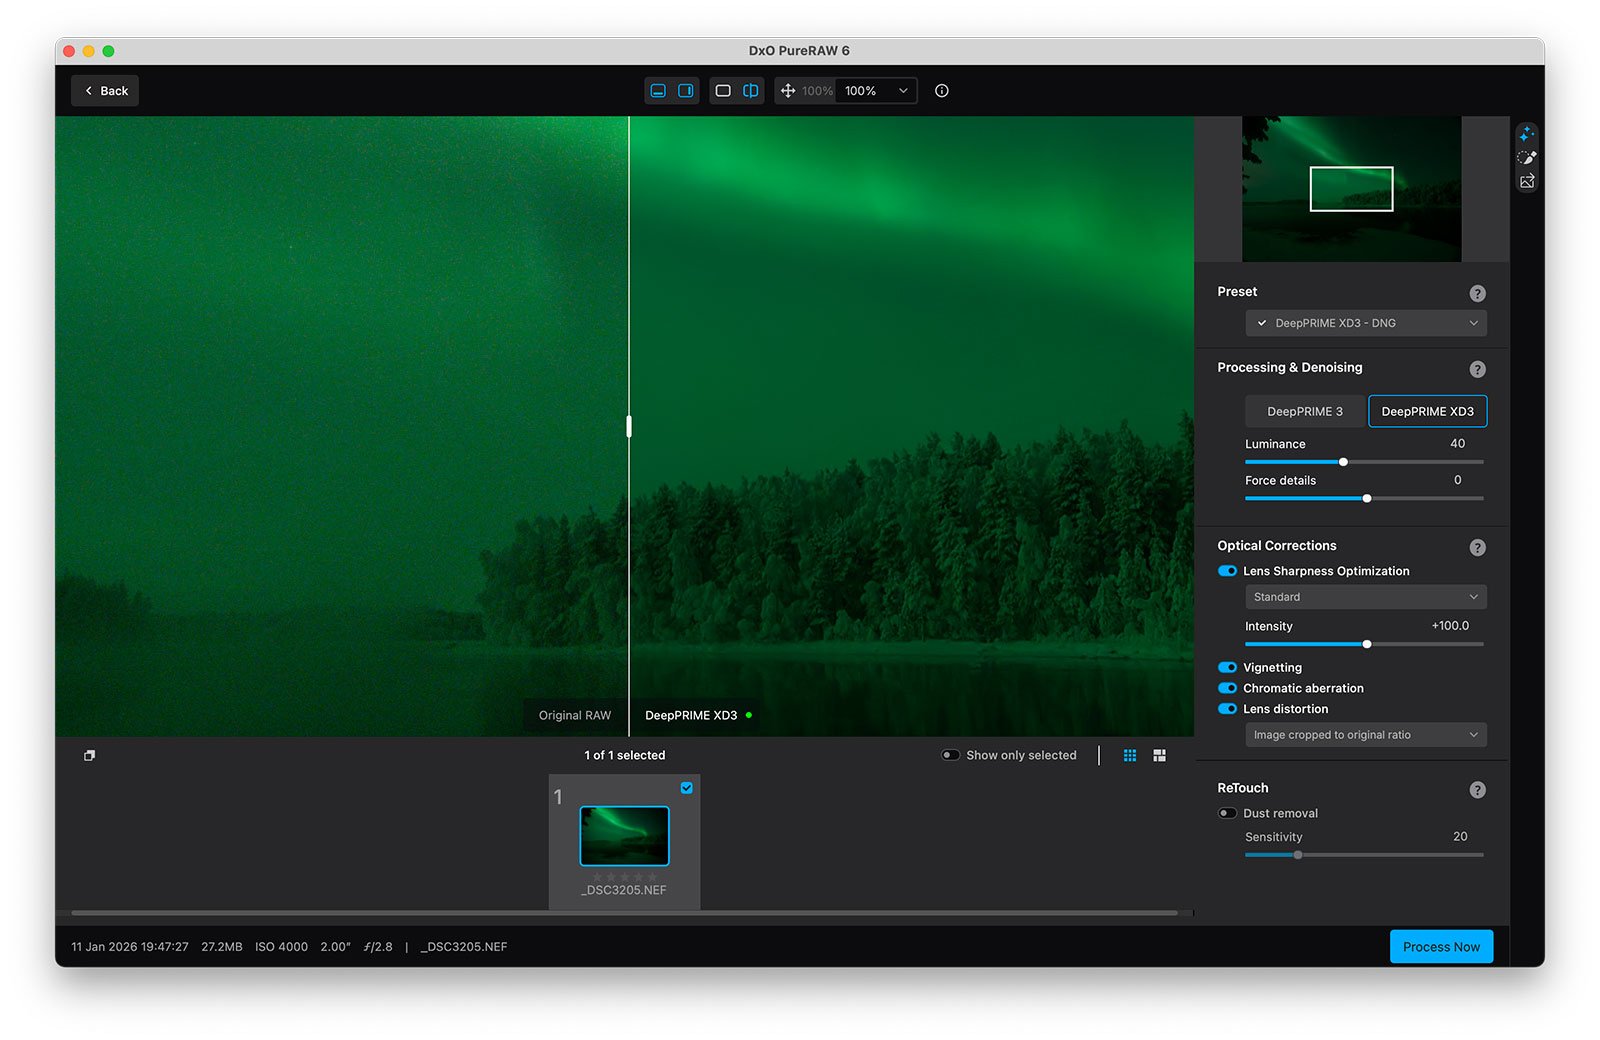
#1 DeepPRIME XD3 (Now Supporting Bayer Sensors)
DeepPRIME XD3, the newest iteration of DxO’s advanced noise reduction technology, now supports Bayer sensors in addition to X-Trans.
In my testing, the difference between XD2 and XD3 is subtle. Both deliver excellent results, and on normal landscape files, I struggle to see a clear difference.
#2 High-Fidelity DNG Compression (Major Update)
This is, in my opinion, the most important update in the new version.
One long-standing drawback of PureRAW has been file size. Processed DNG files were often significantly larger than the original RAW files.
For example:
- Original RAW: 57.8 MB
- PureRAW 5 DNG: ~140 MB
- PureRAW 6 DNG (standard): ~136 MB
- PureRAW 6 (High-Fidelity Compression): 17.2 MB
That’s a dramatic reduction.
DxO claims the compressed DNG files are up to four times smaller with zero loss in image quality. Based on my own testing, including examining files at 400% and applying basic exposure and contrast adjustments in Lightroom, I haven’t been able to identify any meaningful difference between compressed and uncompressed DNG exports.
For photographers concerned about storage, backup, or long-term file management, this update alone significantly improves the practicality of PureRAW.
#3 AI Sensor Dust Removal
The new AI-based dust removal tool automatically detects and removes dust spots.
It works well. In my tests, it performs reliably and saves time.
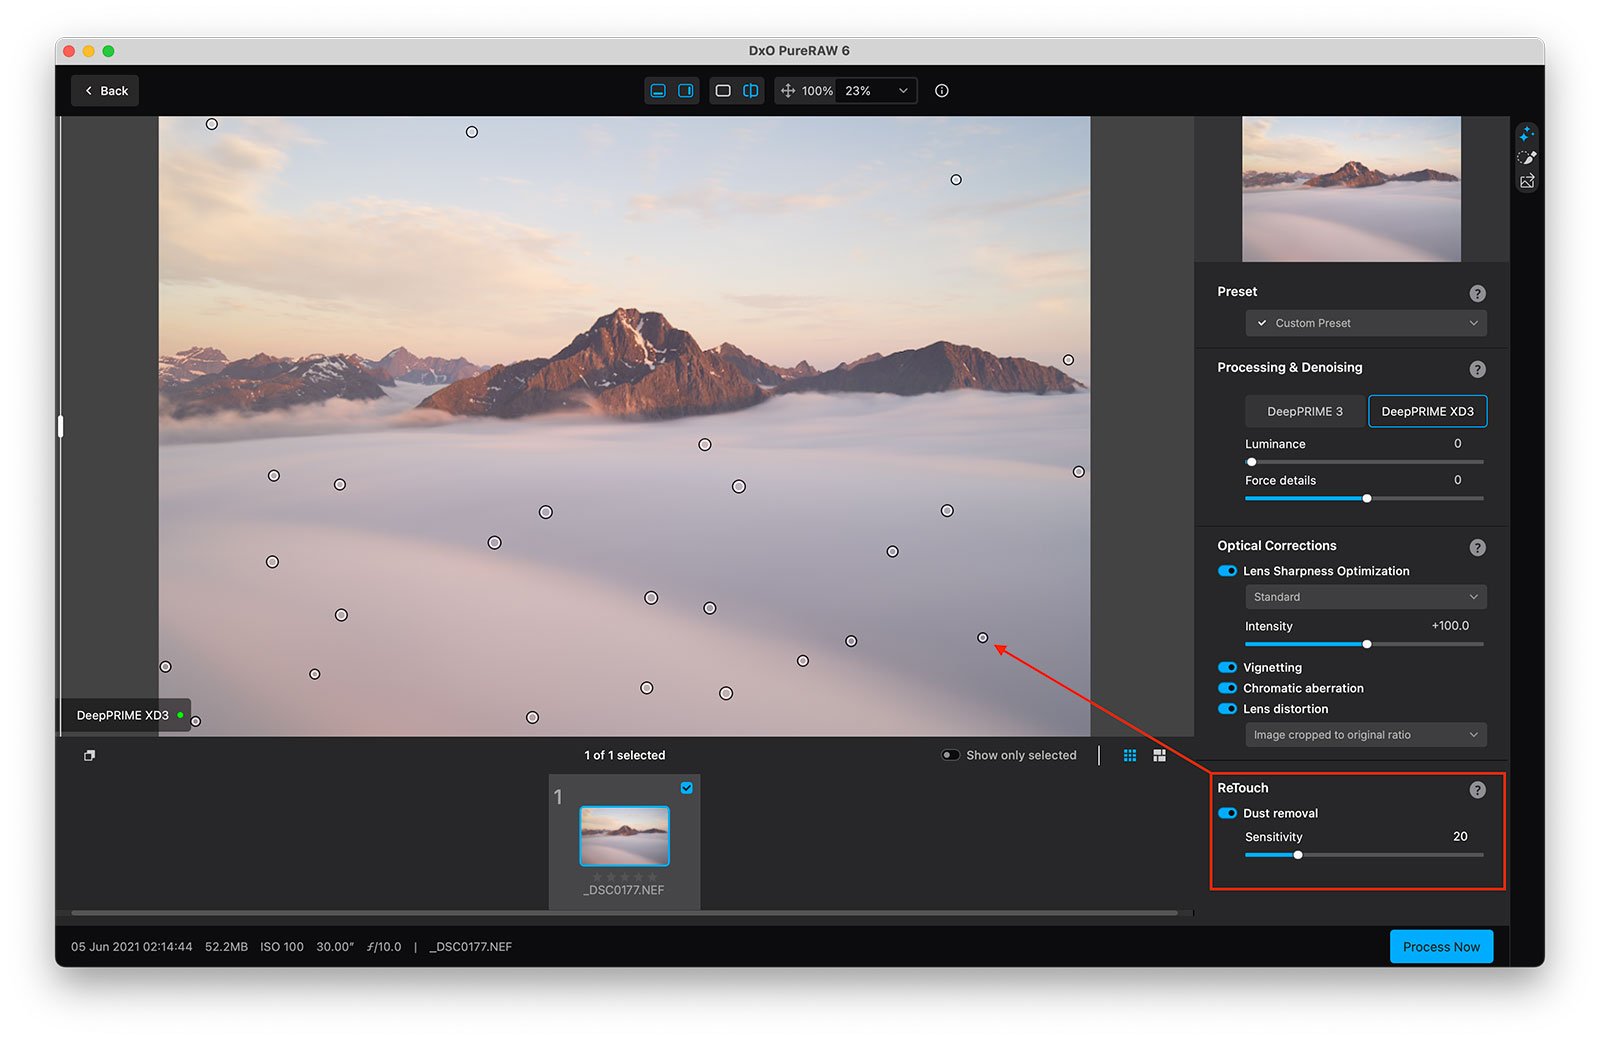
That said, Lightroom’s own AI dust removal has also improved considerably. For most users already working inside Lightroom, this feature alone likely won’t justify upgrading.
#4 Faster High-Volume Processing (Batch Parallelization)
The latest version also introduces batch parallelization, allowing PureRAW 6 to prepare the next file while the current one is still processing.
If you regularly process large batches of images, this can reduce waiting time.
In my own workflow, I typically process files individually, so this improvement has less impact. But for photographers handling high-volume shoots, it may be valuable.
Is It Worth Upgrading to Version 6?
Whether the upgrade is worthwhile depends on what matters most in your workflow.
If you’re coming from version 5 and are satisfied with the image quality, the jump from XD2 to XD3 alone is unlikely to feel transformative. In my own side-by-side comparisons, I see only subtle differences in typical landscape files.
However, the new High-Fidelity DNG Compression is a good improvement.
If file size has been a concern in your workflow, especially when working with large volumes of images, the ability to reduce DNG size significantly without visible quality loss makes this update far more practical.
The added dust removal and faster batch processing are useful, but for my workflow, they are secondary benefits.
If you already own a recent version and are comfortable with file size, upgrading is optional.
If storage efficiency matters to you, this version becomes much more compelling.
If you’re unsure whether to upgrade, DxO offers a 30-day free trial. That’s the best way to evaluate it on your own files.
How DxO PureRAW Fits Into My Workflow
I don’t use DxO PureRAW 6 as a standalone starting point before importing images into Lightroom.
Instead, I import and organize my files in Lightroom as usual. Once I’ve identified the images I want to work on, I process them through PureRAW 6 before making any adjustments.
If you’re using Lightroom, this is the correct way to open a file in PureRAW:
File → Plug-in Extras → Preview and Process with DxO PureRAW
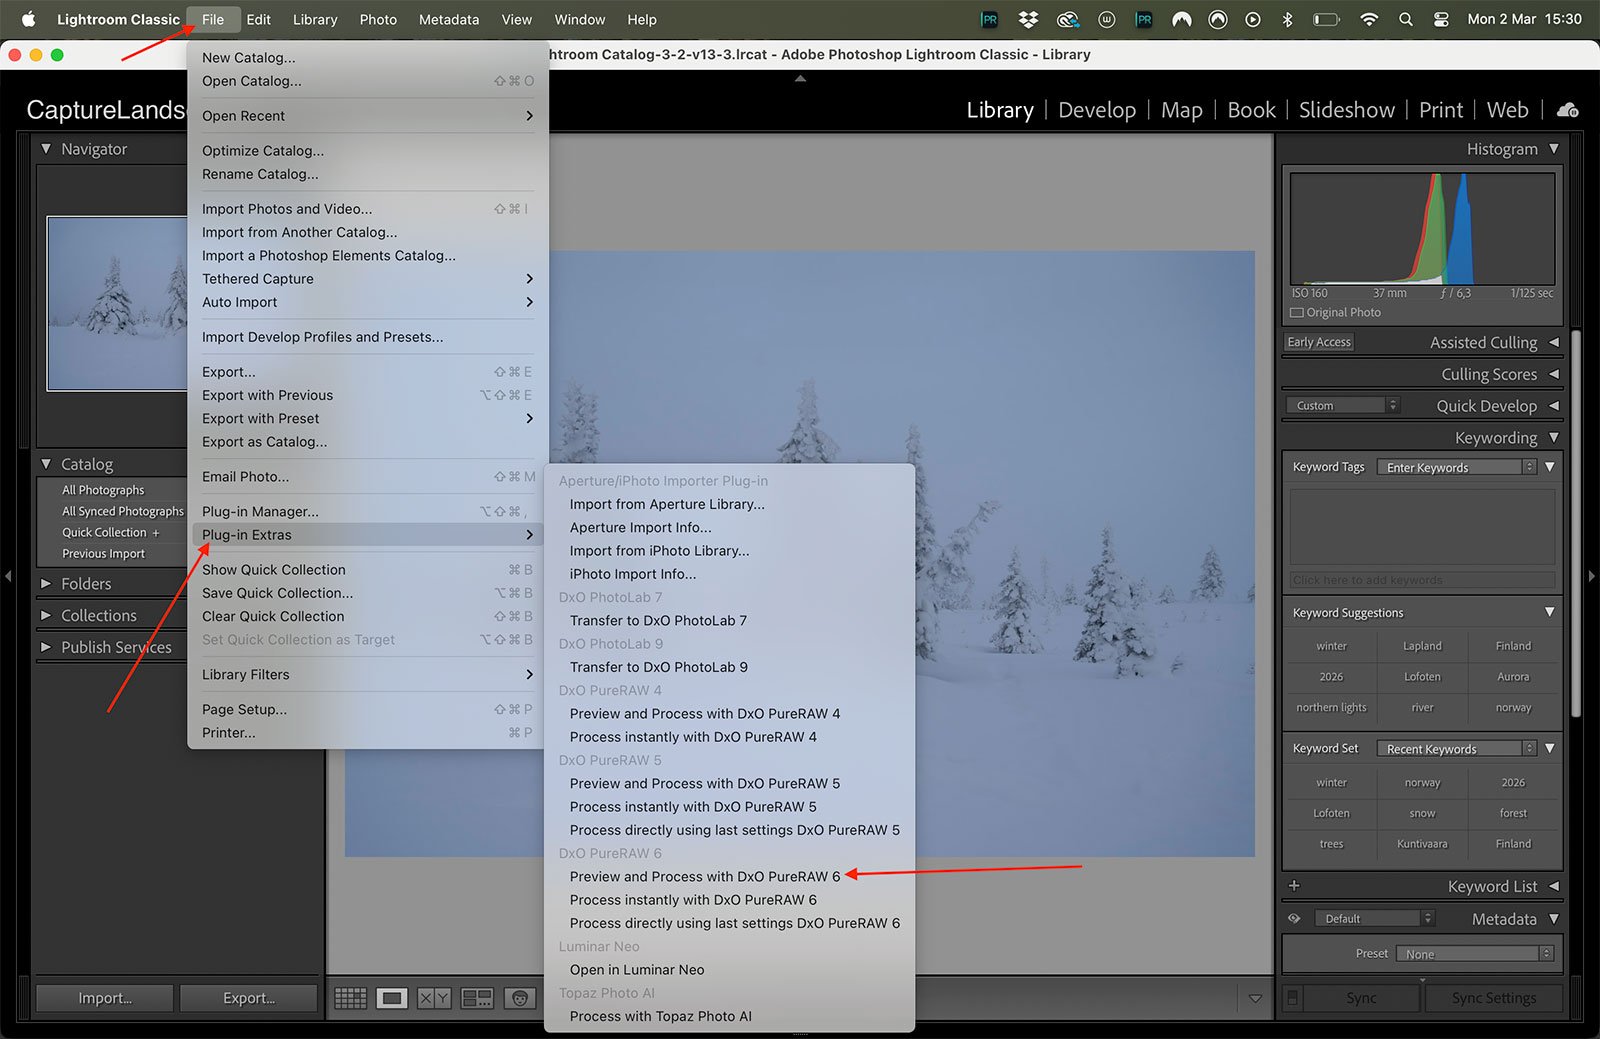
This ensures that PureRAW works directly on the original RAW file, not on a version that has already been interpreted or adjusted inside Lightroom. It also guarantees that the processed DNG returns cleanly to your catalog without disrupting your workflow.
Inside PureRAW, my approach is consistent.
I enable all optical corrections. DxO’s lens and camera modules are one of the strongest aspects of the software, and I want those corrections applied before I begin editing.
For noise reduction and detail rendering, I typically use DeepPRIME XD (or XD3 in the latest version), adjusting the Luminance and Force Details sliders slightly when needed. Most files don’t require aggressive settings, but having that control lets me balance noise reduction with the preservation of fine detail.
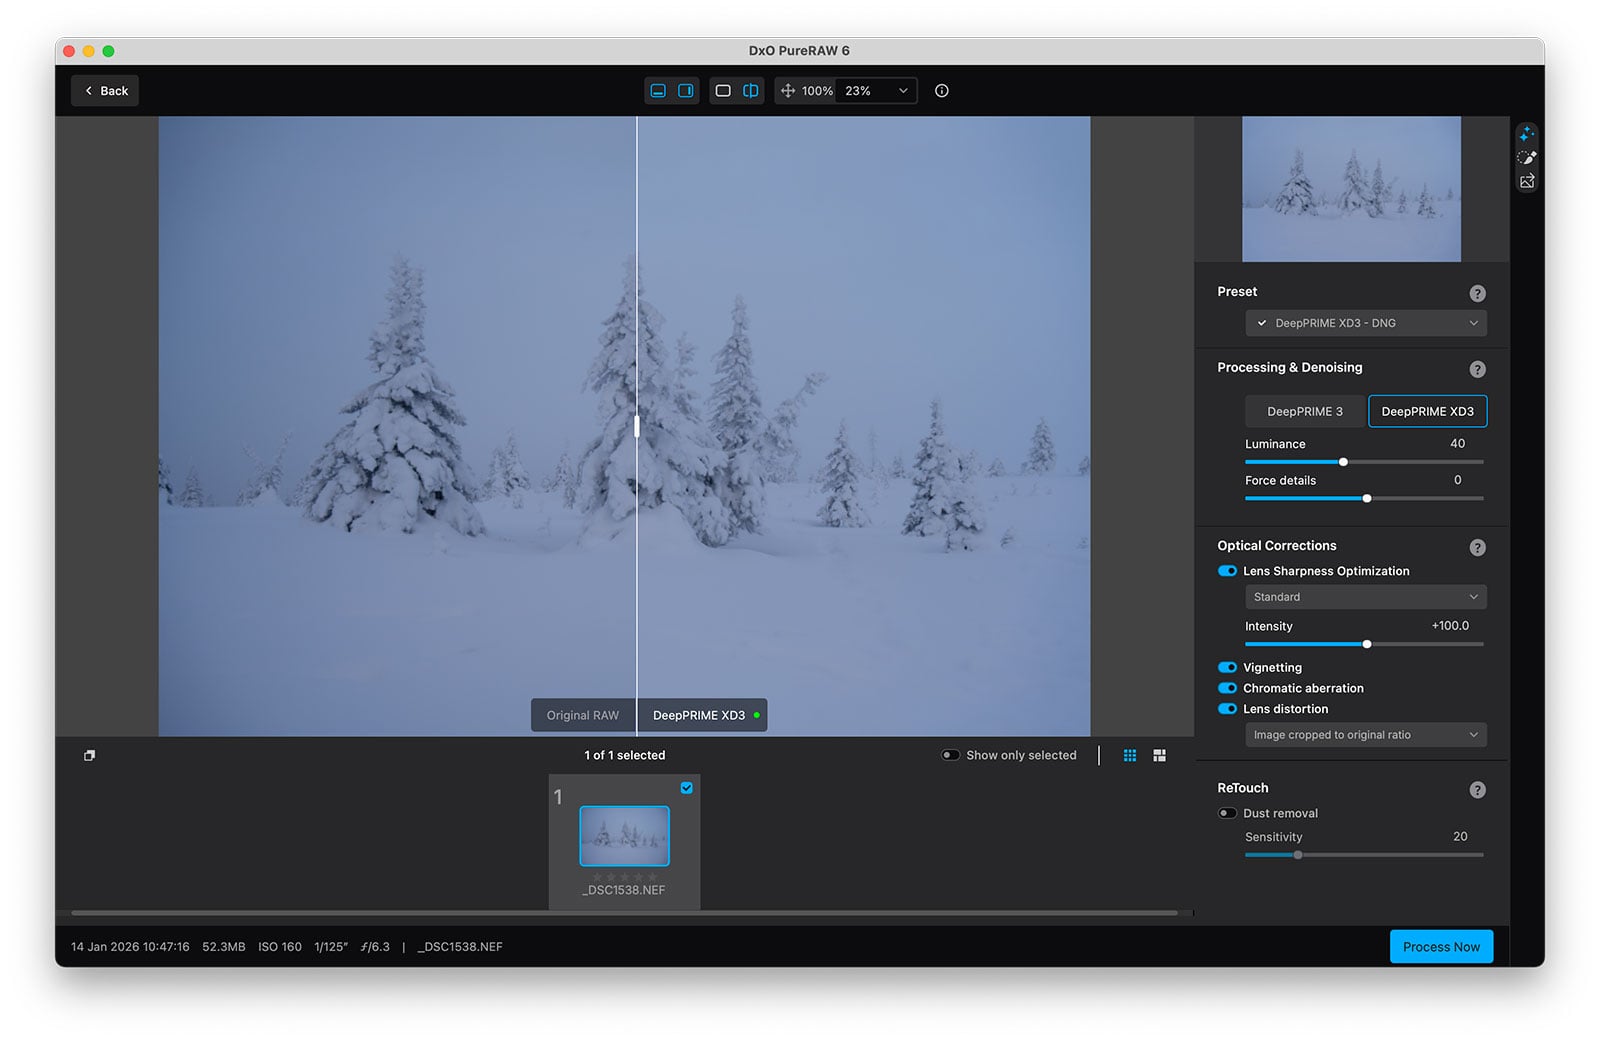
Once processed, PureRAW generates a new DNG file that appears alongside the original RAW in Lightroom. From there, I edit as usual.
Even when applying more aggressive exposure adjustments later, such as lifting shadows, increasing contrast, or refining tonal balance, I don’t see a loss in image quality. The file still looks cleaner than the original RAW, particularly in shadow areas where noise and micro-detail can easily break down.
That stronger technical foundation is what makes PureRAW valuable in my workflow.
Recommended Reading: Noise Reduction in Photography: In Field & Post-Processing
Image Quality: Noise, Detail, and Optical Corrections
At the end of the day, the value of DxO PureRAW comes down to one thing: image quality.
If the processed file doesn’t hold up under close inspection or during heavy adjustments, the workflow isn’t worth the extra step.
In my experience, PureRAW consistently delivers improvements in three key areas.
Micro-Detail and Lens Sharpness
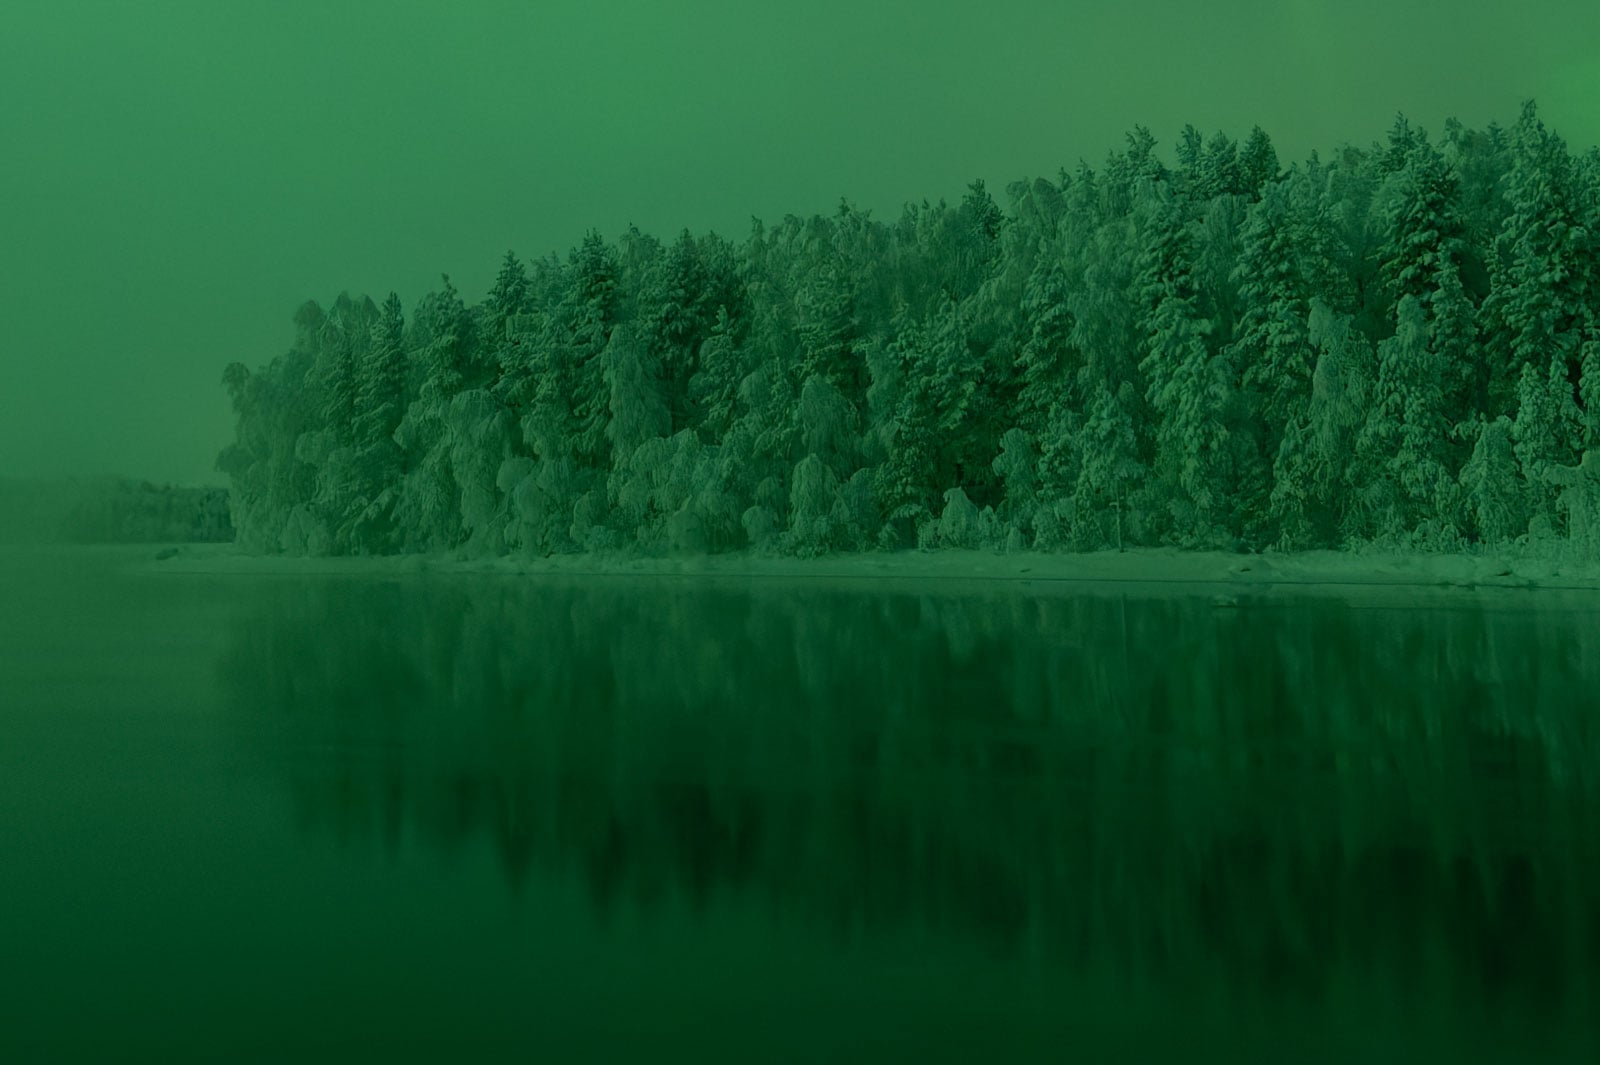
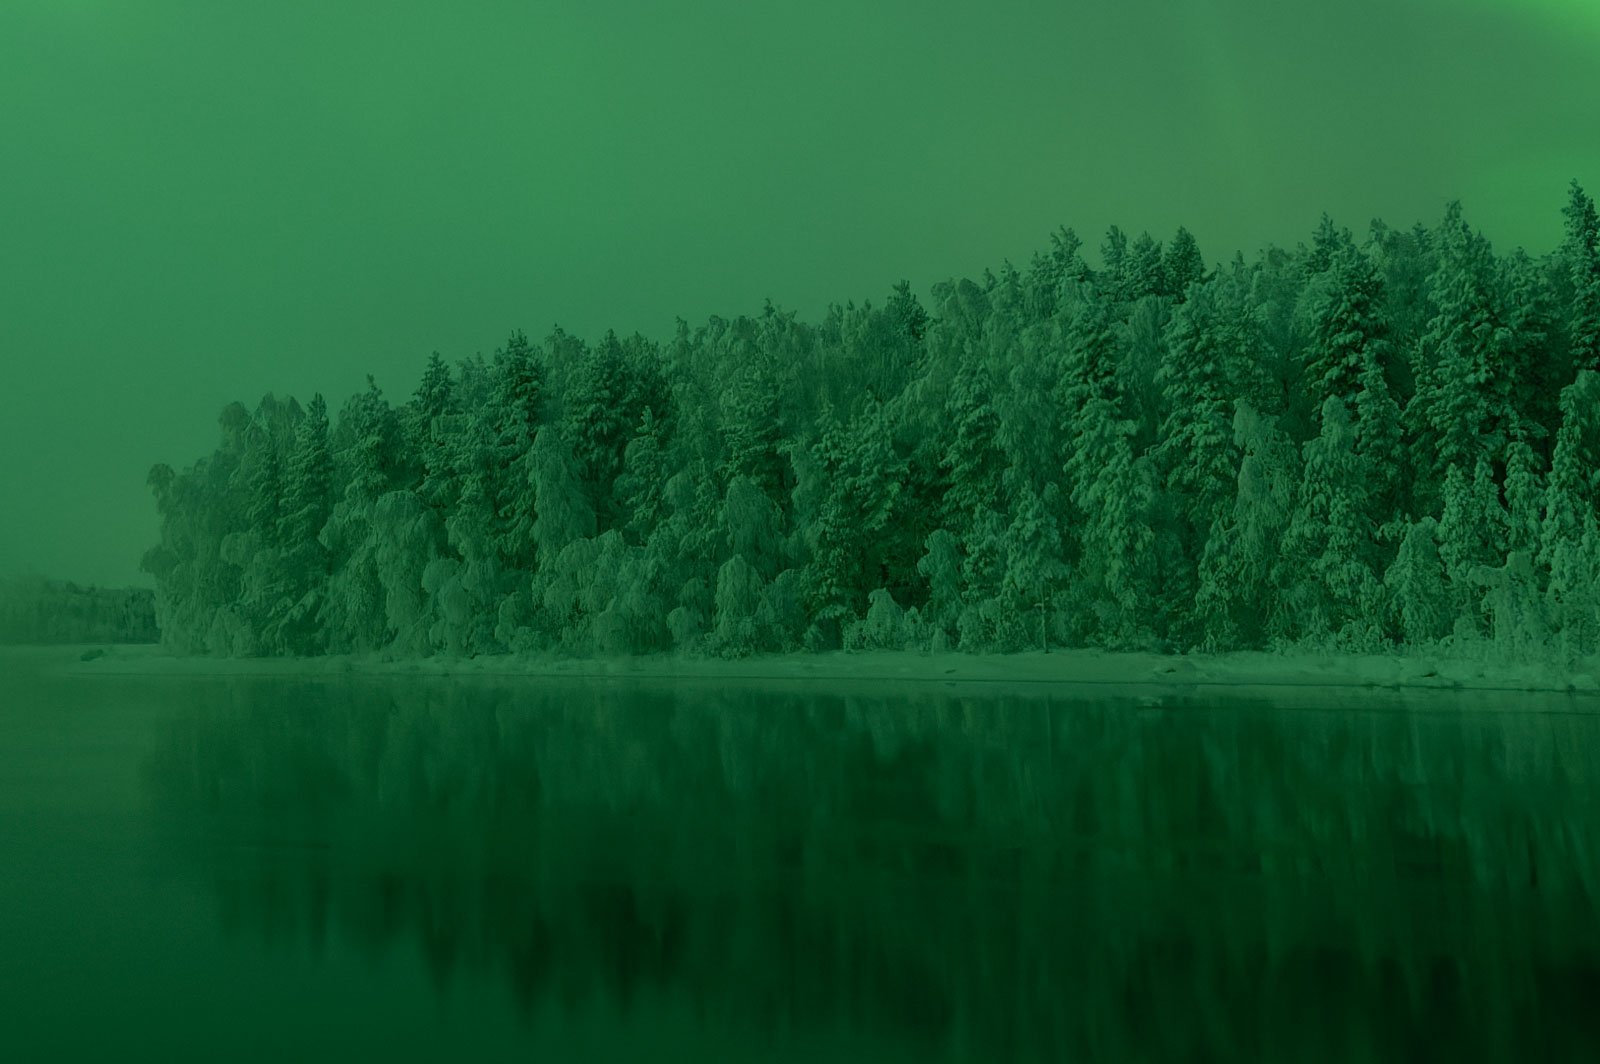
The most noticeable difference is in fine detail rendering.
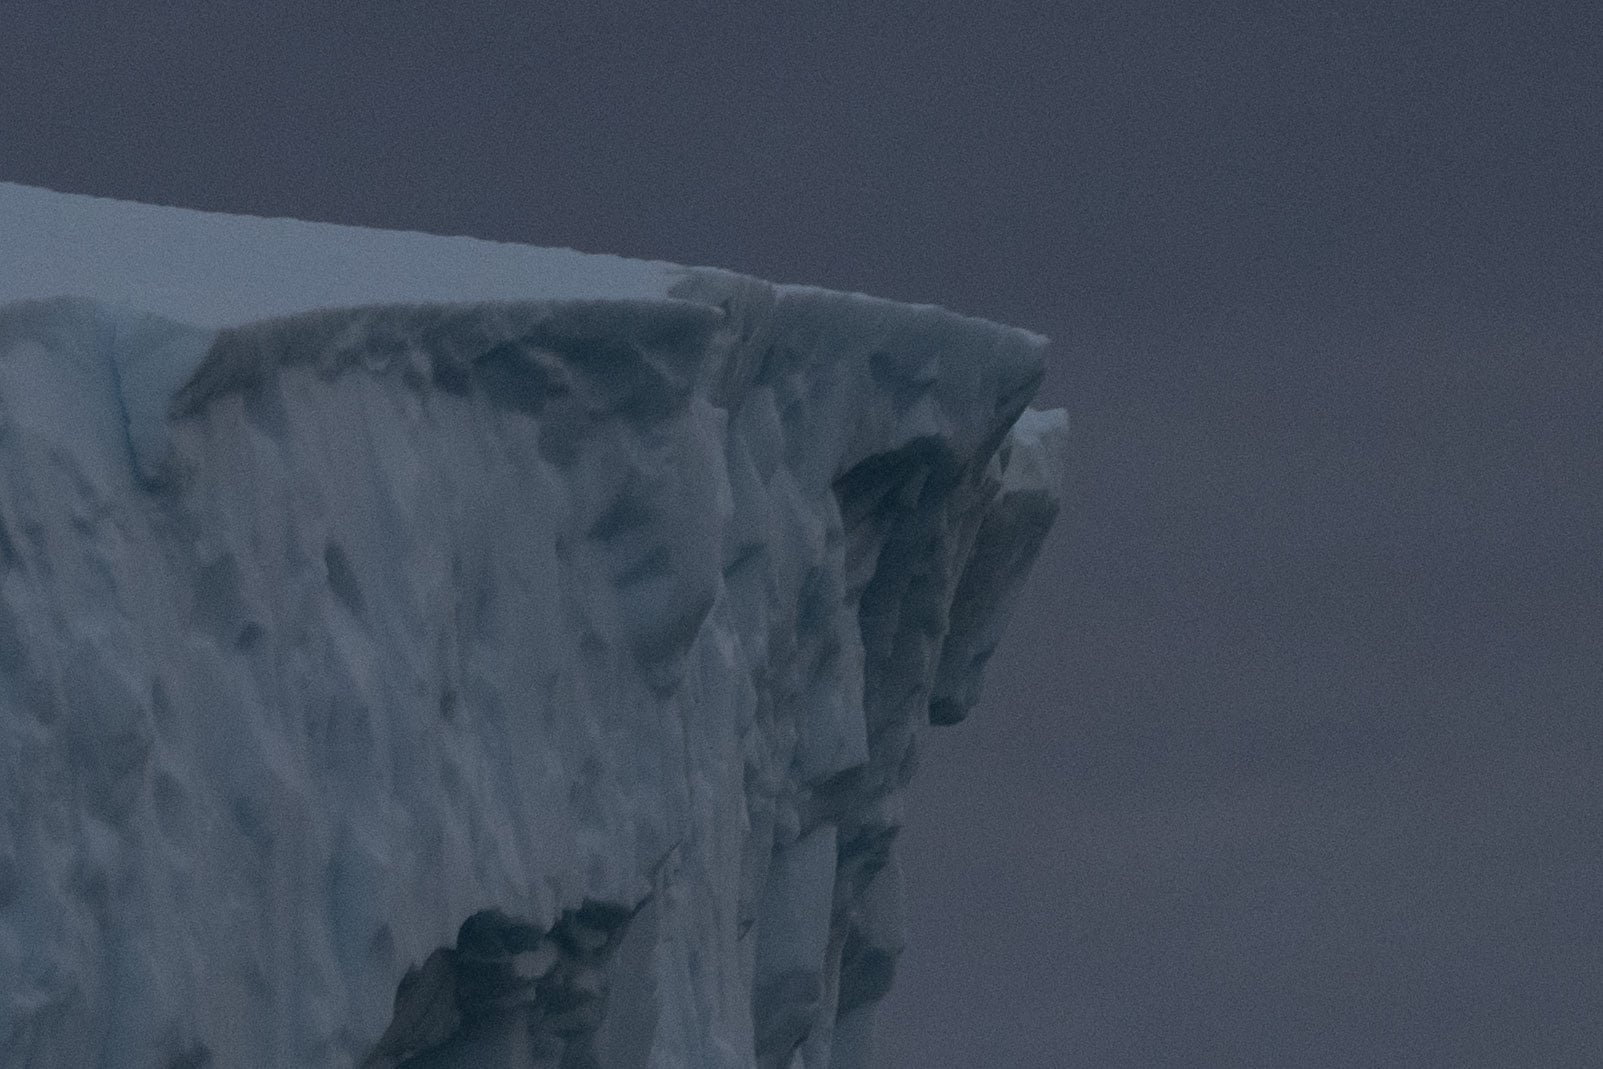
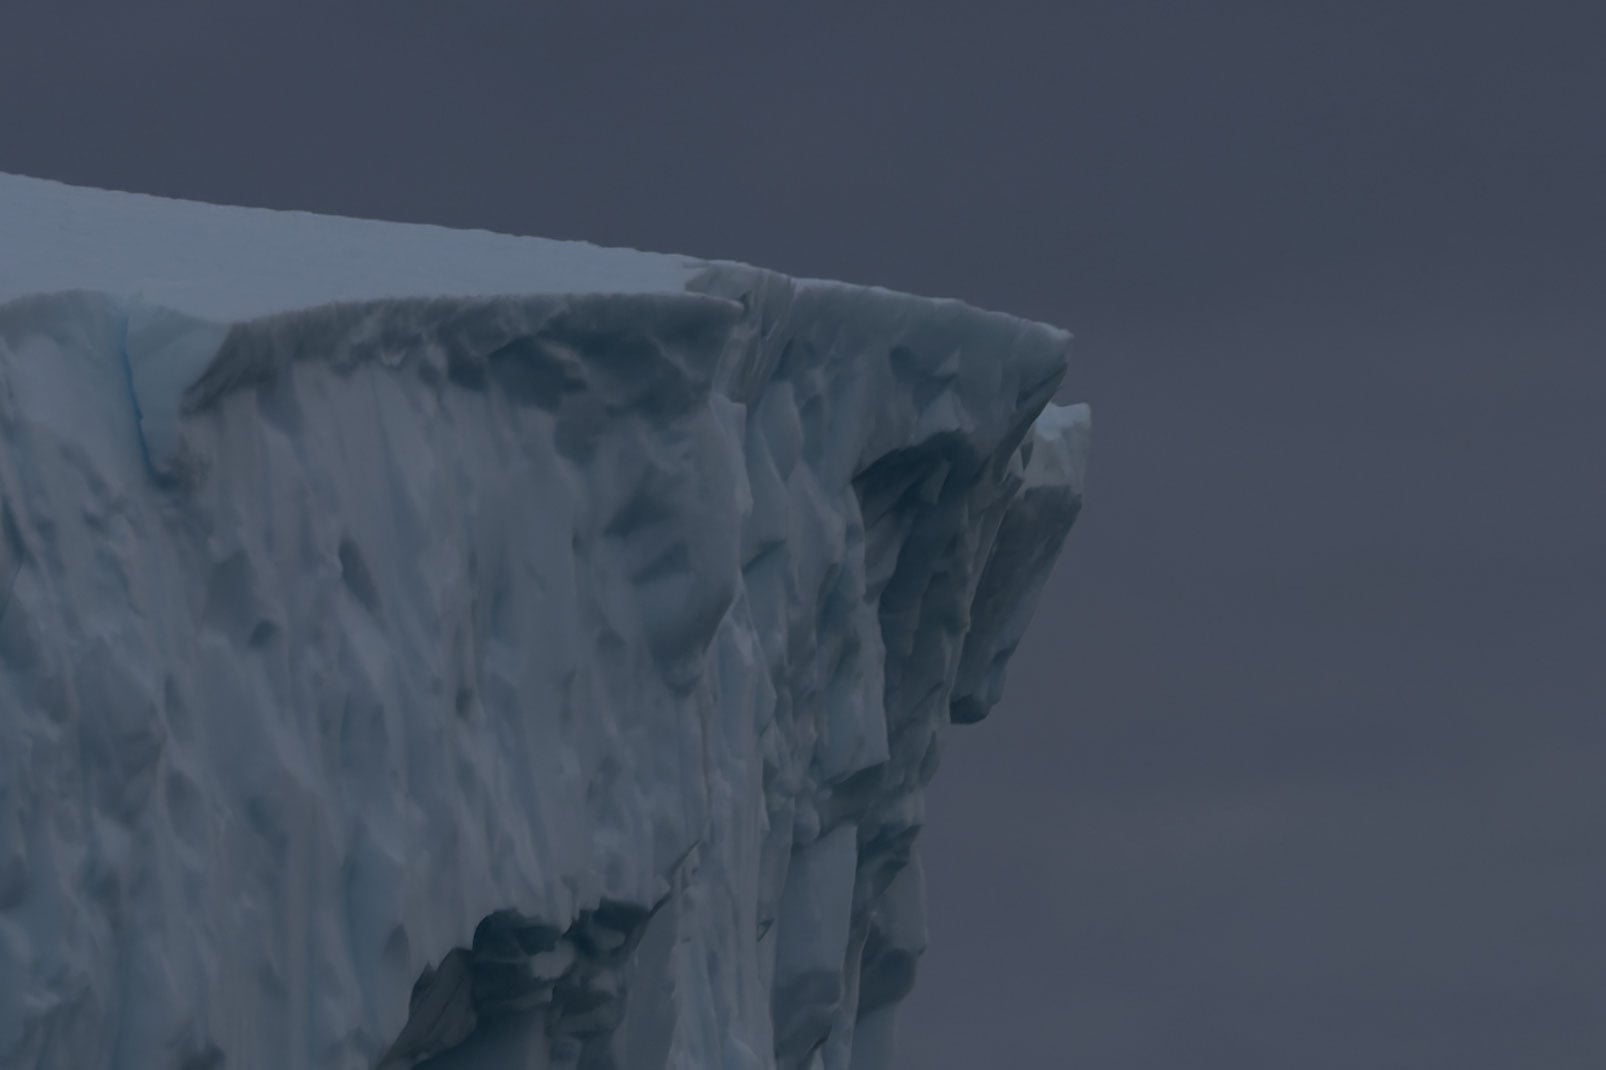
With Lens Sharpness Optimization enabled, PureRAW corrects much of the subtle softness that can come from lenses, especially when working with telephoto glass or older optics. Fine textures in rocks, trees, snow, and distant terrain appear more defined without looking artificially sharpened.
Lightroom can produce strong results, but when comparing files side-by-side at 100% or 200%, PureRAW often resolves slightly more micro-detail. It feels as though the file has been interpreted more precisely rather than simply sharpened.
It’s not dramatic in every image, but the difference is consistent.
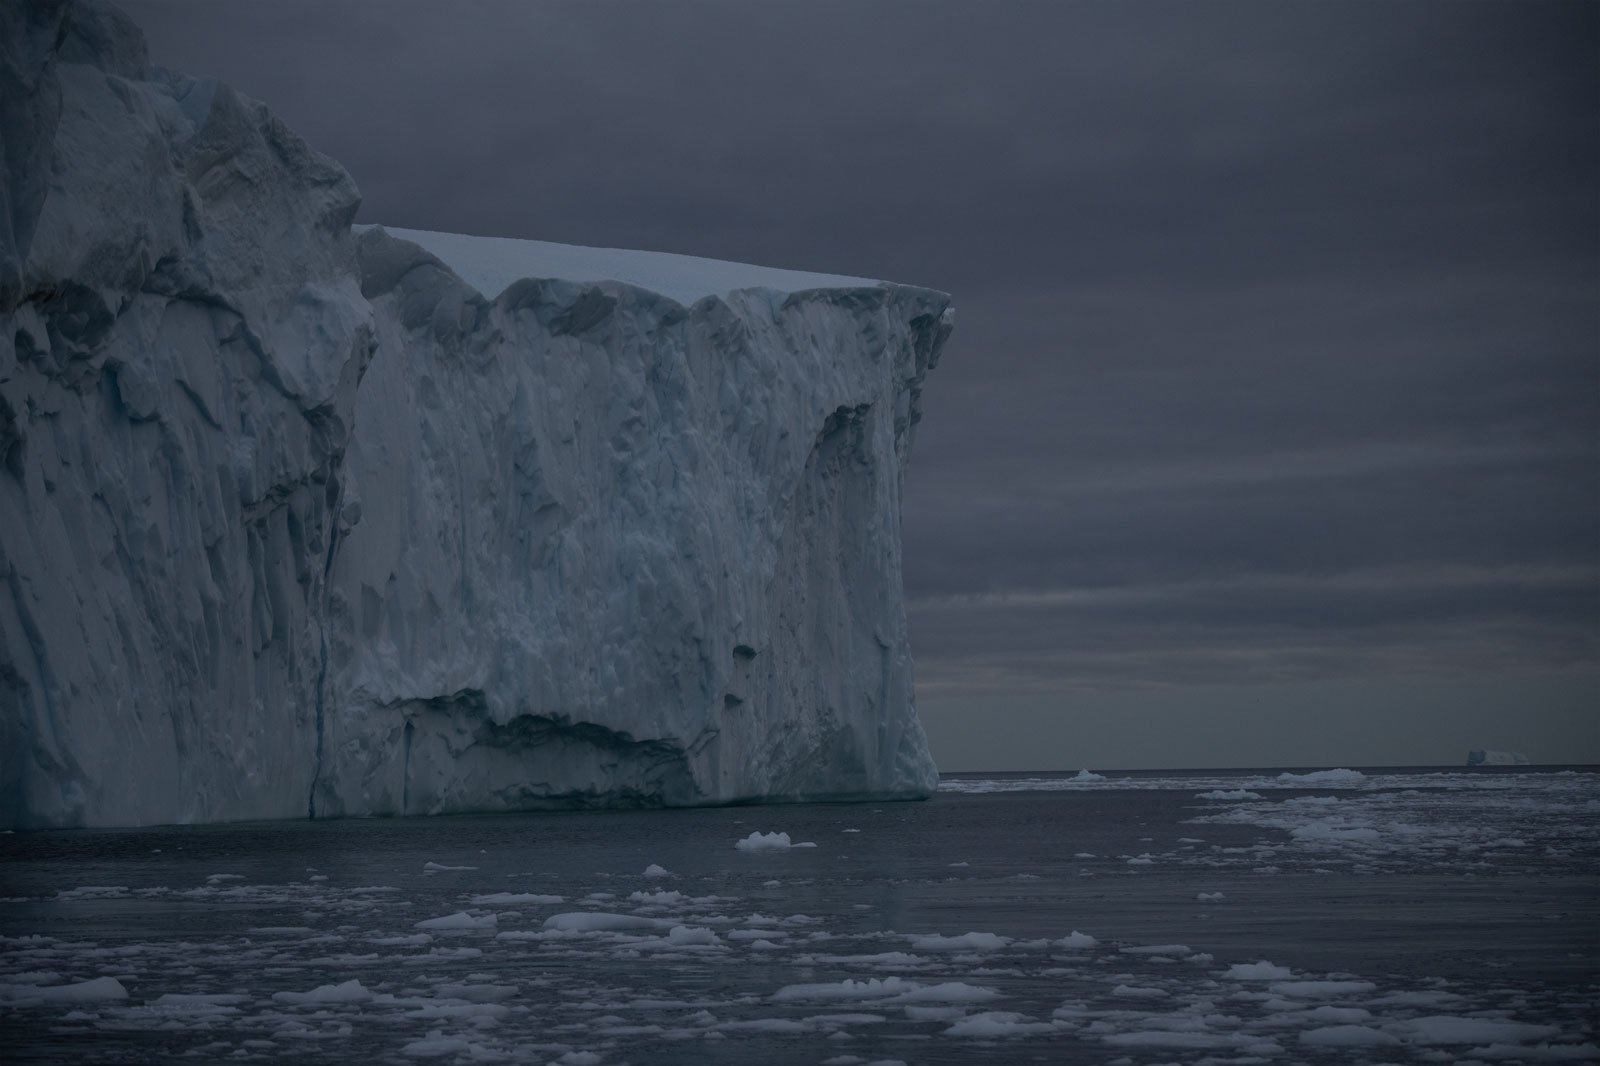
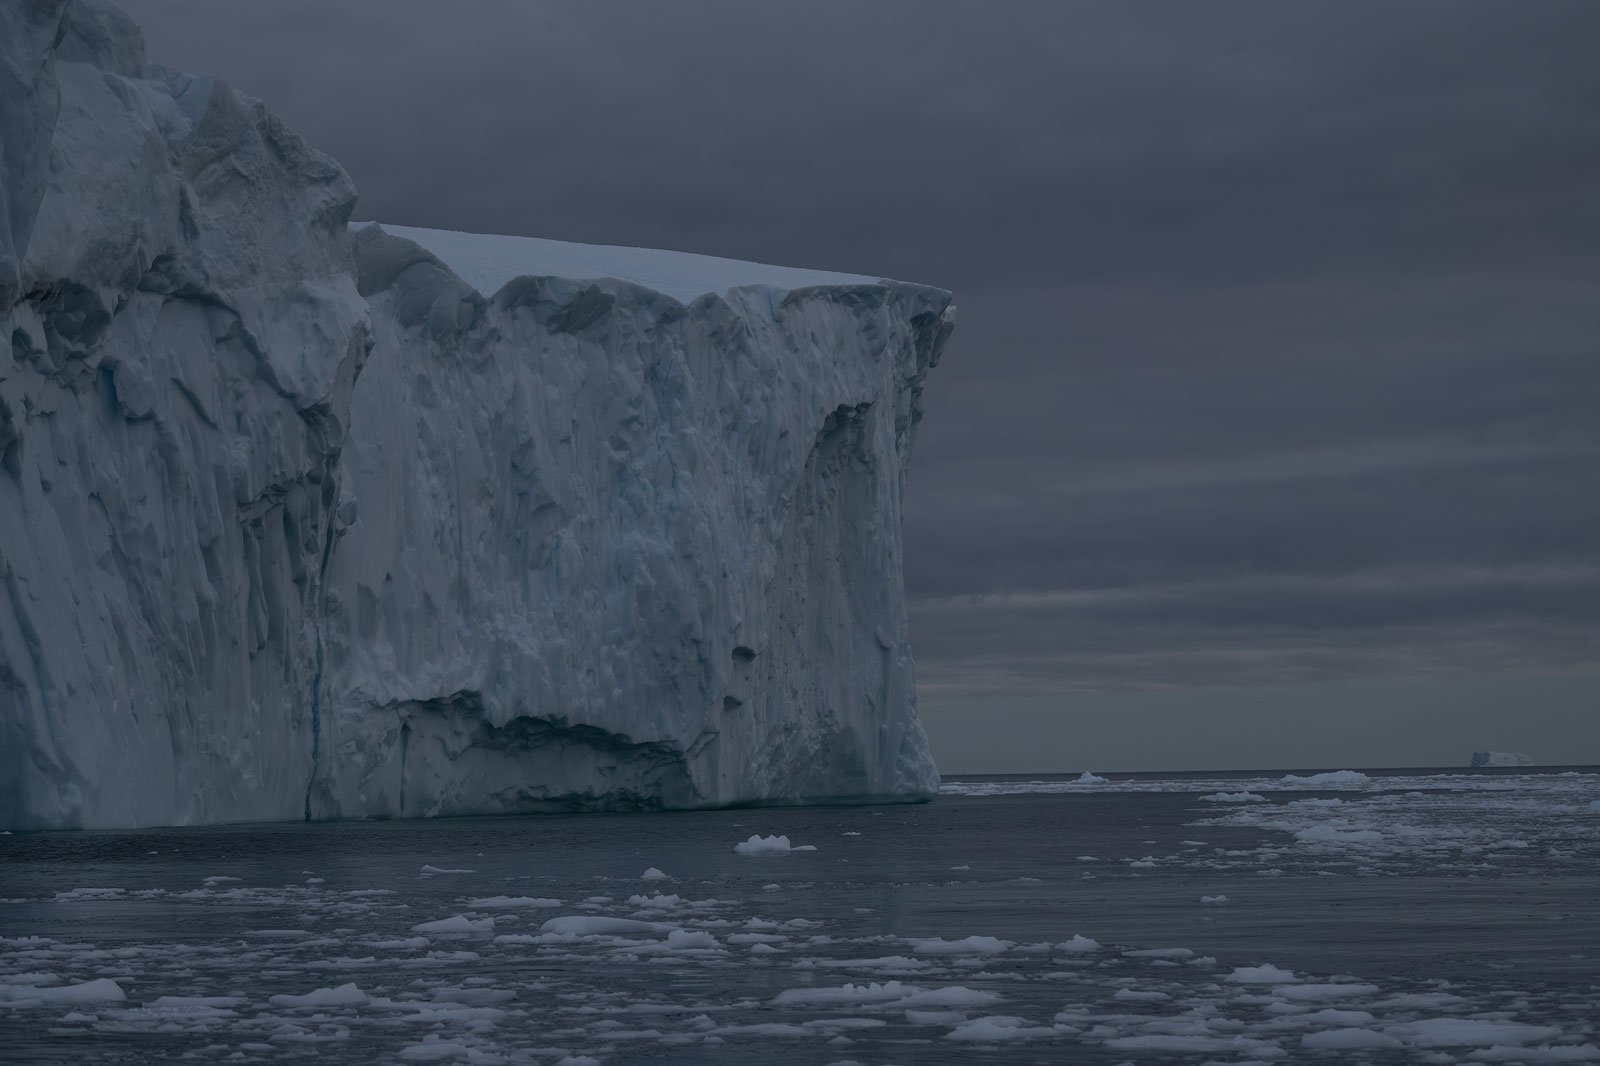
Shadow Recovery and Noise Handling
The second area where PureRAW stands out is shadow recovery.
When lifting darker areas in Lightroom, especially in low-light or higher ISO files, noise and smearing can quickly become visible. With PureRAW-processed files, shadow areas remain noticeably cleaner when pushed.
Even after aggressive exposure or contrast adjustments, I find the files hold together better. Noise is reduced without flattening texture, and detail remains more intact in darker regions.
For photographers who regularly recover shadow detail, this is significant.
Optical Corrections and Distortion Control
DxO’s lens and camera database has long been one of its strongest assets.
PureRAW applies highly specific optical corrections based on exact camera and lens combinations. In practice, I’ve found distortion and edge softness corrections to be more accurate than Lightroom’s profiles, particularly with wide-angle lenses.
The corrections feel precise rather than generic.
That precision contributes to a cleaner overall file before any creative adjustments begin.
Color Rendering
Color differences are subtle, but noticeable.
In some files, I find that PureRAW-processed DNGs appear slightly cleaner and more separated in tonal transitions. Lightroom’s default rendering can sometimes feel a touch muddier in comparison, especially in complex shadow areas.
It’s not a dramatic shift, but it contributes to the sense that the file has been interpreted more cleanly at the RAW level.
Why This Matters
None of these differences are extreme.
You won’t suddenly turn a poor file into a masterpiece. But if you care about extracting the maximum quality from a strong image, these refinements add up.
For photographers who print large, crop heavily, or work with demanding files, that stronger technical base makes a real difference.
DxO PureRAW 6 vs Adobe Lightroom
For most photographers, the obvious question is:
Why not just use Lightroom?
Lightroom’s noise reduction has improved significantly in recent years, and its sharpening tools are good. For many photographers, especially those sharing images online or not pushing their files heavily, Lightroom alone is more than sufficient.
But there is still a difference.
In my workflow, once a file has been processed with PureRAW, I turn off both sharpening and noise reduction in Lightroom. I no longer rely on Lightroom’s input sharpening (Detail Tab) as I did for years.
The reason is simple: I consistently see cleaner detail and better noise handling from PureRAW.
Lightroom’s noise reduction can produce strong results, but in direct comparisons, I still find that PureRAW preserves micro-detail more naturally, particularly in shadow areas and at higher ISOs. The rendering feels less smoothed and less processed.
The same applies to sharpening. Lightroom can enhance detail, but it does so after the RAW file has already been interpreted. PureRAW works at an earlier stage, which allows it to correct lens softness and optimize detail in a way that feels more foundational.
That doesn’t mean Lightroom’s tools are inadequate.
For photographers who don’t regularly print large, crop heavily, or push shadow recovery, Lightroom’s built-in tools are more than capable. But if your goal is to extract the maximum technical quality from your RAW files, PureRAW offers a noticeable step up.
It’s not about replacing Lightroom.
It’s about strengthening the starting point.
DxO PureRAW 6 vs Topaz Photo AI
DxO PureRAW and Topaz Photo AI are often compared because both aim to improve image quality using AI-driven processing.
But in practice, they approach the task differently.
I’ve used both extensively. I’m also an affiliate for both. While I still recommend Topaz for certain use cases, I no longer use it for RAW optimization in my own workflow.
Here’s why.
Noise Reduction and Detail Rendering
Out of the box, I find Topaz Photo AI to be more aggressive with its noise reduction.
In some files, especially night photography, this can lead to a softer or slightly blurred look, particularly in areas like the sky. With careful refinement, you can achieve strong results. But it often requires more manual adjustment to avoid over-smoothing fine detail.
PureRAW, on the other hand, tends to deliver a more balanced result by default. The noise reduction feels cleaner and more natural, while preserving micro-detail without that slightly “processed” look.
For ease of use and consistency, PureRAW produces a better starting point in my experience.
RAW Interpretation Differences
There are also subtle but noticeable differences in how each software interprets the RAW file.
When comparing a Topaz-generated DNG to the original RAW, I’ve observed:
- Slightly darker overall exposure
- Stronger vignette
- Increased contrast
In contrast, PureRAW’s DNG files typically appear:
- Slightly brighter
- More evenly corrected for lens vignetting
- With slightly more shadow detail
These differences aren’t extreme, but they affect how much correction is needed later in Lightroom.
File Size
File size has historically been a drawback for both tools.
In my testing:
- Original RAW: 31.3 MB
- Topaz DNG: 133.2 MB
This is similar to earlier versions of PureRAW before the new High-Fidelity Compression update.
With PureRAW’s new compression option, the processed DNG can now be significantly smaller without visible quality loss. That gives PureRAW a clear advantage in long-term storage and workflow efficiency.
Where Topaz Still Excels
There is one area where I still use and recommend Topaz Photo AI: upscaling.
Its AI-based upscaling tool remains excellent, particularly for photographers printing large or needing to increase resolution beyond what their camera natively provides.
For that specific purpose, Topaz remains a strong option.
Recommended Reading: Topaz Photo AI: Is it Worth the Money? [2026 Review]
Pricing
Pricing is also worth considering.
Topaz Photo AI is currently offered as a subscription at $17 per month (or $199 annually). DxO PureRAW is available as a perpetual license at $139, with optional upgrades typically around $89 per year.
Over time, PureRAW can be the more economical option, particularly if you prefer owning software rather than subscribing.
Final Thoughts on DxO PureRAW vs Topaz Photo AI
Both tools are capable.
But if your primary goal is optimizing RAW files for maximum detail, clean shadow recovery, and accurate optical corrections, I find DxO PureRAW to be the more refined and consistent solution.
If your focus is upscaling or heavy restoration work, Topaz still has its place.
DxO PureRAW Pros and Cons
| Pros | Cons |
| – Excellent micro-detail rendering, especially with Lens Sharpness Optimization enabled Very natural and effective noise reduction, particularly in shadow recovery Highly accurate optical corrections based on specific camera and lens combinations Clean and consistent results straight out of the box Seamless Lightroom plug-in workflow New High-Fidelity Compression dramatically reduces DNG file size without visible quality loss Perpetual license with optional upgrades | Adds an extra processing step to the workflow Processing time can be noticeable on older machines Improvements over Lightroom are incremental rather than dramatic for casual users Upgrade pricing may not feel necessary if you already own the previous version |
Is DxO PureRAW 6 Worth It?
For casual photography, Lightroom’s built-in tools are often more than enough.
But if you print your work, license images, publish photographs, or simply take your photography seriously, I believe DxO PureRAW should be part of your toolkit.
The improvements it delivers are not gimmicks. They are subtle refinements that compound across your entire body of work: cleaner shadow recovery, more precise lens corrections, stronger micro-detail, and a more consistent technical foundation before you even begin editing.
There simply aren’t other tools that match the quality PureRAW delivers at the RAW-processing stage with the same level of consistency.
It won’t transform a weak image into a strong one. It won’t replace creative vision. But it will give strong images the technical base they deserve.
For me, that makes it more than a convenience.
It’s a workflow upgrade that supports every file I choose to develop seriously.
DxO PureRAW Discount
If you’d like to try DxO PureRAW yourself, DxO offers a free 30-day trial that lets you test it on your own files and see how it performs in your workflow.
DxO has also provided CaptureLandscapes readers with a 15% discount on new purchases. You can use the code capturelandscapes at checkout.
If you decide to add PureRAW to your toolkit, using the code helps support the work I do here at CaptureLandscapes, at no additional cost to you.

")


I am wondering if this version can effectively fix the motion blur due to the sudden movement of birds? The blurring head and eyes of animals makes the otherwise interesting photos to be kept. Lightroom and photoshop have no capability to recover this kind of images. If PureRaw 6 can do this kind of job decently, I will go for it.
Hi Changde,
I think this is one aspect where Topaz Photo AI is better (read my review here: https://www.capturelandscapes.com/topaz-photo-ai/). In Topaz Photo AI, you have the Motion Blur sharpening option which is built for that exact reason. It does a fairly good job with photos like what you mention. At least when there’s just a slight movement in the animal. PureRAW doesn’t have a model for this, it’s more built around improving lens softness than motion blur. I hope that helps.
Thanks Christian for quick replying. I am aware that Topaz Photo AI can do this job, but the subscription fee is ridiculaously higher than Adobe. I hope that Adobe photoshop can offer this capability in the future, or the next version of PureRaw can add support.
I agree, Changde. The subscription model is a big disappointment when it comes to Topaz, especially since it’s a tool that most don’t use daily, or as a plugin with their main photo editor. Have you tried this method in Photoshop: Filter -> Sharpen -> Smart Sharpen, then choose Motion Blur under the “Remove” option?
Tried and gave up. Hard to get desired result. The old Nik collection when google owned has an option of correcting blur when doing sharpen. My internet search did not positive thing about the motion blur functionality of the paid new version of Nik collection. So, my current option is ao throw the field photos with motion blur.
Hi Christian,
Is PurerRaw useful for a Photolab 9 user like me ? I use PL9 as my main editor and it already includes the very effective denoise tools. I have also acces to the NIK Collection tools. The compressed DNG in PureRaw may be of interest in my current workflow. So, are there any advantages to add PureRaw to my processing workflow ?
Hi Marcel,
To be honest, I would say no. PureRAW is more aimed for Lightroom (or non-PhotoLab) users who want access to the powerful DxO noise reduction and optical corrections. In PhotoLab 9, you have more or less the same tools that PureRAW offers. The only reasons to add it would be to access the XD3 denoising model, and the DNG compression. I wouldn’t be suprised, though, if you’ll see both of them in the next version of PL.
Thank you for your advice.
You wrote in your article:
…..
For example:
Original RAW: 57.8 MB
…
PureRAW 6 DNG (standard): ~136 MB
PureRAW 6 (High-Fidelity Compression): 17.2 MB
….
I’ve test PureRAW 6 and I can’t this reproduce this file size reduction in any cases.
Relaistic values are on RAW files from a Canon R5 (Mark I) with a size approx. 45-55 MB are DNGs with compression between 30 and 40 MB.
Hi Axel,
That is an interesting observation. I just did another one right now and the compressed version was only 8,9MB compared to the original 54,8MB. When I first read about the new compression tool, I expected it to be in the ballpark of what you describe (30-40MB), so I was really surprised to see the files this small. Your comment has made me curious, so I will try to get an answer why there’s such a big difference between your results and mine.
I have been using pure raw for years and now I am on PR5. I completely agree with the article and in fact use it the same way. I am a serious amateur photographer and doing wildlife I often have to stretch the capability of my gear, heavy crops,low light hi iso etc and I find pure raw makes a noticeable improvement. On very noisy images I often go first with pure raw then again with LR Denoise after
Hi Mac,
I’m glad to hear that. I really think it is the best tool right now for raw file optimisation. No other software can match the noise reduction and optical corrections. I can imagine it’s extra useful for your wildlife work, often demanding higher ISOs than landscape photography.